If you try to open a hard drive in Windows Explorer and you get the error “Drive is not accessible. Access is denied” then read this tutorial to fix the issue. The error “Drive is not accessible – Access is denied” usually appears while trying to access an external or internal hard drive without having the proper permissions on it.
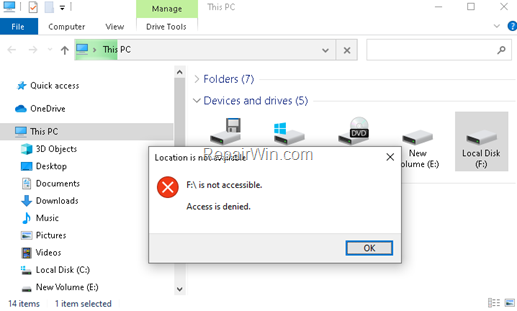
How to FIX: Access Denied on Hard Drive. *
* Important: Before you continue to troubleshoot the “drive not accessible” error, ensure that the hard drive is not locked by BitLocker or other encryption software. For example, if the drive is locked with BitLocker, right-click on it, choose Unlock drive and type the password to unlock it.
Method 1. Access the Hard Drive in Safe Mode.
The most easiest solution, to bypass the “Drive is not accessible – Access is denied” error in Windows Explorer, is to view the hard drive’s contents in Windows Safe Mode.
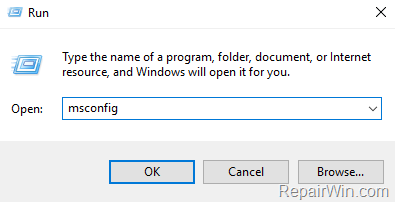
1. Press the Windows ![]() + R keys to open the run command box.
+ R keys to open the run command box.
2. Type msconfig and press Enter.
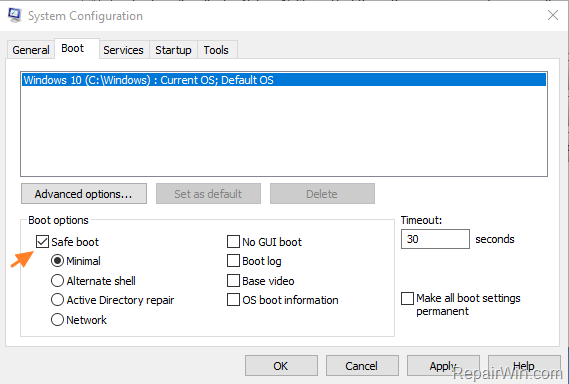
3. At Boot tab select the Safe Boot option, then click OK and restart your computer.
4. After restart and while in Safe Mode, open Windows Explorer and double click on the drive to view its contents.
5. Copy the hard drive’s contents to another location (drive) on your PC.
6. When done, right click on the drive and click Format to format the drive.
7. After format, run the ‘msconfig’ tool again and at the General tab, check the Normal startup and click OK.
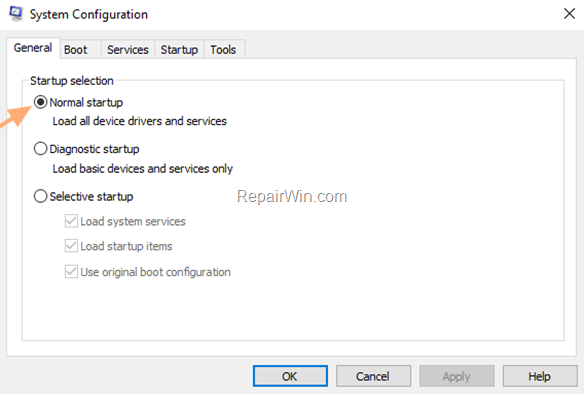
6. Restart your computer.
7. After restart, move the copied files back to the drive and you ‘re done!
Method 2. Modify Permissions on the Hard Drive.
The next method to resolve the “Disk is not accessible – Access is denied” error, is to assign the correct permissions on the drive. To do that:
1. Right click on the drive with the “Access Denied” problem and choose Properties.
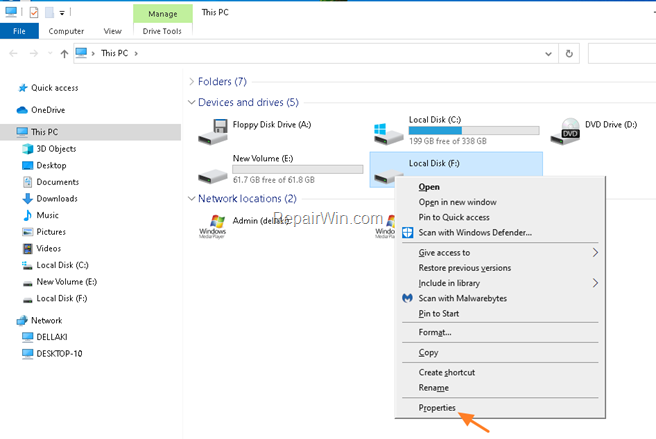
2. At Security tab click Advanced.
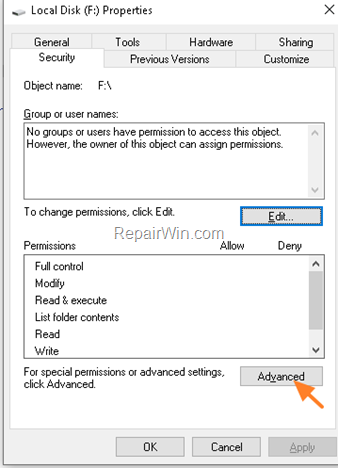
3. Click Change Owner
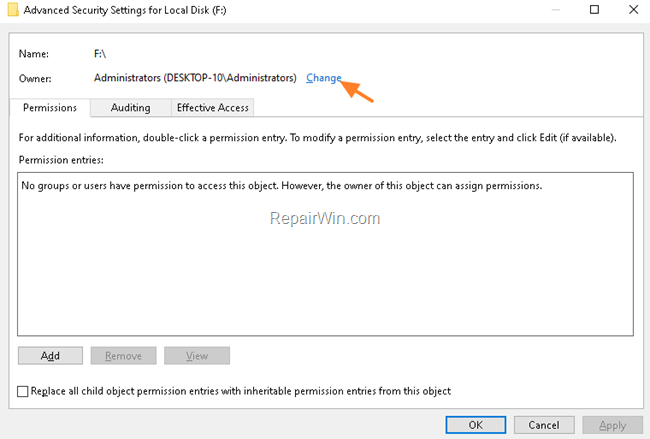
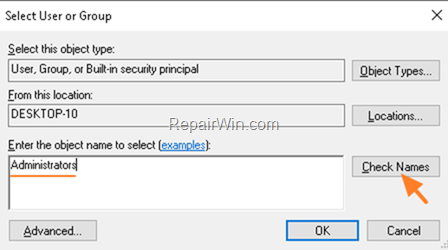
4. Type Administrators and click Check Names
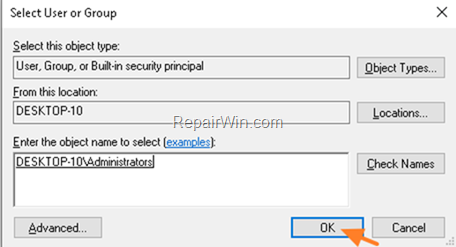
5. Then, click OK
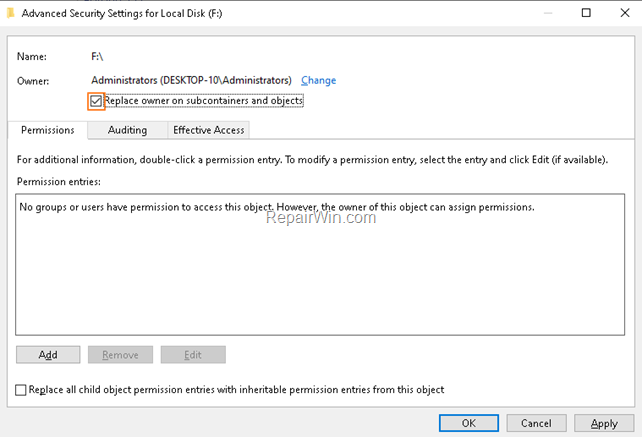
6. Check the Replace owner on subcontainers and objects checkbox and click OK.
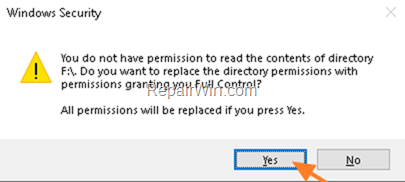
7. Click Yes to replace the permissions.
8. Now click OK to close the Drive’s properties.
9. Re-open the drive’s properties and go to Security > Advanced.
10. At ‘Advanced Security Settings for local disk’, click Add.
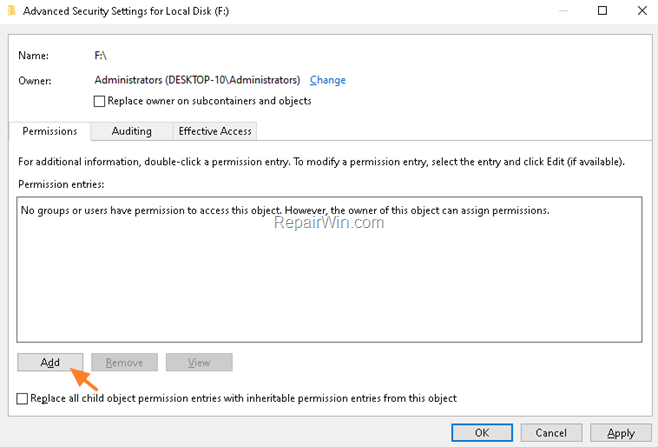
11. Click Select a principal
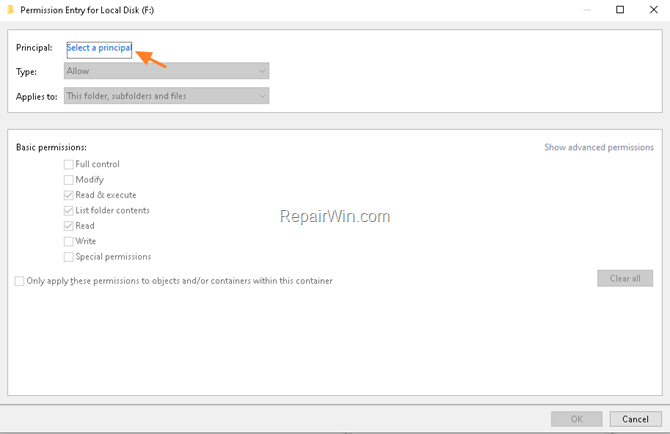
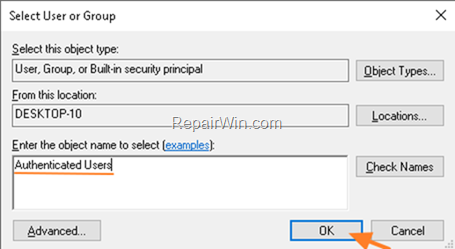
12. Type Authenticated Users and click OK
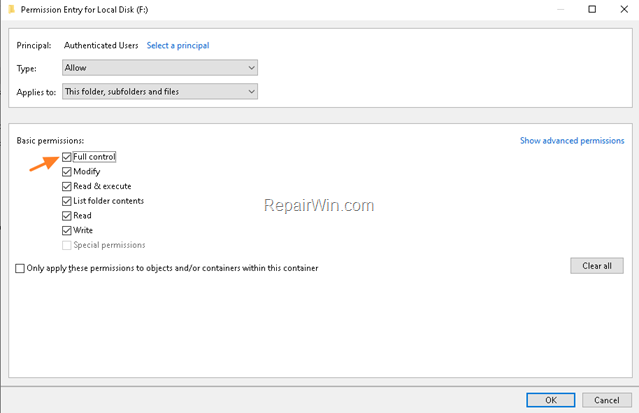
13. Check the Full Control checkbox and click OK.
14. Repeat the steps 10-13 and add the following principals (users):
- Administrators
- SYSTEM
15. When done, click OK to apply the changes and then click OK again to close the drive’s properties.
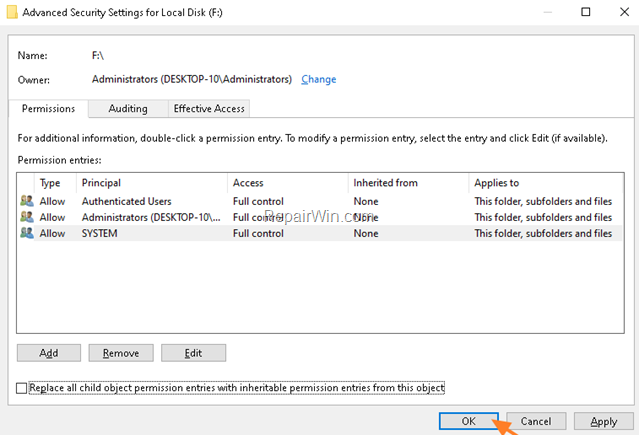
16. Now try to open the drive and see if you access its contents.
Method 3. Check the drive for errors.
1. Open Command Prompt as Administrator. To do that:
- At the search box type: command prompt or cmd
- Right-click at cmd or Command Prompt result and select Run As Administrator.

2. In Command prompt type type the following command and press Enter:
- chkdsk driveletter: /r
* e.g. The drive letter in this example is the “G:”. So the command should be: chkdsk g: /r

4. If you asked to recover files ask Yes.
That’s all! Did it work for you?
Please leave a comment in the comment section below or even better: like and share this blog post in the social networks to help spread the word about this solution.

