This guide contains instructions to fix the “microphone not detected” or “microphone not working” issues, in Windows 10. If you are having troubles with your microphone in Windows 10, then this is can be caused by several reasons. The “microphone not working” issue is a problem for many Windows 10 users and usually appears after a Windows update.
This tutorial contains several solutions, to resolve microphone problems in Windows 10.
How to FIX: Windows 10 Microphone Not Working or Not Detected. *
* Note: If you have problem with your mic, in a particular app, try the following:
1. Ensure that the particular app, is allowed to use the mic, by using the instructions in method-1 below.
2. Ensure that the mic is selected as a default input device in the app settings. (e.g. in Skype, go to Settings and ensure that your microphone or headset is selected).
3. Close any other app that may use your microphone.
4. Restart your PC and test your MIC again.
Solution 1. Allow Apps to Access your Microphone.
The first method, to solve problems with your microphone in Windows 10, is to ensure that all apps has access to your microphone. To do that:
1. . From the Start menu ![]() click Settings
click Settings ![]() and then open Privacy.
and then open Privacy.
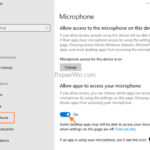
2. Select Microphone on the left pane and then Turn On the Allow apps to access your microphone.

3. Then scroll down, and ensure that the App you want to use your Microphone, is able to access it. *
* Suggestion: For your privacy, turn off microphone access to any app you don’t want your microphone to use.

4. When done, test your Microphone.
Solution 2. Check if your Microphone is the Default Input Device (Recording Device).
1. . From the Start menu ![]() click Settings
click Settings ![]() and then open System.
and then open System.
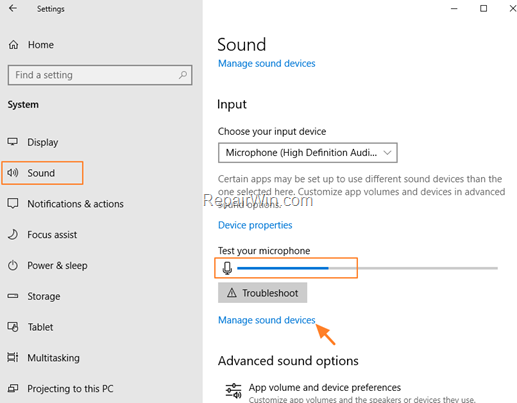
2. Click Sound on the left pane, and then speak to test your microphone. If your microphone is working, you should see the slider bar moving below. If not, then click Manage sound devices.
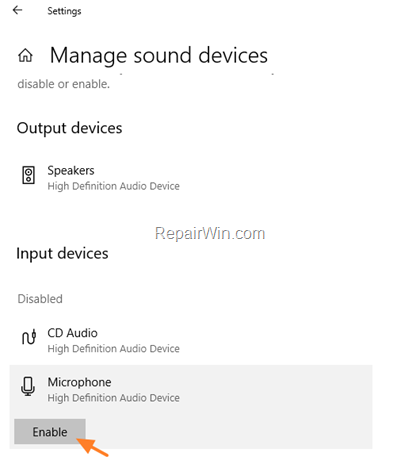
3. At ‘Manage sound devices options, ensure that your Microphone is listed under the ‘Input Devices” as the default input device, and its Enabled. If not, click on your Microphone and click Enable.
Solution 3. Check Microphone Settings in Control Panel.
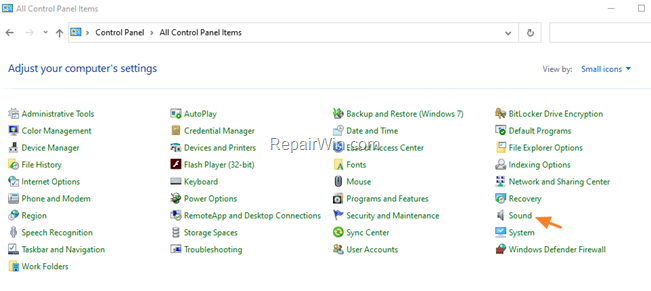
1. Navigate to Windows Control Panel and open Sound.
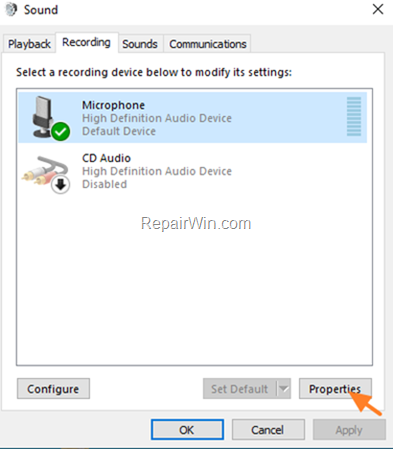
2. At the Recording tab, select your Microphone and click Properties.
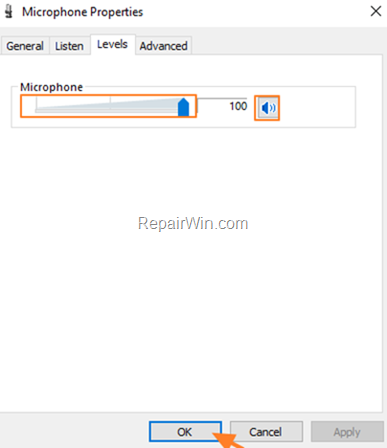
3. At the Level tab, drag the slider to the right, to increase the microphone volume, and ensure that your mic is unmuted (In case your mic is muted, its volume icon ![]() , will be displayed with a red symbol
, will be displayed with a red symbol ![]() ). When done click OK and OK to close the Sound Properties.
). When done click OK and OK to close the Sound Properties.
Solution 4. Change the Sound Card Driver.
The final method to solve microphone problems in Windows 10 is to change the Sound Driver, especially if your own a Realtek Audio device. To do that:
1. Open Device Manager. To do that:
1. Press Windows
+ R keys to open the run command box.
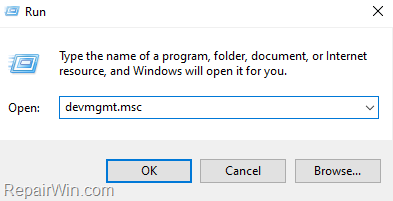
2. In the “Open” box, type: devmgmt.msc & click OK.
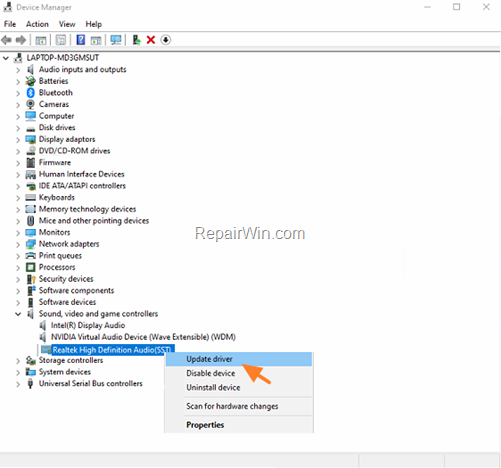
2. Expand the Sound, video and game controllers.
3. Right click on the Realtek High Definition Audio device and select Update Driver.
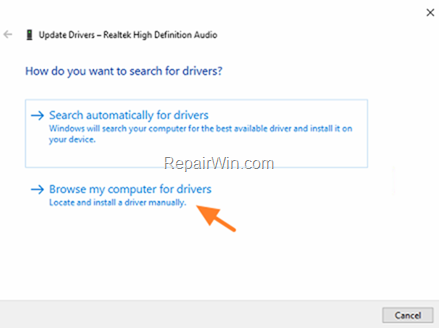
4. Select Browse my computer for drivers.
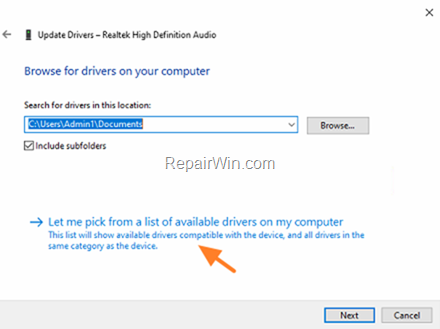
5. Select Let me pick from a list of available drivers on my computer.
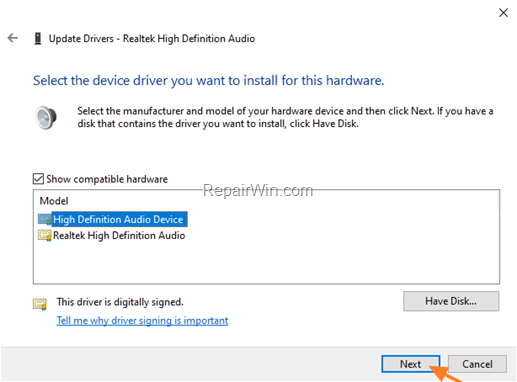
6. At the next screen, select the High Definition Audio Device and click Next.
8. On the ‘Update Driver Warning’ window, click “Yes” to install the new driver.
9. When the driver installation is completed, restart your computer.
10. After restart, proceed and test your microphone.
Solution 5. Uninstall & Reinstall the Sound Card Drivers.
The final solution to fix microphone not working issue, in Windows 10 is to completely uninstall and reinstall the Sound Card’s drivers.
1. Navigate to Control Panel > Program and Features and uninstall any software related to your Sound Card.
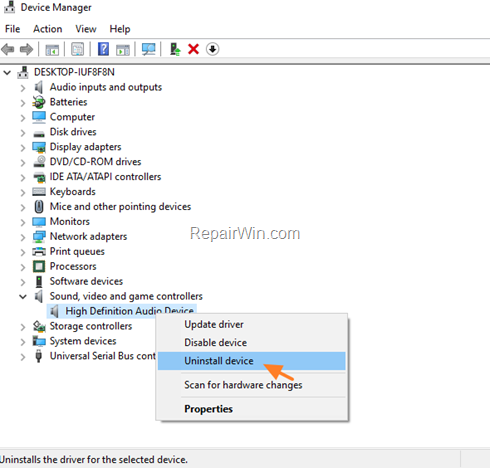
2. Open Device Manager and expand the Sound, video and game controllers.
3. Right click on the installed Audio device and click Uninstall Device.
4. When done, navigate to your computer or laptop’s manufacturer support site and download and install the latest driver for your sound card.
5. After the installation, restart your pc and check if your microphone is working.
Additional Help: If after applying the above solutions, your mic is still not working, then probably its damaged. To ensure, if you own a laptop plug an a external microphone, or use another microphone if you own a desktop.
That’s all folks! Which method worked for you? Please leave a comment in the comment section below or even better: like and share this blog post in the social networks to help spread the word about this solution.

