This tutorial contains instructions to fix the error 0x800106ba in Microsoft Security Essentials or in Defender Antivirus: “The service couldn’t be started. The program’s service has stopped.”
The Defender Antivirus & Security Essentials error 0x800106ba “Service Couldn’t be Started”, usually occurs when a third-party antivirus program is installed or because a malware program has disabled antivirus protection on your computer. To fix the error 0x800106ba follow the step below.
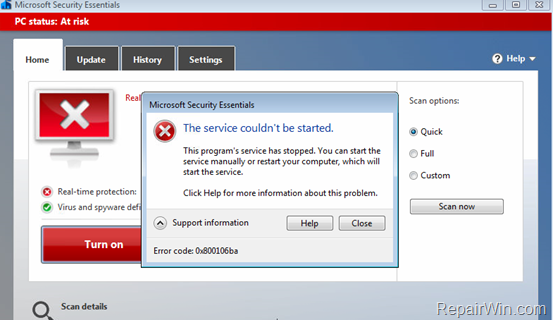
Attention: If you receive the Security Essentials error 0x800106ba, after installing a third party antivirus, this is normal. At this case, you have to uninstall the third-party antivirus to fix the problem.
Method 1. Turn on the Real Time Protection Manually.
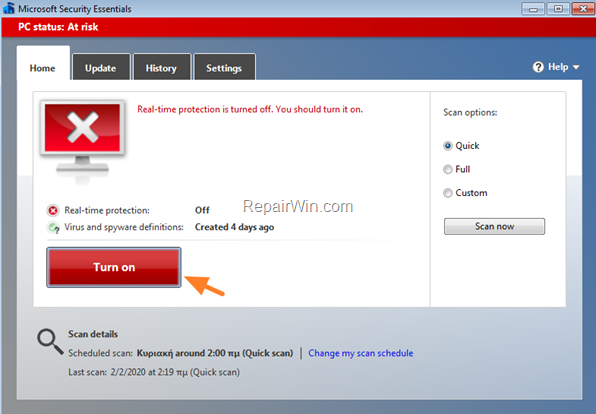
In some cases the error 0x800106ba in Security Essentials & Defender Antivirus can be easily resolved by activating the real-time protection. So, click the Turn on button and wait to see if the problem is resolved. If after 1-2 minutes, the problem remains, to the next method.
Method 2. Scan your computer for Malware & Viruses.
The next method to fix the error “The service couldn’t be started” in Defender Antivirus (or in Security Essentials AV), is to scan and clean your system from viruses and malware. For that task follow the instructions in this guide: How To Scan Your Computer for Viruses and other Malicious Programs.
Method 3. Enable the Windows Defender Service in Registry.
1. Open the Registry Editor. To do that:
1. Press Windows
+ R keys to open the run command box.
2. Type regedit and press Enter.
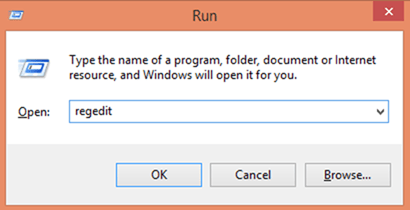
3. In Windows registry editor locate the following key:
- HKEY_LOCAL_MACHINESYSTEMCurrentControlSetservicesWinDefend
4. At the right pane, double click at the Start value and set the value data from 4 to 2.
5. When done, click OK.
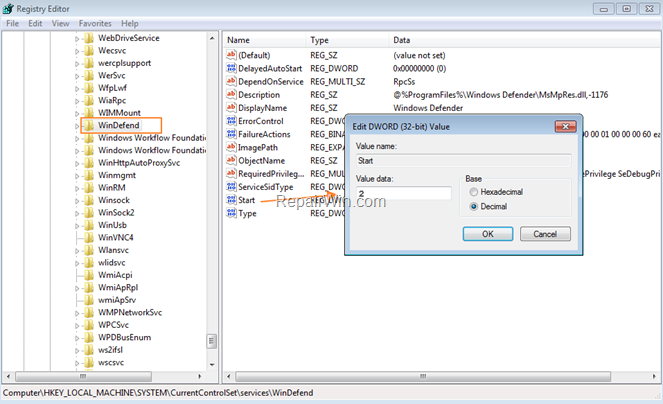
6. Close the registry editor and restart your PC.
7. If after restart the problem persists continue to next method.
Method 4. Turn On the Real Time Protection from Registry.
1. Open the Registry Editor.
2. Navigate to the following key at the left pane:
- HKEY_LOCAL_MACHINESOFTWAREMicrosoftWindows Defender
3. Right click at the Windows Defender key and click Permissions.
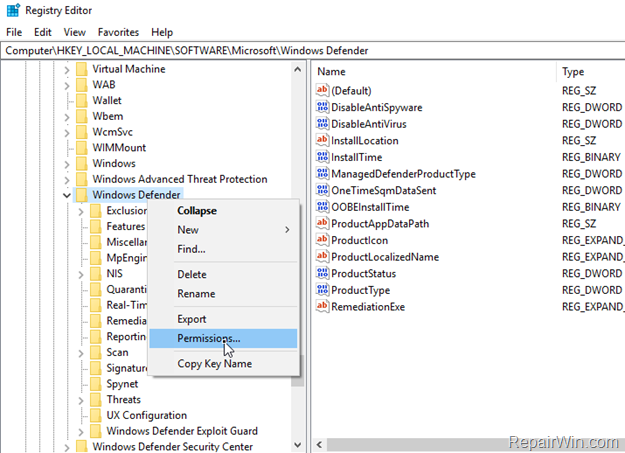
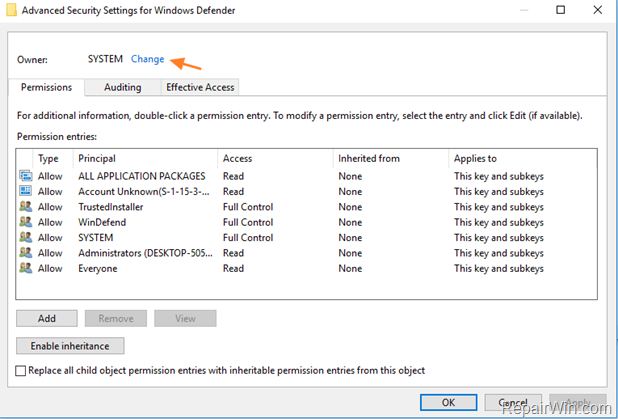
4. Click Advanced and then click Change owner.
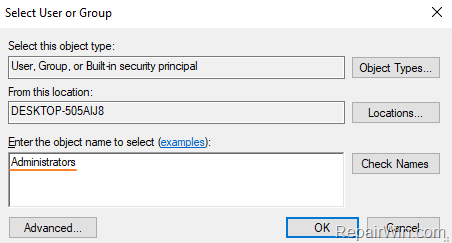
5. At “Enter the name to select” box, type Administrators and click OK.
6. Click Replace owner on subcontainers and objects and click Apply.
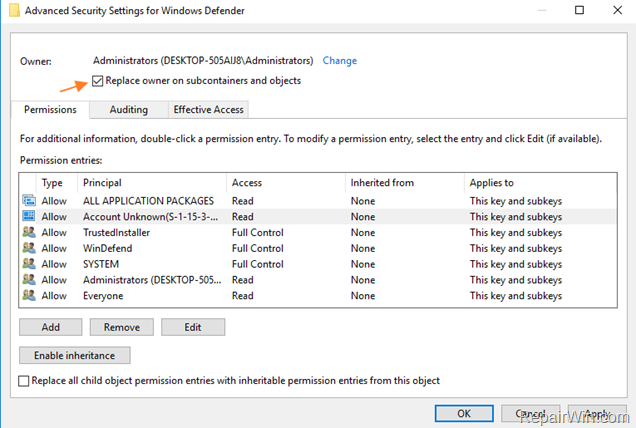
7. Double click at Administrators entry.
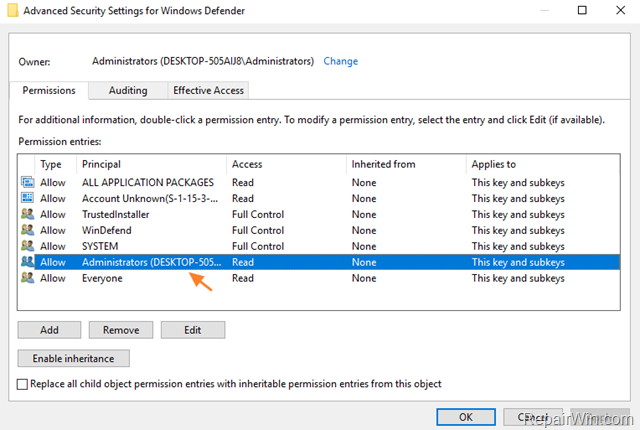
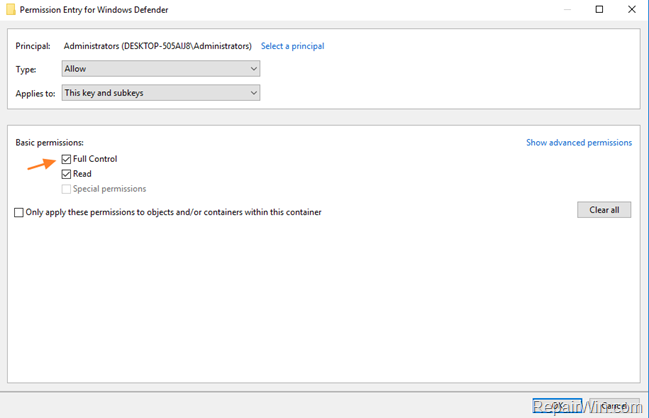
8. Check the Full Control check box and then click OK three (3) times to close permission properties.
9. Close Registry Editor.
10. Re-open Registry Editor and navigate to the same registry location:
- HKEY_LOCAL_MACHINESOFTWAREMicrosoftWindows Defender
11. At the right pane, double click to open the DisableAntiSpyware REG_DWORD value and change the value data to 0
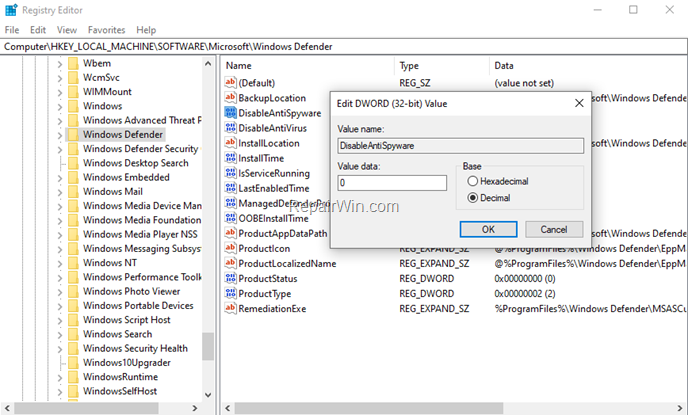
12. Then open the DisableAntiVirus REG_DWORD value and change the value data to 0. *
* Note: If you own Windows 7 OS, skip this and the next step, close the registry editor and restart your PC.
13. Finally, navigate to this key:
- HKEY_LOCAL_MACHINESYSTEMCurrentControlSetServicesSecurityHealthService
14. At the right pane double click at Start REG_DWORD value and change the value data to 3.
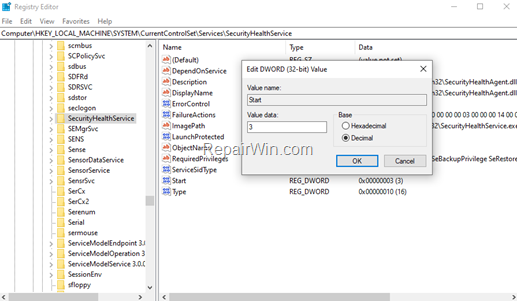
15. Close Registry Editor and restart your computer.
That’s all folks! Did it work for you?
Please leave a comment in the comment section below or even better: like and share this blog post in the social networks to help spread the word about this solution.

