The Windows 10 Update error code “0x800707E7 – 0x3000D: The installation failed in the FIRST_BOOT phase with an error during MIGRATE_DATA operation”, usually occurs when Windows cannot migrate a user profile.
The error 0x800707E7 in Windows 10 Update, commonly faced on computers with NVIDIA Graphics cards, which are using the NVIDIA Update Service to update drivers or other NVIDIA software. More specifically, on NVIDIA card systems, when you install the NVIDIA software, a new user is automatically created in Windows, named “UpdatusUser” which is used by the NVIDIA Update service.
In this guide you’ll find step-by-step instructions to resolve the following errors in Windows 10 Update:
- 0x800707E7 – 0x3000D: The installation failed in the FIRST_BOOT phase with an error during MIGRATE_DATA operation
- 0x000007E7: ERROR_PROFILE_DOES_NOT_MATCH_DEVICE, The specified profile is intended for a device of a different type than the specified device.
How to Solve Windows 10 Update Errors 0x800707e7, 0x000007E7.
Step 1. Uninstall NVIDIA Software from your Machine.
If you own an an NVIDIA graphics card, navigate to Control Panel -> Programs and features and Uninstall all NVIDIA Software.*
* Note: This step, applies only to systems with NVIDIA Cards. If you don’t own an NVIDIA graphics card skip to step-2.
To Uninstall NVIDIA’s Software.
1. Navigate in Programs and features in Control Panel. To do that:
1. Press simultaneously the Windows
+ R keys to open the run command box.
2. Type: appwiz.cpl and click OK.
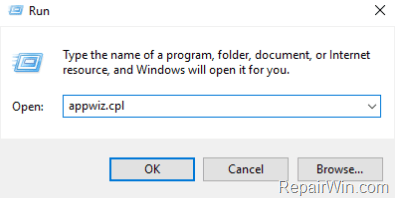
2. Select one by one all the NVIDIA software and click Uninstall.

3. Follow the onscreen instructions to remove NVIDIA’s software from your computer.
4. When the uninstall is complete restart your PC and continue to next step.
Step 2. Delete “UpdatusUser” & any Unknown User Profile.
1. Right-click on your computer (This PC) icon on Explorer and choose Properties.
2. Click Advanced System Settings.
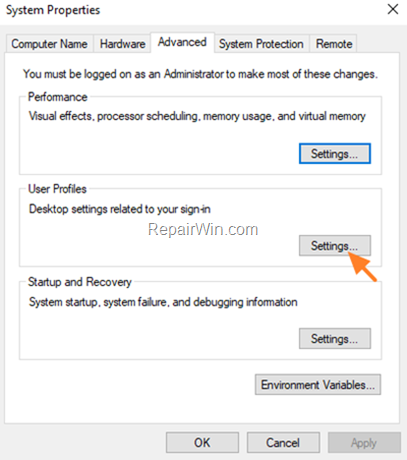
3. At User Profiles, click Settings.
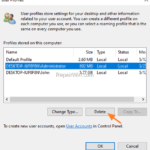
3. Select and delete the UpdatusUser profile, or any other profile that is unknown to you (except your profile and the Default Profile).
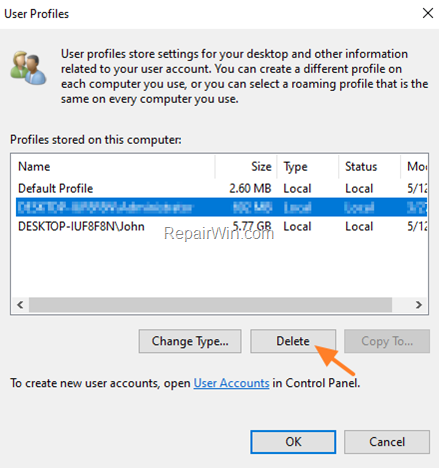
4. When done, click OK and continue to next step.
Step 3. Remove Unknown User Profiles in Registry.
1. Open Registry Editor: to do that:
1. Press Windows
+ R keys to open the run command box.
2. Type regedit and press Enter.

3. In Registry Editor navigate to the following key at the left pane:
- HKEY_LOCAL_MACHINESOFTWAREMicrosoftWindows NTCurrentVersionProfileList
4a. Now expand the ProfileList key and click on each “S-1-5-21-xxxx” profile and see if any of them has the value “C:UsersUpdatusUser” at ProfileImagePath.

4b. If you find the “C:UsersUpdatusUser” value on a profile, then select the profile on the left pane and Delete it.

5. Finally see the full name of each “S-1-5-21-xxxx” profile-key (under the “ProfileList key”), and delete any profile-key that has a .bak extension at the end of its name.

6. When done, close Registry Editor and restart your PC.
7. After restart:
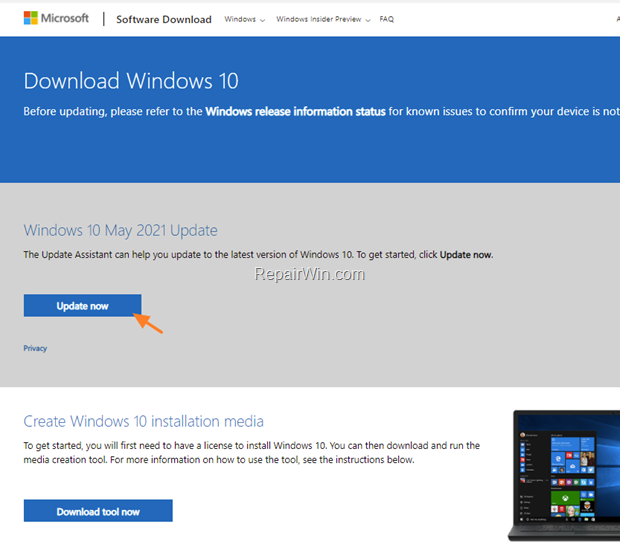
a. Navigate to Windows 10 download site and click the Update now button.
b. Save the “Windows10Upgrade9252.exe” file on your desktop.
c. Double click at the downloaded file to open the Windows Upgrade Assistant.
d. Click Update Now to start the update.
8. Windows Update should now be completed smoothly and without error 0x800707e7 (or 0x000007E7).
9. Finally, after updating Windows 10, and if you own an NVIDIA graphics card, proceed and re-install the NVIDIA’s software.
That’s all folks! Did it work for you?
Please leave a comment in the comment section below or even better: like and share this blog post in the social networks to help spread the word about this problem.

