If you face blank icons on Windows 10 on desktop or in Start menu or Programs menu continue reading below to fix the issue.
Some Windows 10 users have reported that some or all icons on the desktop or start menu appear blank without the name or icon of the corresponding program. The blank/empty icons issue in Windows 10 can be caused by different reasons and in this guide we will show you step by step how to fix it.
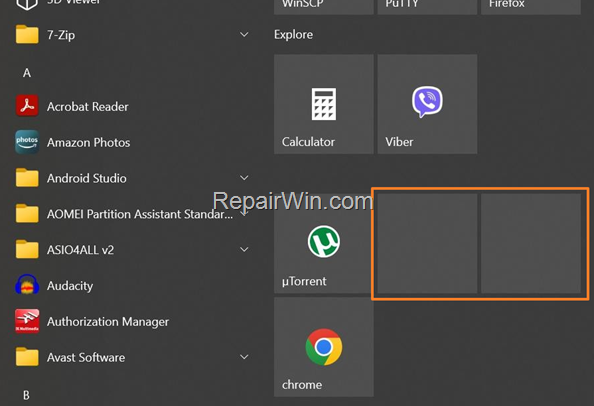

How to fix: Empty/Blank icons on Desktop, Taskbar or in Start menu on Windows 10/11.
Suggestion: If only 2-3 icons are blank, the quickest way to solve the problem is to delete and recreate the shortcuts of the respective programs.
Method 1. Fix Blank Icons by Restarting Windows Explorer.
The first method to solve the white/blank icons issue, is to restart Windows Explorer.
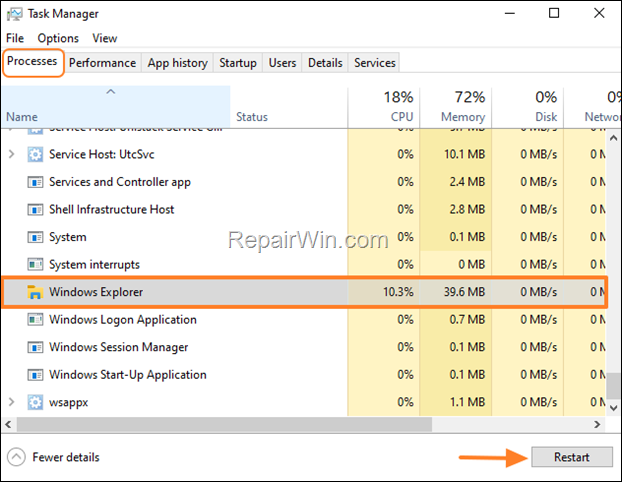
1. Press CTRL + SHIFT + ESC to open Task Manager.
2. Select the Windows Explorer process and then click the Restart button.

Method 2. Rebuild Icon Cache Database.
The second method to fix the blank/empty icons issue, is to delete the icons cache database, in order to force Windows to rebuild it.
1. Open Command Prompt as Administrator. To do that:
1. Press the Windows
+ R keys to open the ‘Run’ command box
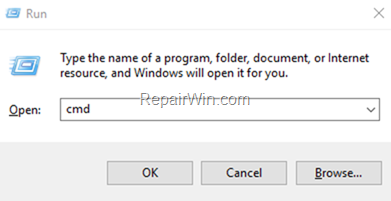
2. Type CMD and then press CTRL + SHIFT + ENTER.
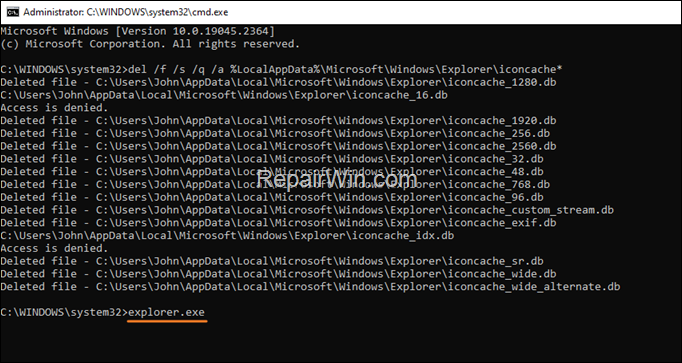
2. In command prompt copy and paste the following command but do not press Enter yet:
- del /f /s /q /a %LocalAppData%MicrosoftWindowsExplorericoncache*


3. Now, press CTRL + SHIFT + ESC to open the Task Manager.
4. In Details tab, select the explorer.exe and click End Task and then End Process.
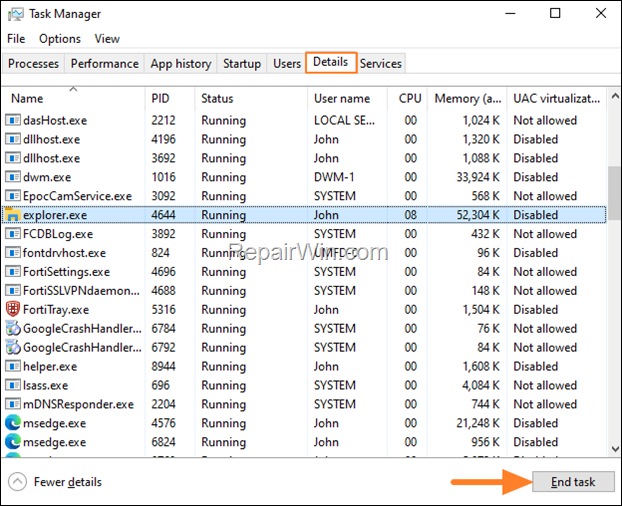

5. Now, at the command prompt window, hit Enter to execute the command you entered before.
6. Finally, type explorer.exe and press Enter to reload the Windows Explorer and check if the blank icons problem is fixed.

Method 3. Fix White Icons by Repairing Windows.
1. Open Command Prompt as Administrator.
2. In command prompt give the following command and press Enter:
- DISM /Online /Cleanup-Image /StartComponentCleanup
![image_thumb[6] image_thumb[6]](https://qnet88.com/wp-content/uploads/2023/04/image_thumb6_thumb-6.png)
![image_thumb[6] image_thumb[6]](https://qnet88.com/wp-content/uploads/2023/04/image_thumb6_thumb-6.png)
3. When the process is completed, give the following command:
- DISM.exe /Online /Cleanup-image /Restorehealth


4. When the DISM operation is completed, type the following command and hit Enter:
- sfc /scannow


5. Now wait until the System File Checker repairs the Windows System Files.
6. When the repair is completed, restart your PC and check if the problem has resolved.
Method 4. Reinstall Display Drivers.
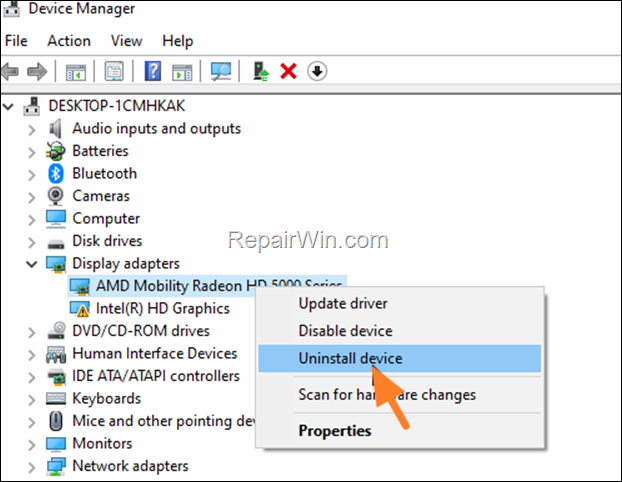
1. Navigate to Device Manager and expand Display adapters.
2. Right-click on the installed display adapter(s) and select Uninstall device. *

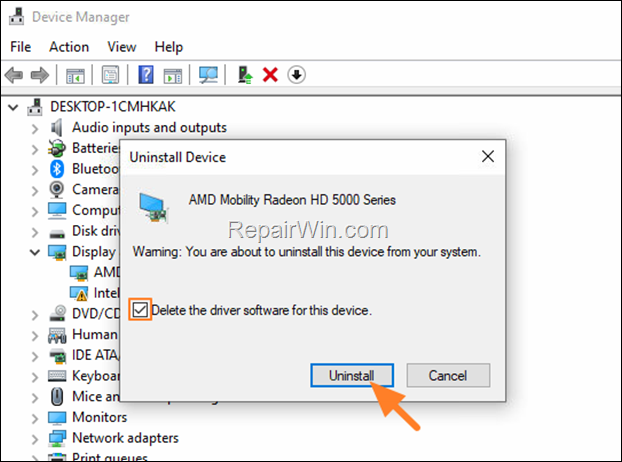
3. At the next window, check the option “Delete the driver software for this device” and then click Uninstall to completely remove the drivers.

4. Restart your PC and go to Windows Update > Check for Updates. Let Windows to download and reinstall the display drivers and then check if the problem is fixed. *
* Note: If the problem is not fixed, repeat the same steps to uninstall the device drivers and then download and install the latest display drivers from manufacture’s site.
That’s all folks! Please leave a comment in the comment section below or even better: like and share this blog post in the social networks to help spread the word about this solution.


