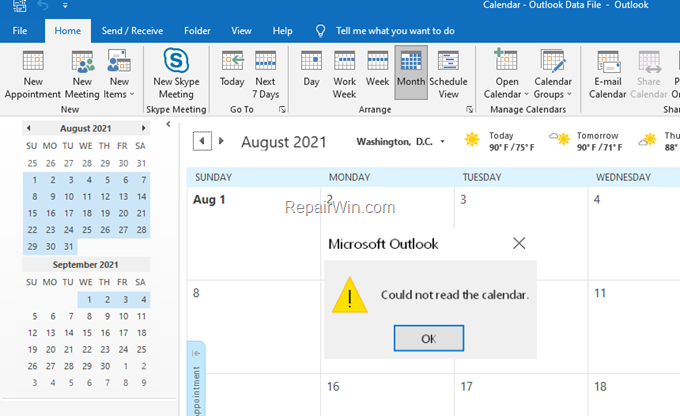
If you receive the error “Could not read calendar” in Outlook 365, Outlook 2019 or Outlook 2016, continue reading below to fix the problem.
Problem in details: Suddenly and for no apparent reason the Outlook Calendar does not open and displays the error “Could read the Calendar”. The problem may appear in Outlook 2016, Outlook 2019 or Outlook 365.

How to fix Microsoft Outlook error: Could not read the calendar.
The Microsoft Outlook error “Could read the Calendar”, usually appears after installing Office Updates. To fix the problem use one of the following options:
Method 1. Install all Office Updates.
The first method to solve the “Could not read calendar” in Outlook is to install all Office updates. To do that:
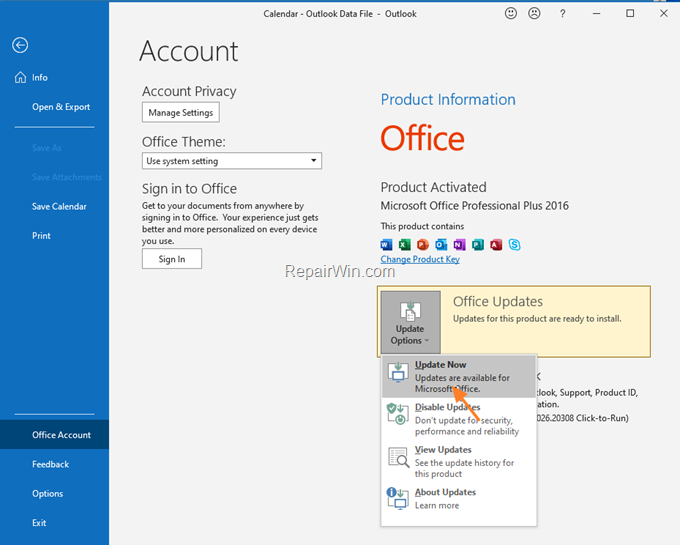
1. Open any Office application and from the File menu, choose Account. (or Office Account)
2. Click the Update Options button and choose Update Now.

3. Let Office to install the updates and then restart your PC.
Method 2. Restore Microsoft Office to Previous Version.
The second method to fix the Outlook error “Could not read the calendar”, is to restore the previous version of MS Office:
1. Close all Office applications.
2. Open Command Prompt as Administrator. To do that:
- At the search box type: command prompt or cmd
- Right-click at cmd or Command Prompt result and select Run As Administrator.
3. At command prompt, type these commands in order (press Enter after typing each command)
- cd
- cd C:Program FilesCommon Filesmicrosoft sharedClickToRun
- officec2rclient.exe /update user updatetoversion=16.0.13801.20360

4. Wait 4-5 minutes for “Office Setup” process to update the required files.
5. When this is done, open the Outlook calendar and check if the problem is solved. If yes, proceed and prevent the automatic installation of Office updates, by doing the following:
1. Open any Office application and go to File menu -> Account.
2. Click Update Options and Disable Updates.
Method 3. FIX “Could not read calendar” error by Repairing Office Installation.
Another method to solve the error “Could not read calendar” in Outlook is to repair Microsoft Office. To do that:
1. Close all Office applications.
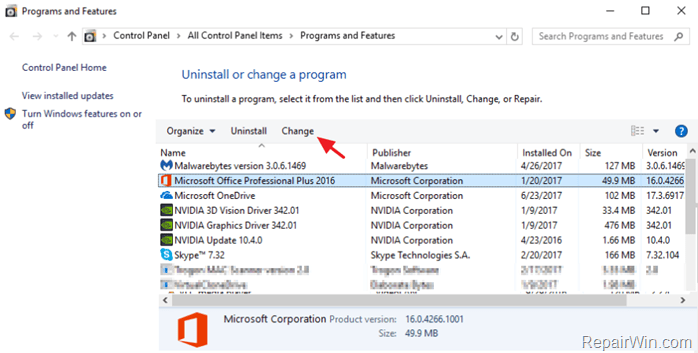
2. Navigate to Programs and Features. To do that:
1. Press simultaneously the Windows
+ R keys to open the run command box.
2. Type: appwiz.cpl and click OK.
3. In Programs and Features, select the Microsoft Office product that installed on your system and click Change.

4. Finally click Repair and follow the rest steps to repair Microsoft Office. *
* Notice: If after clicking ‘Repair’, you receive the “How would you like to repair your Office Programs” screen, select the Quick Repair option, which checks and replaces the missing or corrupted files. If after the “Quick Repair”, the problems doesn’t fixed, then choose the Online Repair option to reinstall your Office product. (requires an Internet connection).

5. When the repair is completed, launch Office applications and check if the problem solved.
Method 4. Remove & Reinstall Microsoft Office.
The final method to fix the Outlook calendar error, is to completely uninstall and reinstall Microsoft Office on your PC. To do that:
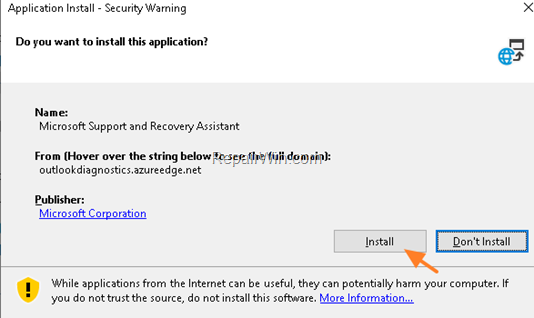
1. Download the Microsoft Support and Recovery Assistant (SARA) utility.
2. When the download is completed double click to run the SetupProd_OffScrub.exe application.
3. Click Install to install the SARA utility.

4. When the installation is completed, click Agree and then click Yes.

5. Wait until the ‘Microsoft Support and Recovery Assistant’ troubleshooting the issue.
6. Select the checkbox, at the left of the Office product name to select all the installed Office products and click Next.

7. Now wait until the Office removal process is complete and when this is done, restart your computer.
8. After restart, proceed and reinstall Office by following the instructions from these links:
- Office 365
- Office 2019
- Office 2016
- Office 2013
That’s all folks! Did it work for you?
Please leave a comment in the comment section below or even better: like and share this blog post in the social networks to help spread the word about this solution.


