Recently a friend told me that its mouse cursor moves on its own. In particular, the mouse cursor on his laptop moves slowly to the left side of the screen and makes it difficult to click on anything on the screen. If you face a similar problem, then continue reading below.
This article contains several methods to resolve the “mouse cursor moving on its own” issue on your PC.
How to FIX: Mouse Pointer Moving on its Own issue on Windows.*
* Note: Before you continue to the methods below apply the following actions, and see if the problem persists:
- Restart your PC.
- Ensure that your mouse’s bottom and your working surface is clean from dust or other materials.
- Ensure that you have only one mouse connected and disconnect any other device that can cause the problem (e.g. a Graphics/Pen tablet).
- If you ‘re using a wireless mouse, replace its batteries and check if the problem persists.
- Check if the problem persists with another mouse.
- If you own a laptop and you use an external mouse, disable the Touchpad. (see method-5).
- Check your computer for malware. For that task follow the instructions in this guide: How To Scan Your Computer for Viruses and other Malicious Programs.
- Method 1. Reduce the Mouse’s Speed.
- Method 2. Disable the Enhance Pointer Precision.
- Method 3. Hide Pointer while typing.
- Method 4. Uninstall and re-install the Mouse device.
- Method 5. Disable the Touchpad Device. (Laptop).
Method 1. Reduce the Mouse’s Speed.
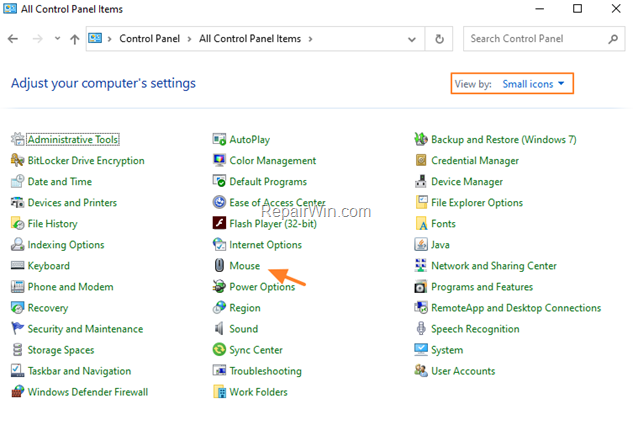
1. Navigate to Windows Control Panel and double click on Mouse* item to open the mouse properties.
* Note: If you se the ‘Mouse’ item, change the ‘View by’ to Small icons.
2. At Pointer Options tab, set the pointer speed at middle and click OK.
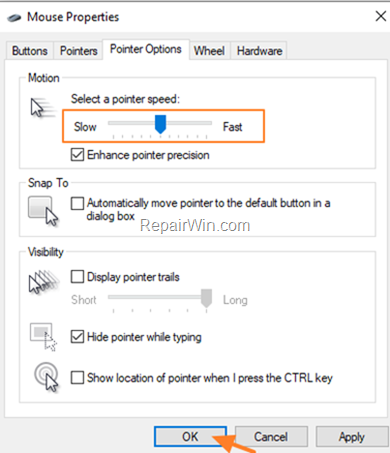
3. Now check if your mouse cursor is still moving on its own, and if the issue persists continue to method-2.
Method 2. Disable the Enhance Pointer Precision.
1. Navigate to Windows Control Panel and open the Mouse properties.
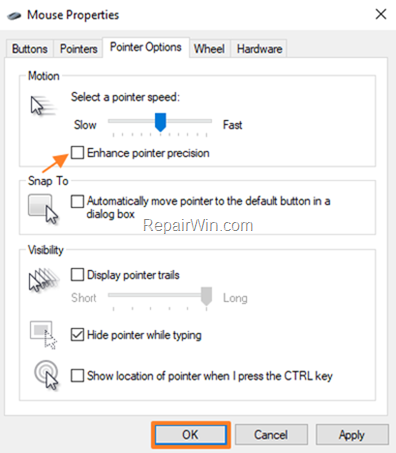
2. At Pointer Options tab, uncheck the Enhance Pointer Precision and click OK.
Method 3. Hide Pointer while typing.
1. Open the Mouse properties in Control Panel.
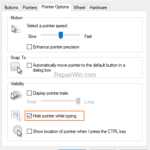
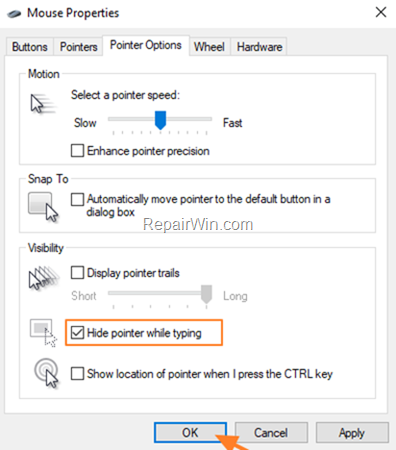
2. Check the Hide pointer while typing option and click OK.
Method 4. Uninstall and re-install the Mouse device.
1. Navigate to Device Manager. To do that:
1. Press Windows
+ R keys to open the run command box.
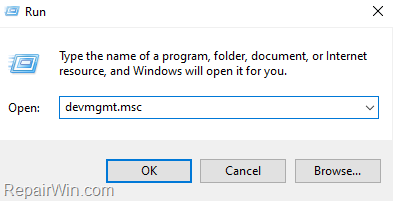
2. In the “Open” box, type: devmgmt.msc & click OK.
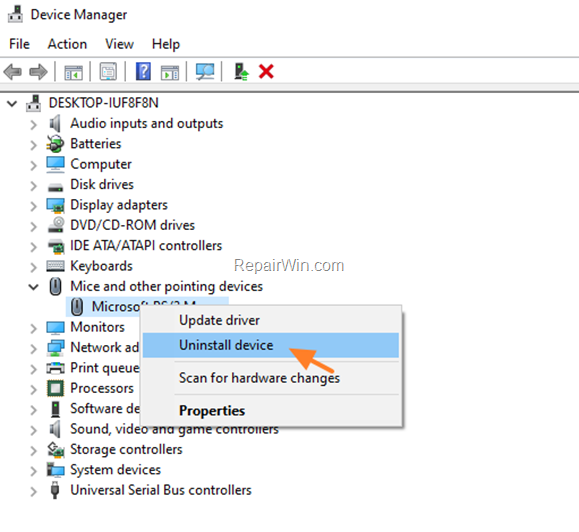
2. Expand the Mice and other pointing devices.
3. Right-click on the mouse device and select Uninstall device. *
* Note: If you see more than one mouse devices, uninstall all of them.
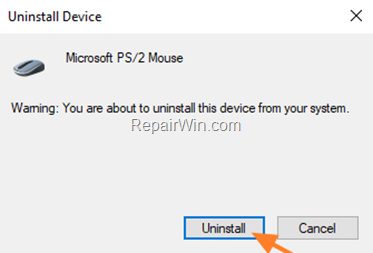
4. At the warning message, click Uninstall.
5. Now, perform one of the following:
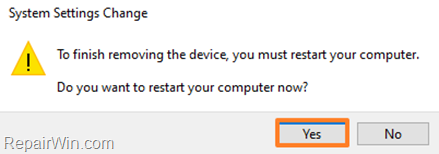
a. If prompted to restart your PC, press Enter.
b. If you don’t receive the restart prompt, press the Windows
+ X keys and then press the U and R keys on your keyboard to restart the PC manually.
6. After restarting, check if the mouse has stopped moving on its own.
Method 5. Disable the Touchpad Device.
The “mouse moving on its own” issue, commonly faced on laptops with a damaged touchpad device. At this cases, proceed and disable the Touchpad device by following the instructions below:
1. Navigate to Windows Control Panel and double click on Mouse* item to open the mouse properties.
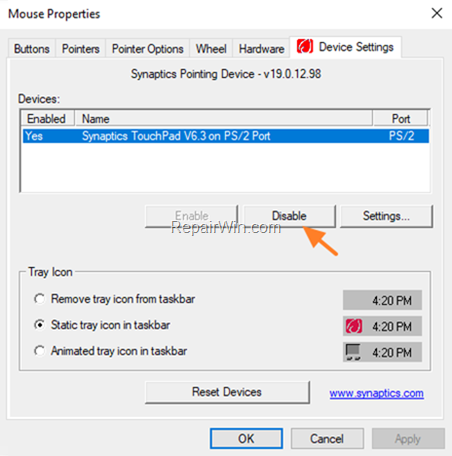
2. At Device Settings tab, select and Disable the Touchpad device. When done, click OK and check if the problem persists. *
* Note: If you face the same problem, replace your mouse.
That’s all! Did it work for you?
Please leave a comment in the comment section below or even better: like and share this blog post in the social networks to help spread the word about this solution.

