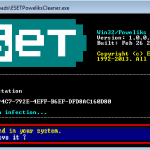
The “Powershell has stopped working“ problem, is caused by Poweliks virus. The “Powershell stopped working” error message is followed by the “A problem caused the program to stop working correctly. Windows will close the program and notify you if a solution is available” notification
and Windows asks from the user to confirm to close the problematic program. After confirming to close the program causing the error, the same message pop up every few seconds.
The solution to eliminate the “Powershell has stopped working” problem is to clean your computer from Poweliks virus by following this guide.
How to remove Poweliks virus and fix the “PowerShell Stopped Working” problem.
Step 1. Start your computer in Safe Mode with Networking.
First of all you have to boot your computer into safe mode to prevent Poweliks virus from running. To do that:
- Windows 7, Vista & XP:
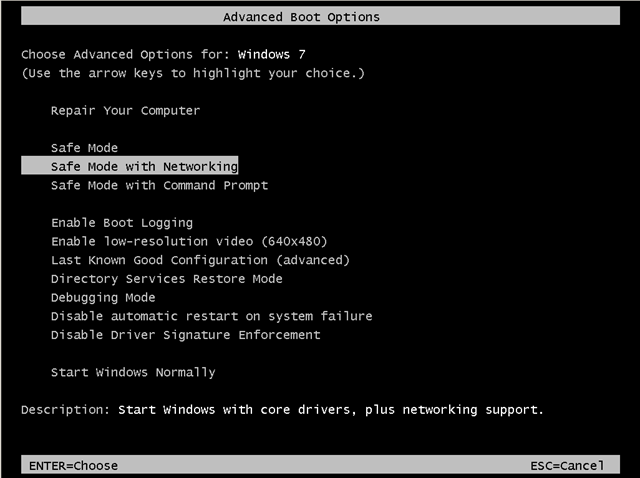
- Restart your computer and hit the “F8” key while your computer is starting up (before the appearance of Windows Logo).
- When “Advanced options” menu appears on your screen, navigate to “Safe Mode With Networking” option (using your keyboard arrow keys) option and hit Enter.
- Windows 8 & Windows 8.1:
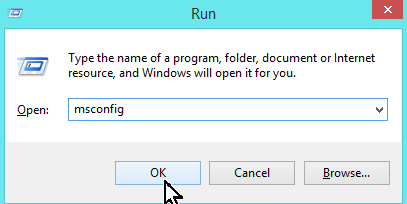
- Press “Windows” + “R” keys to open the RUN window.
- Type msconfig & press OK.
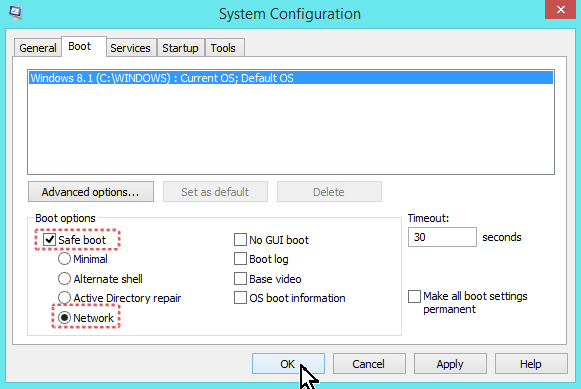
- Click the Boot tab.
- Select the Safe Boot & Network options & click OK.
- Restart your computer.
Step 2: Fix Internet Download Ability.
Reset Internet Explorer settings to default to re-enable download.
- From Internet Explorer’s main menu, click: the “gear” icon
 at the top right corner and choose “Internet Options”.
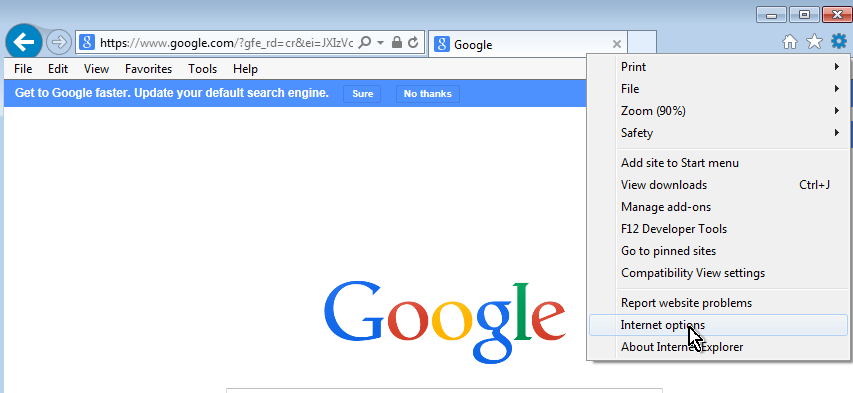
- Go to “Advanced Tab”.
- Click the “Reset” button.
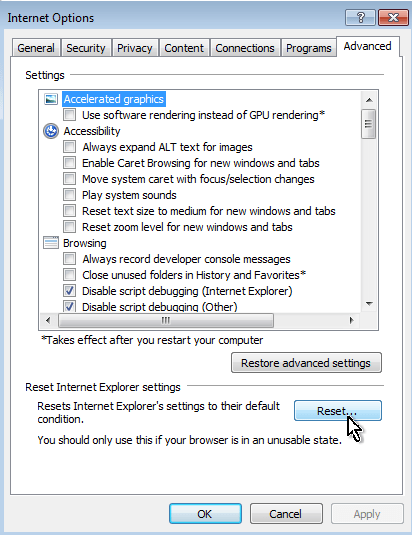
- Check the “Delete Personal Settings” check box and then press the Reset button.
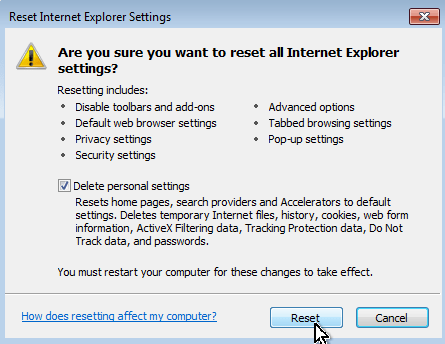
- Close all Internet Explorer windows and restart your browser.
Step 3. Terminate and remove Poweliks virus malicious process with RogueKiller.
– RogueKiller is an freeware anti-malware program, able to detect and remove generic malwares and some advanced threats such as rootkits, rogues, worms, etc.
- Download and run RogueKiller. (Download a compatible version for your system 32bit or 64bit)
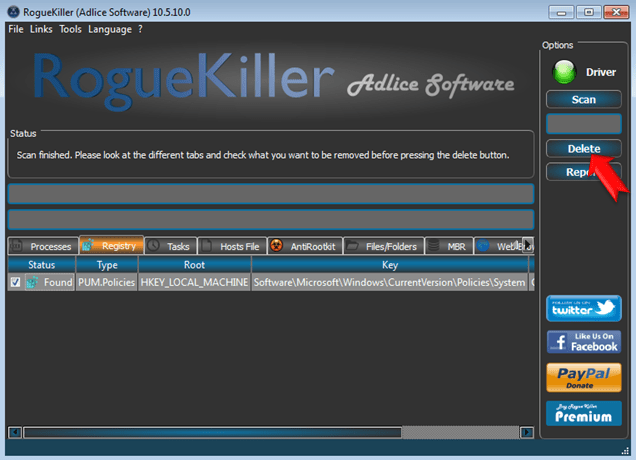
- Allow the Pre-Scan to complete and then press the Scan button.
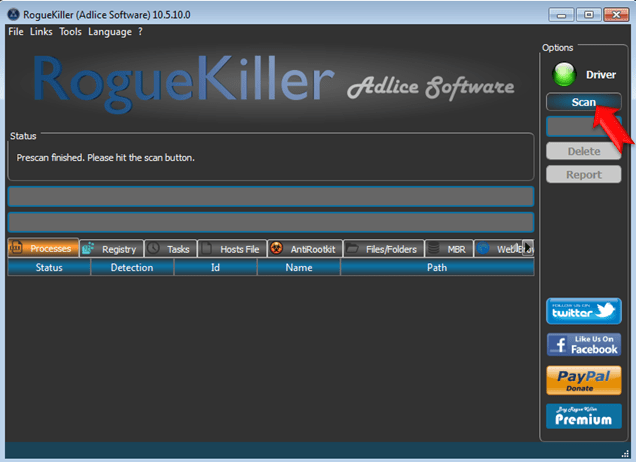
- Be patient until Rogue Killer scans your system.
- When the scan is completed, select all items found at Registry & Web Browsers tabs.
- Press the “Delete” button to remove items found.
Step 4. Clean Poweliks virus with ESET’s Poweliks Cleaner.
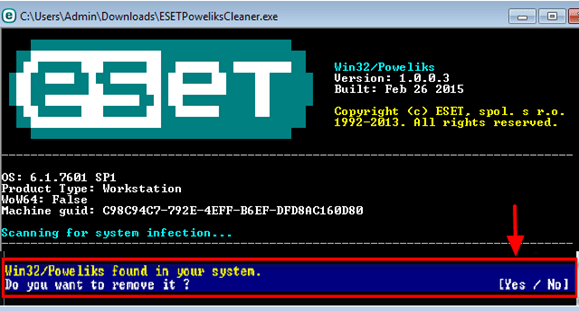
- Download and run ESET Poweliks Cleaner removal tool.
- Read and Accept the License Agreement
- Press the “Y” key on your keyboard to remove Poweliks infection.
- Close ESET’s Poweliks Cleaner.
- Restart your computer in Safe Mode with Networking again.
Step 5. Perform a full scan with Malware with Malwarebytes Anti-Malware
- Download and install Malwarebytes Anti-Malware Free. *
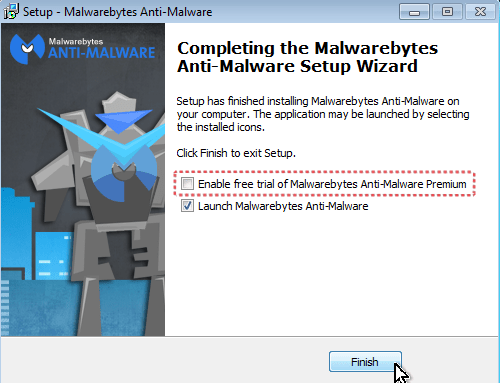
- * Beware: at the last screen of installation, uncheck the box next to “Enable free Trial of Malwarebytes Anti-Malware PRO” in order to use the free version of this GREAT software.
- Launch Malwarebytes Anti-Malware.
- Update the Database.
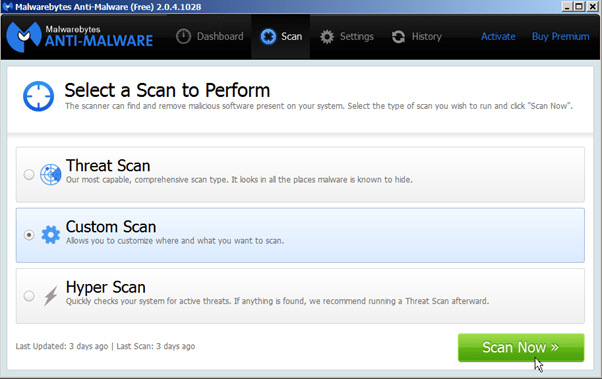
- Select Scan from top menu.
- At ‘Select a Scan to perform’ screen:
- Select Custom Scan &
- then press the Scan Now button.
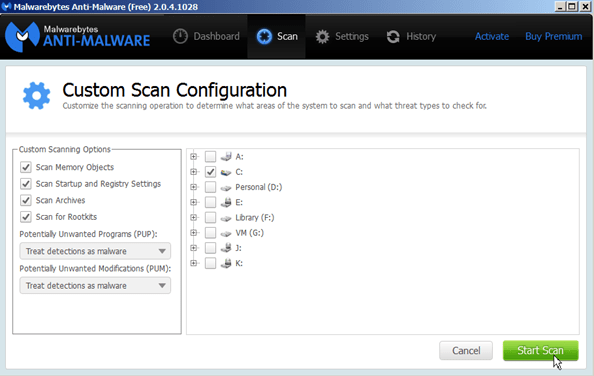
- At ‘Custom Scan Configuration’ screen:
- Check all the available checkboxes under Customs Scanning Options (at the left).
- Check the disk’s C: checkbox and then press the Start Scan button.
- Wait until the scan process is finished.
- When the scan is completed press “Quarantine All”.
- Restart your computer if needed and you ‘re done.
Did it work for you?
Please leave a comment in the comment section below or even better: like and share this blog post in the social networks to help spread the word about this problem.

