The error “Printer settings could not be saved because another printer or printer share with this name already exists”, occurs because you try to change the printer name by giving it the same name as another installed printer.
The issue commonly appears, when you replace your old printer with another one which is the same model (as your old printer), and you want to rename the new printer or the printer share with the name of your old printer. To easy bypass the problem, give to your new printer a different name or continue below to fix the problem.
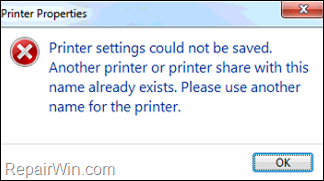
This article contains instructions to resolve the error “Printer settings could not be saved because another printer or printer share with this name already exists” in Windows 10, 8, 7 OS.
FIX: Another printer or printer share with this name already exists. Printer settings could not be saved.
Step 1. FIX Printer settings could not be saved error by removing Unused Printers.
The first step to resolve the “Printer settings error” is to uninstall any printers that doesn’t exist:
1. Navigate to Windows Control Panel > Device and Printers.
* Note: if you can see the “Device and Printers” item, change the View by to Small icons.
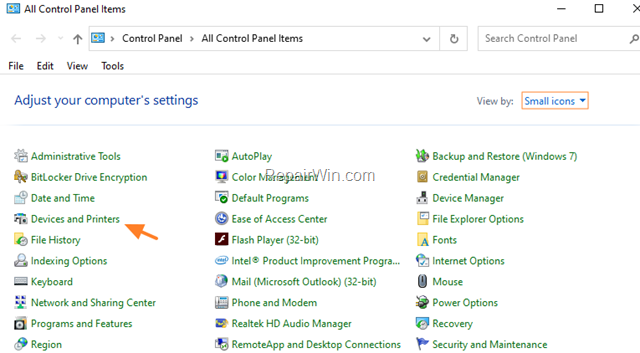
2. Right-click on any printer that no longer exists, and select Remove Device.*
* Note: If you have installed any additional software for the unused printer, proceed and uninstall it from ‘Programs and features’ in Control Panel.
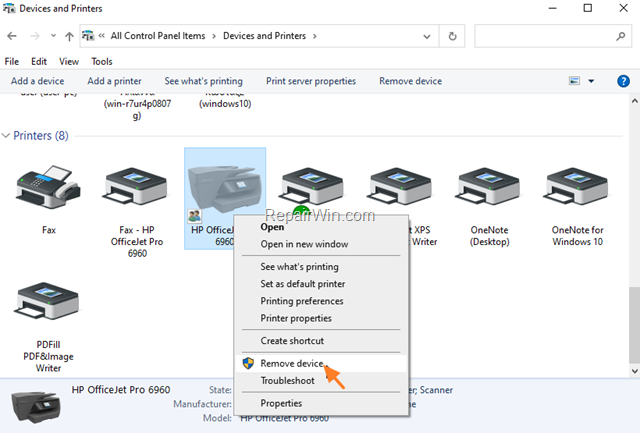
3. Restart your computer and then try to rename the printer again. If you receive the same error, proceed to step-2 below.
Step 2. Remove Unused Printer from Registry.
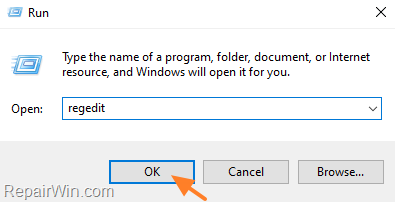
1. Press Windows ![]() + R keys to open the run command box.
+ R keys to open the run command box.
2. Type regedit and press Enter.
3. In Registry Editor navigate to the following key:
- HKEY_LOCAL_MACHINE/SYSTEM/CurrentControlSet/Control/Print/Printers
4. Under the Printers key, right-click the registry key with the same name as the printer you want to use and select Delete.
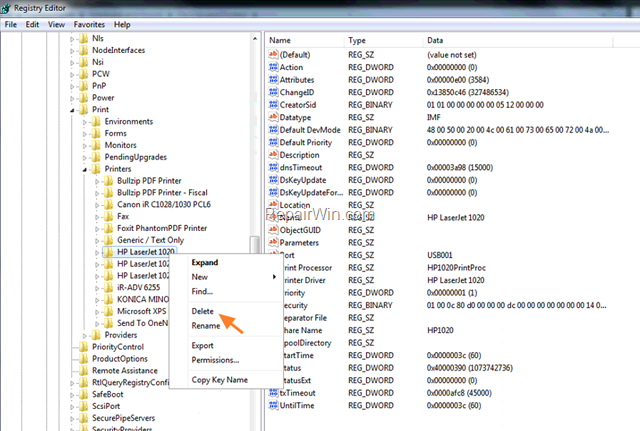
5. When done, close the Registry Editor.
6. Open the Windows Services control panel: To do that:
- Press Windows
 + R keys to open the run command box.
 - In the Search box, type: services.msc & click OK.
- Press Windows

7. In Services panel, right-click on Print Spooler service and click Restart.
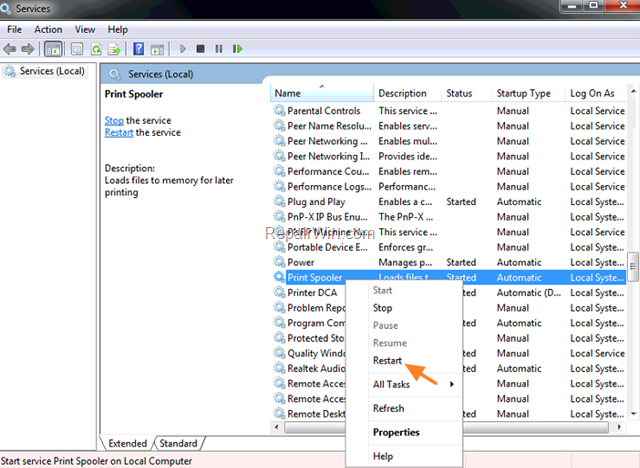
8. Try to rename your printer again. This time, you should have not any problem when renaming your printer, or the printer’s share name.
That’s all folks! Did it work for you?
Please leave a comment in the comment section below or even better: like and share this blog post in the social networks to help spread the word about this problem.
Bài liên quan
- FIX: Error 0x81000203 in System Restore. (Solved)
- Cannot Access Shared folder. User has not been granted the requested logon type at this computer. (Solved)
- FIX: Cannot clear TPM – 0x80284001, 0x80290300 or 0x80290304.
- Unable to Schedule Teams Meeting in 15 or 10 minutes slots (Solved)
- How to Share Folder without Username/Password on Windows 10/11.
- FIX: Thunderbird High CPU or Memory Usage issues.