In this guide you will find instructions to fix the problem of white thumbnails in image files in Windows 10/11.
Problem in details: Images files (JPG, PNP, TIFF, etc.) appears with white/blank thumbnails/icons in File Explorer on Windows 10.
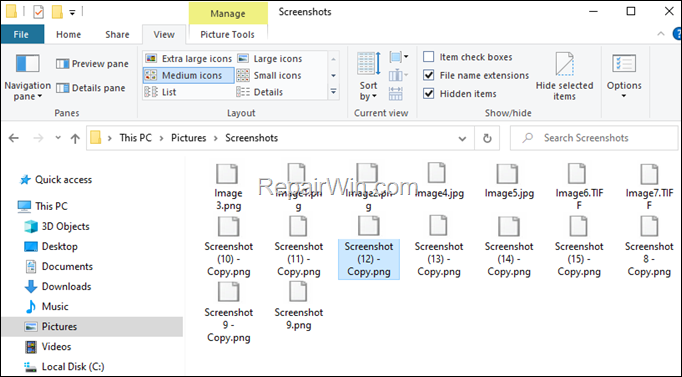

In Windows 10/11, the Microsoft Photos app is the default app for viewing and organizing your photos, and is the app responsible for displaying image thumbnails in Explorer. So the issue of blank thumbnails on images in Explorer can appear if the Photos app is not the default app to view the images files or due to a problem with the Photos app.
How to FIX: White/blank Icons on Photos and Images in File Explorer in Windows 10/11. *
* Important: Before you continue to the methods below:
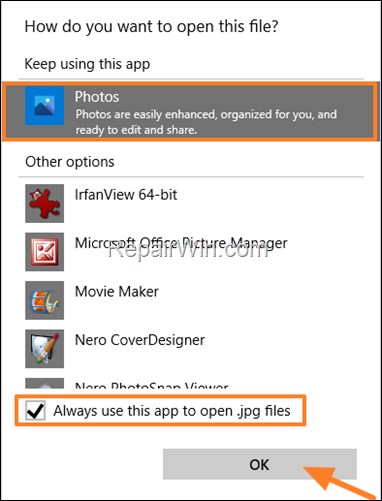
1. Ensure that you have set the Photos app as the default app for images files. To do that, right-click on a photo/image and select Open with > Choose another app. Then select the Photos app in the list, check the option Always use this app and click OK.

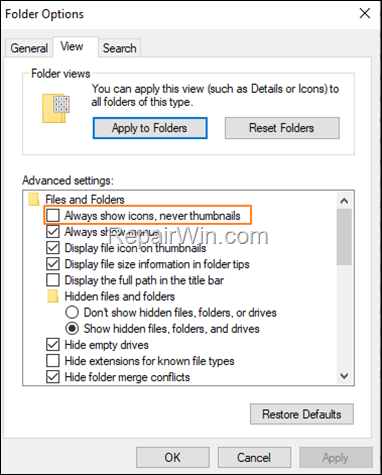
2. Open File Explorer options (View > Options), and ensure that the Always show icons, never thumbnails option is unchecked.

Method 1. Free up disk space and Delete Thumbnails.
Step 1. Ensure that you have enough free space.
The problem of the bank icons on images in File Explorer, may appear if you haven’t enough free space on your disk. Therefore, before proceeding to the next step, make sure that the disk is not full and has enough free space.
Step 2. Run Disk Cleanup and Remove Thumbnails.
1. Open File Explorer.
2. Right click at the Local Disk C: (drive) and choose Properties.
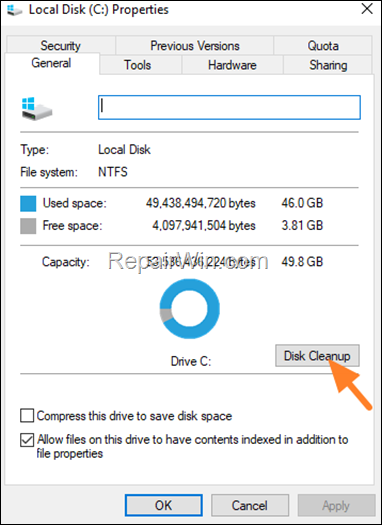
3. Click the Disk Cleanup button.

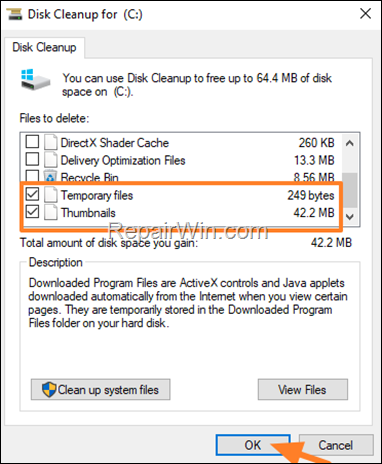
4a. Select to remove the following files and click OK.
- Downloaded Program Files
- Temporary Internet Files.
- Temporary Files
- Thumbnails

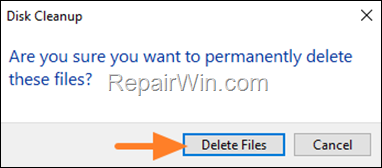
4b. Click Delete files to confirm your decision.

5. When the operation is completed, close the disk properties and check if the problem is solved.
Method 2. Run the Windows Store Apps Troubleshooter.
1. Navigate to Start -> Settings -> Update and Security.
2. Choose Troubleshoot from the left, and then at the right click Additional Troubleshooters > Windows Store Apps Troubleshooter and click Run the troubleshooter.
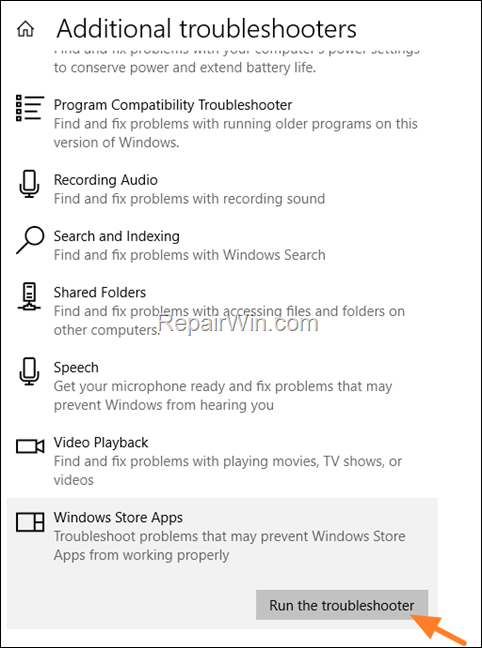

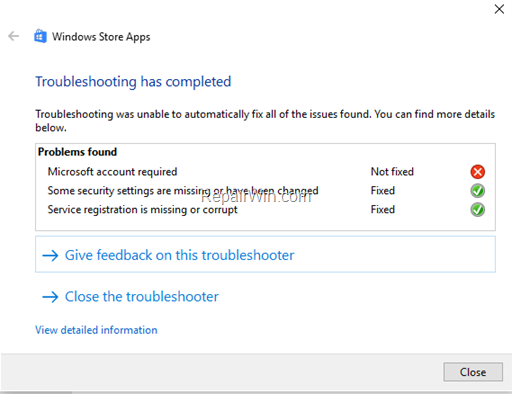
3. Follow the on-screen instructions and let the troubleshooter to fix the problems.
4. When the troubleshooting is done, close the troubleshooter and check if the problem persists. If yes, then proceed to the next step.

Method 3. Rebuild Thumbnails Cache.
1. Open Command Prompt as Administrator. To do that:
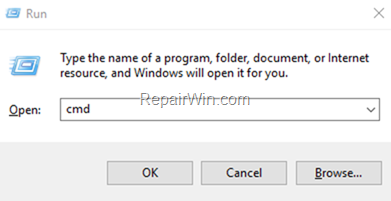
1. Press the Windows
+ R keys to open the ‘Run’ command box
2. Type CMD and then press CTRL + SHIFT + ENTER.
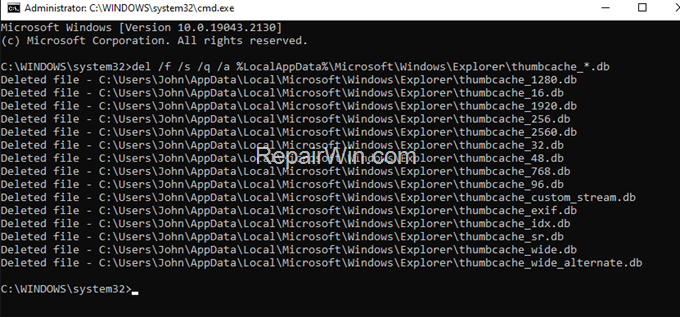
2. In command prompt copy and paste the following command but do not press Enter yet:
- del /f /s /q /a %LocalAppData%MicrosoftWindowsExplorerthumbcache_*.db


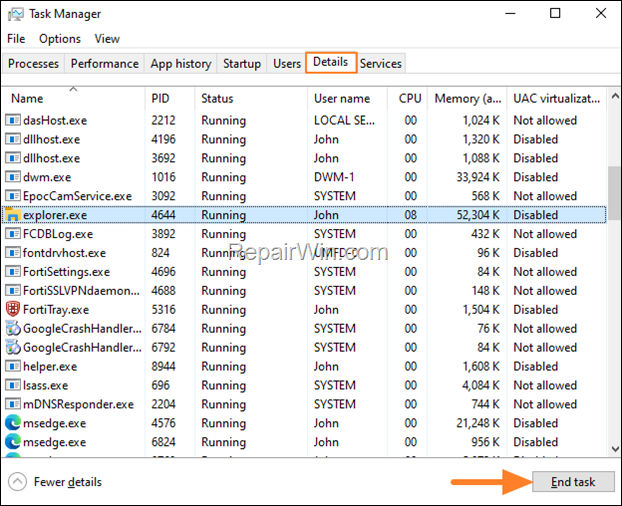
3. Now, press CTRL + SHIFT + ESC to open the Task Manager.
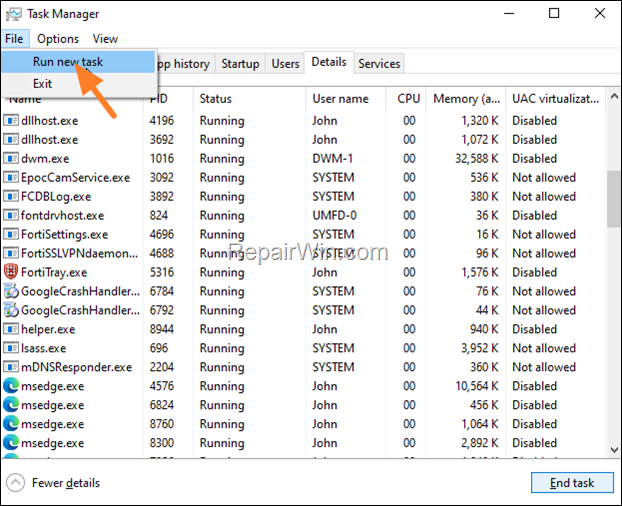
4. In Details tab, select the explorer.exe and click End Task and then End Process.

5. Click in command prompt window and hit Enter.

6. Now, in Task Manager window, click the File menu and select Run new task

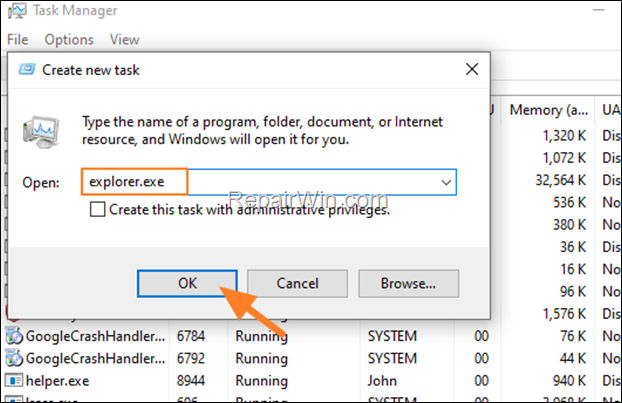
7. Type explorer.exe and press Enter. (OK)

8. Finally, check if the issue is resolved.
Method 4. Repair or Reset the Photos app.
1. Navigate to Start -> Settings -> Apps.
2. At App & features, locate and select the Microsoft Photos and click Advanced Options.
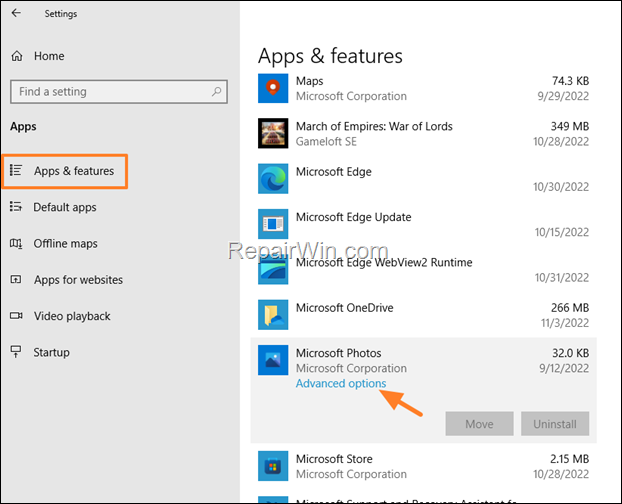

3. At Advanced options, click the Repair button.
4. When the process is completed, you will see a checkmark ![]()
![]() next to the ‘Repair’ button. Go ahead and check if the issue is resolved.
next to the ‘Repair’ button. Go ahead and check if the issue is resolved.
5. If the problem persists, click the Reset button to reset the Photos app’s settings.


Method 5. Completely Uninstall and Reinstall the Photos App.
The next step to fix the mentioned problem with the white thumbnails in Image files, is to complete remove from your system and to reinstall the Photos app. To do that:
1. Open PowerShell as Administrator.
2. At PowerShell give the following command and press Enter, to completely remove the Photos app: *
- Get-AppxPackage *Microsoft.Windows.Photos* | Remove-AppxPackage
*Info: The above command will uninstall the Photos app from Windows 10, and will remove also the installation files and the leftovers of the Photos app, from the “C:Program FilesWindowsApps” directory.


3. When the command is completed, close PowerShell.
4. Go to Start menu and open the Microsoft Store.
5. Type photos in the search box and then open Microsoft Photos.
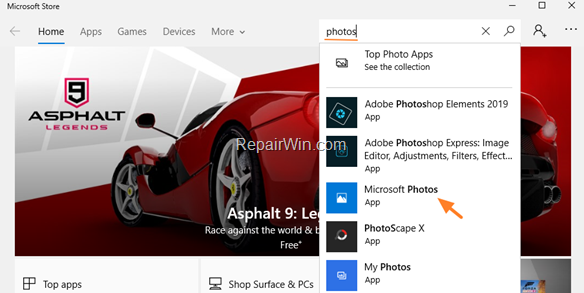

6. Finally, click Install, to reinstall the Photos app on your system.
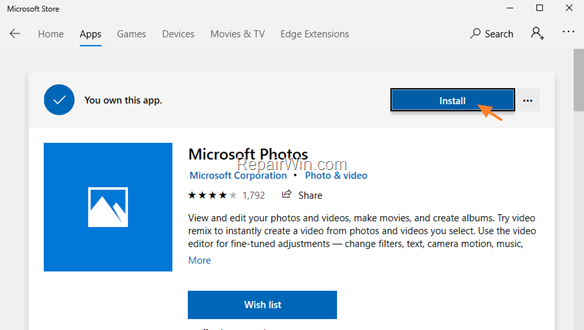

7. When the Photos app installed, the problem should have been resolved.
That’s all folks! Did it work for you?
Please leave a comment in the comment section below or even better: like and share this blog post in the social networks to help spread the word about this solution.


