On a Windows 10 computer, the following message appears when trying to update Windows 10 to version 1803 or 1809: “Some Apps need to be uninstalled: These programs need to be uninstalled because they aren’t compatible with the Upgrade: Avira Antivirus” and when pressing the “Uninstall and continue” button, the following error appears: “We couldn’t uninstall these apps: Avira AntiVir”. The funny thing with this problem, is that the Avira Antivir (Antivirus) it is not installed on the PC (not listed at installed programs).

The problem “Couldn’t uninstall Avira AntiVir” during the Windows 10 v1803 upgrade, is occurred because the update program, finds some files on your PC that are associated with the Avira Antivirus and they haven’t removed during Avira Uninstall. *
* Note: If you really have the “Avira Antivirus” program installed on your machine, then uninstall it using the “Programs and Features” option in control panel and then proceed to update your system to Windows 10 v1803 (or 1809). After upgrade, download and install the latest version of Avira Antivirus in your system.
How to FIX Windows 10 Update Error: Couldn’t Uninstall Avira AntiVir.
1. Start Windows in Safe mode. To do that:
- Press the Windows
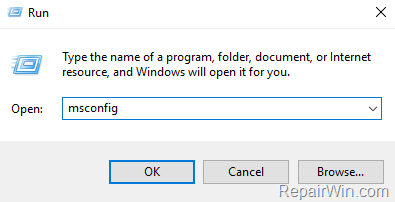
 + R keys to open the run command box.
 - Type msconfig and press Enter.
- Press the Windows

- At Boot tab select the Safe Boot option, then click OK and restart your computer.

2. After restart, open file explorer and delete the avipbb.sys file from the following locations:
- C:WindowsSystem32drivers
- C:WindowsSysWOW64drivers
3. Proceed to delete from the above locations every other file named avipbb despite its extension.
4. Then delete the Avira folder from the following location:
- (Windows 64-bit) : C:Program Files (x86)AviraAntivirus
- (Windows 32-bit): C:Program FilesAviraAntivirus
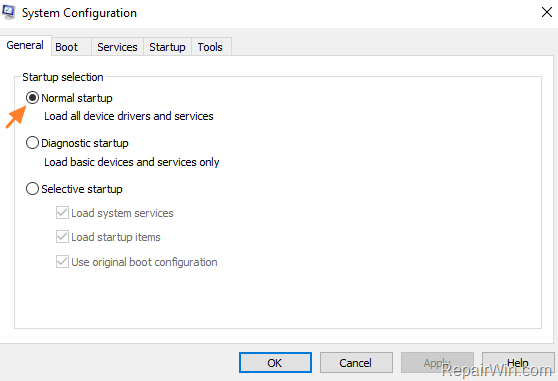
5. Run msconfig again.
6. At General tab, click Normal startup and click OK, to restart your computer normally.

7. Check and install updates. *
* Note: If you still face the “Couldn’t uninstall Avira AntiVir” error during update, then download and run the Avira Registry Cleaner.
That’s all folks! Did it work for you?
Please leave a comment in the comment section below or even better: like and share this blog post in the social networks to help spread the word about this solution.


