If you own Word 365 and you cannot print a custom page range then continue reading below to fix the problem.
Problem in Details: When you try to print a custom page range in Word 365 (Office 365), nothing prints or the print job gets stuck in the print queue. However, you can print the entire document without any problems. The problem does not appear in other programs, e.g. when you try to print from PDF or in Excel.
How to FIX: Word Cannot Print Specific Pages only Full Document (Office 365).
If Word for Office 365, does not print page range but only the full document, try the methods below to fix the issue:
Method 1. Activate “Update Fields before printing” option.
1. From File menu go to Options.
2. In Display tab check the Update fields before printing checkbox and then click OK.

3. Now try to print a custom range. The problem should be solved.
Method 2. Revert Office 365 to a Previous Version.
Because sometimes Word 365 doesn’t print custom page range after installing Office updates, another method to fix the problem is to revert to a previous version of Office 365.
To return to a previous Office 365 version:
1. Close all Office applications.
2. Open Command Prompt as Administrator. To do that:
- At the search box type: command prompt or cmd
- Right-click at cmd or Command Prompt result and select Run As Administrator.
3. At command prompt, type these commands in order (press Enter after typing each command)
- cd
- cd C:Program FilesCommon Filesmicrosoft sharedClickToRun
4. Now find the Build number of the Office 365 version that you want to revert to, from this page: Office365 Version History & Build Numbers. *
* For example: If you want to revert to the Office 365 Version 2111 (December 14, 2021), the build number is: 14701.20248

5. Finally give the following command to revert to the desired Office 365 version (build number). *
- officec2rclient.exe /update user updatetoversion=16.0.BUILD.NUMBER
* Note: Replace “BUILD.NUMBER” with the build number that you want to revert to.**
** For example: To return to Office 365 Build Number 14701.20248, give this command:
- officec2rclient.exe /update user updatetoversion=16.0.14701.20248

6. Wait 4-5 minutes for “Office Setup” process to update the required files.
7. When this is done, open Word and check if the printing problem has been resolved. If so, go ahead and disable (temporarily until the problem is fixed in a later version), the automatic updates of Office by doing the following:
1. From the File menu select Account.
2. Click Update Options and Disable Updates.
Method 3. Repair Office 365.
The third method to fix the printing problem in Word, is to repair Microsoft Office. To do that:
1. Close all Office applications.
2. Navigate to Programs and Features. To do that:
1. Press simultaneously the Windows
+ R keys to open the run command box.
2. Type: appwiz.cpl and click OK.
3. In Programs and Features, select the Microsoft Office product that installed on your system and click Change.

4. Finally click Repair and follow the rest steps to repair Microsoft Office. *
* Notice: If after clicking ‘Repair’, you receive the “How would you like to repair your Office Programs” screen, select the Quick Repair option, which checks and replaces the missing or corrupted files. If after the “Quick Repair”, the problems doesn’t fixed, then choose the Online Repair option to reinstall your Office product. (requires an Internet connection).

5. When the repair is completed, launch Office applications and check if the problem solved.
Method 4. Remove & Reinstall Microsoft Office 365.
The final method to fix Office 365 problems, is to completely uninstall Office365 from your PC, and then to reinstall it:
1. Download the Microsoft Support and Recovery Assistant (SARA) utility.
2. When the download is completed double click to run the SetupProd_OffScrub.exe application.
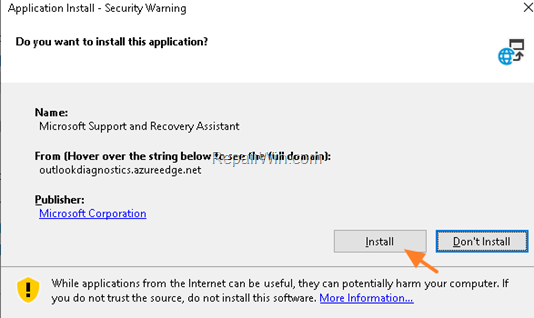
3. Click Install to install the SARA utility.

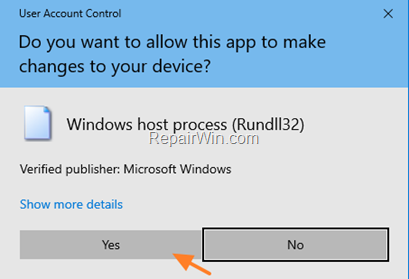
4. When the installation is completed, click Agree and then click Yes.

5. Wait until the ‘Microsoft Support and Recovery Assistant’ troubleshooting the issue.
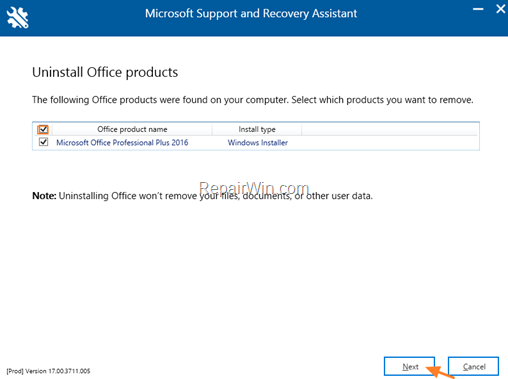
6. Select the checkbox, at the left of the Office product name to select all the installed Office products and click Next.

7. Now wait until the Office removal process is complete and when this is done, restart your computer.
8. After restart, proceed and reinstall Office by following these instructions: Download and install or reinstall Microsoft 365 or Office 2021 on a PC or Mac
That’s all folks! Did it work for you?
Please leave a comment in the comment section below or even better: like and share this blog post in the social networks to help spread the word about this solution.


