This tutorial contains instructions o how to disable Bitlocker Protection and Drive encryption in Windows 10. As you may know, the BitLocker encryption feature which is available in Windows 10 pro and enterprise versions, can help you to protect your PC contents from unauthorized access. But sometimes there is the need to disable the Bitlocker on Windows 10, so in this guide you can find how to do that.
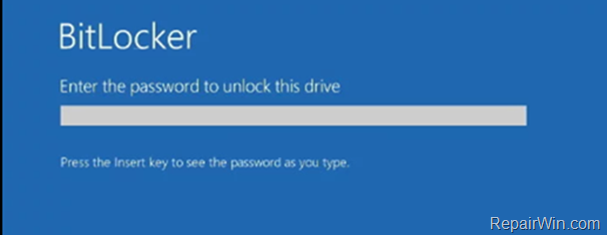
If your computer is protected with BitLocker, then when you start the system, you will be prompted to connect the USB drive that you used during BitLocker activation or to enter your BitLocker password to unlock the drive C: in order to continue booting. If you do not have any of these, then press ESC to enter your BitLocker recovery key. *
* Notes:
1. If the Bitlocker Recovery Key or Password is not accepted at system startup then try to unlock and decrypt the hard drive to another Windows 10 computer or try to : Unlock and Decrypt the Protected Drive in the Windows Recovery Environment (WinRE).
2. If you Cannot Unlock the Drive (e.g. If don’t own the BitLocker Recovery Key or because the BitLocker key is not accepted) and you want to remove the BitLocker encryption in order to use the protected drive again, then read this tutorial: How to Remove BitLocker Protection from a Drive Without the BitLocker Recovery key or Password.
After booting to Windows then follow the instructions below to disable the bitlocker protection and to decrypt the drive.
How to Turn Off BitLocker Protection and Decrypt a Bitlocker Encrypted Drive in Windows 10.
In order to turn off the Bitlocker protection, you must have the Bitlocker password or the bitlocker recovery key in order to unlock the drive first and then to decrypt the drive.
The Bitlocker recovery key is a 48-digit number key and can be found at following locations:
- On a printout you saved, when you enabled Bitlocker.
- On a USB drive you used, during the Bitlocker activation to save the Bitlocker recover key.
- At the Microsoft Account Recovery Keys, by using the MS account you using to login to your device, or you have added to the device in order to download apps from Microsoft Store, or to activate MS Office or for email.
- On your Azure Account for work PC’s that login with an Azure Active Directory account.
Once you find the Bitlocker recovery key or the bitlocker password, then proceed to unlock the Bitlocker encrypted drive and to remove the Bitlocker encryption by using one of the following ways:
- Method 1. Disable BitLocker Protection from Windows GUI.
- Method 2. Disable BitLocker & Decrypt a Bitlocker Encrypted Drive from PowerShell.
Method 1. How to Turn Off Bitlocker Protection in Windows 10 GUI.
To disable the protection on your System Drive C:
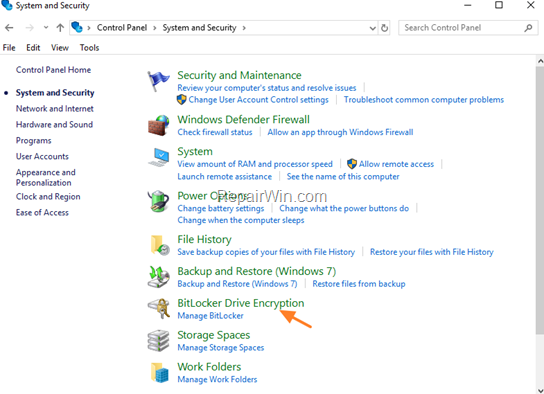
1. Navigate to Windows Control Panel -> System and Security and then click Bit Locker Drive Encryption.
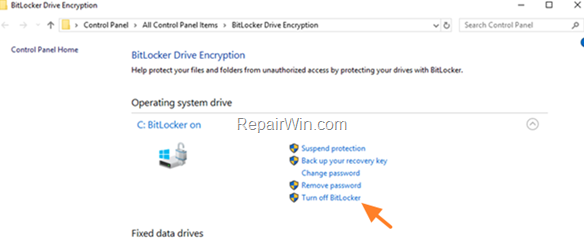
2. Next to the operating system drive C:, click Turn Off BitLocker. *
* Notes:
1. If the “Turn Off BitLocker” option, is not available, open command prompt as administrator and give the following command:
- manage-bde -off C:
2. To see the decryption status (progress) of drive C:, give this command:
- manage-bde -status C:
3. After Turning Off the Bitlocker, then click at the Bitlocker icon in the taskbar to view the decryption process.

To disable the protection on any other BitLocker protected drive from Windows GUI:
1. Open Windows Explorer and then double click on the locked drive.
2. Enter the Bitlocker password or click More Options to enter the Bitlocker Recovery key, in order to unlock the drive.
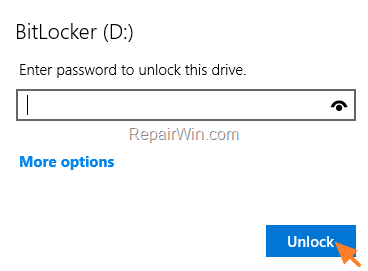
2. After unlocking the drive, then navigate to Control Panel -> System and Security -> Bit Locker Drive Encryption and after selecting the drive click Turn off BitLocker to decrypt the drive. (see the screenshots above)
Method 2. How to Turn OFF BitLocker Protection & Decrypt a Bitlocker Encrypted Drive from PowerShell in Windows 10.
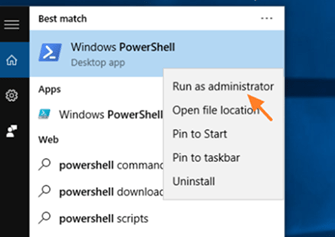
1. Open PowerShell as Administrator. To do that:
- At Cortana‘s search box, type powershell
- Right click on Windows PowerShell result and select Run as administrator.
2. Then check the encryption status of each drive on your computer, by typing this command:
- manage-bde -status
3. Note in which drive letter the Lock Status shows Locked, and then proceed to unlock that drive, by typing this command: *
- manage-bde -unlock drive-letter: -rp BitLocker-recovery-key
* e.g.: If you want to unlock the drive “D:” and the bitlocker recovery key is: “123456-123456-123456-123456-123456-123456” then type:
- manage-bde -unlock D: -rp 123456-123456-123456-123456-123456-123456
* Note: If you know the Bitlocker password then give this command:
- manage-bde -unlock drive-letter: -pw BitLocker-Password
* e.g.: If you want to unlock the drive “D:” and the BitLocker password is: “123qwerty” then type: *
- manage-bde -unlock D: -password 123qwerty
4. Then disable the bitlocker encryption and decrypt the encrypted drive, by using one of the following commands:
- Disable-BitLocker -MountPoint “drive-letter:”
- manage-bde -off drive-letter:
* e.g.: If you want to disable the bitlocker encryption on drive “D:”, then type:
- Disable-BitLocker -MountPoint “D:”
OR type…
- manage-bde –off D:
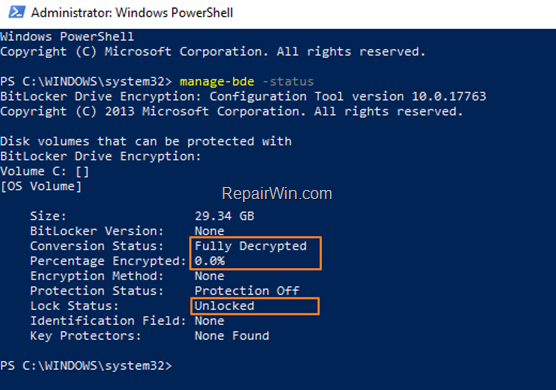
5. When the decryption process is completed, proceed to check again the encryption status by giving this command:
- manage-bde -status
6. If the ‘Lock Status’ shows Unlocked and the ‘Conversion Status’ shows Fully Decrypted, you’re done!
That’s all folks! Did it work for you?
Please leave a comment in the comment section below or even better: like and share this blog post in the social networks to help spread the word about this problem.

