This tutorial contains instructions on how to enable the System Protection on Windows 10, 8 & 7 OS. The System Restore Protection (commonly known as ‘System Protection’) is a Windows feature that allow you to restore your system to an earlier point in time, if Windows doesn’t work properly after a significant change on system files (e.g. after a Windows Update, or after a virus attack.)
The System Restore tool, uses the Volume Shadow Copy service in order to take snapshots of the Windows system files and registry and saves them as Restore Points. These “Restore Points” can be used to restore the system to a previous working condition, if Windows fail to boot or if become unstable, without having to reinstall the operating system.
How to Turn On the System Restore Protection in Windows 10.
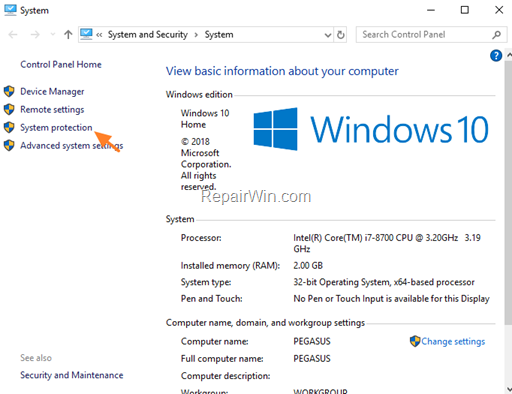
1. Open Windows explorer, right click at ‘This PC” icon and choose Properties.

2. Choose System Protection at the left.

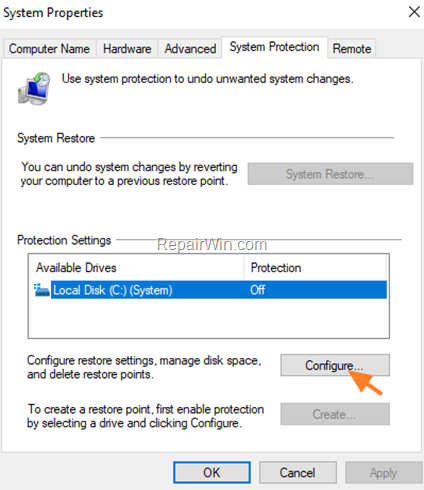
3. Highlight the Local Disk C: (System) and click Configure.

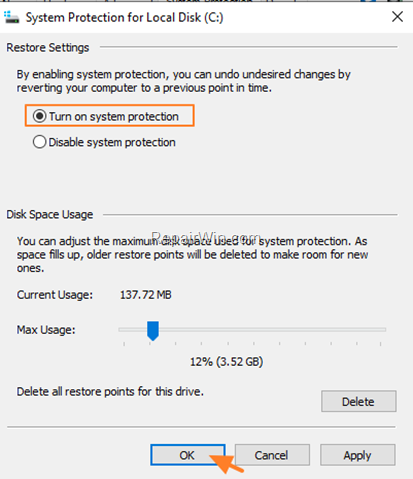
4. At System Protection options, select Turn on system protection and click OK. *
* Note: If the “System Protection: is already enabled, then you ‘re OK.

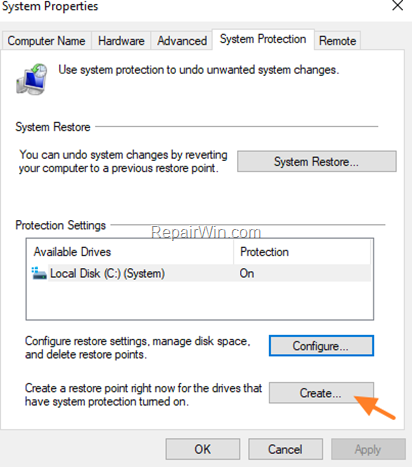
5. Finally, at the System Protection options, click Create to create a snapshot (Restore Point), of the current system state.

That’s all! Did it work for you?
Please leave a comment in the comment section below or even better: like and share this blog post in the social networks to help spread the word about this solution.
Bài liên quan
- FIX: Error 0x81000203 in System Restore. (Solved)
- Cannot Access Shared folder. User has not been granted the requested logon type at this computer. (Solved)
- FIX: Cannot clear TPM – 0x80284001, 0x80290300 or 0x80290304.
- Unable to Schedule Teams Meeting in 15 or 10 minutes slots (Solved)
- How to Share Folder without Username/Password on Windows 10/11.
- FIX: Thunderbird High CPU or Memory Usage issues.