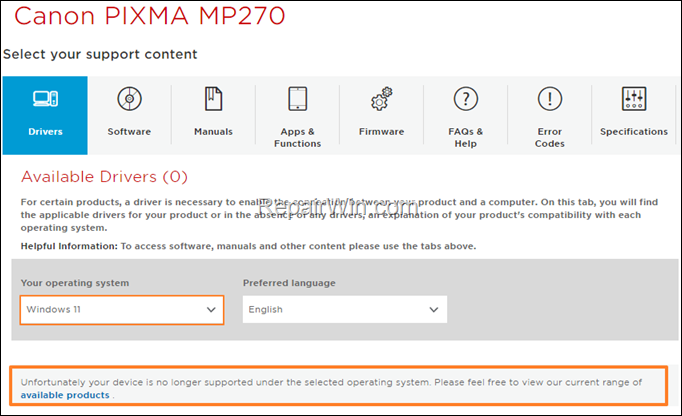
A few days ago, one of my customers asked me to install its Canon printer (PIXMA MP270) on Windows 11. As usual, I tried to download the required driver from the official Canon Drivers official website, but I informed that “There is no driver for the OS Version you selected. The driver may be included in your OS or you may not need a driver.” and “Unfortunately your device is no longer supported under the selected operating system. Please feel free to view our current range of available products.”

In this tutorial you’ll find instructions on how to install a Canon printer without official drivers for Windows 11.
How to Install any Canon printer no longer supported under Windows 11. *
* Note: Before you continue to the steps below ensure that Canon doesn’t offer a Windows 11 driver for your printer
Step 1. Install Printer via Windows Update.
The first step to install any printer on Windows 11 without an official driver from the manufacturer, is to check if the driver is available in Windows Update. So, connect the printer with your PC, then power the printer on and proceed as follows:
1. Go to Start > Settings > Update and Security and Check for Updates.
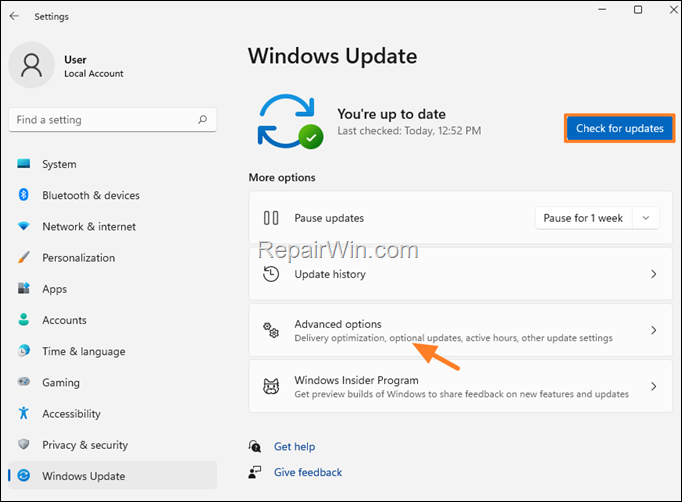
2. Let Windows to find all available updates and then install them. When this done, click Advanced options.

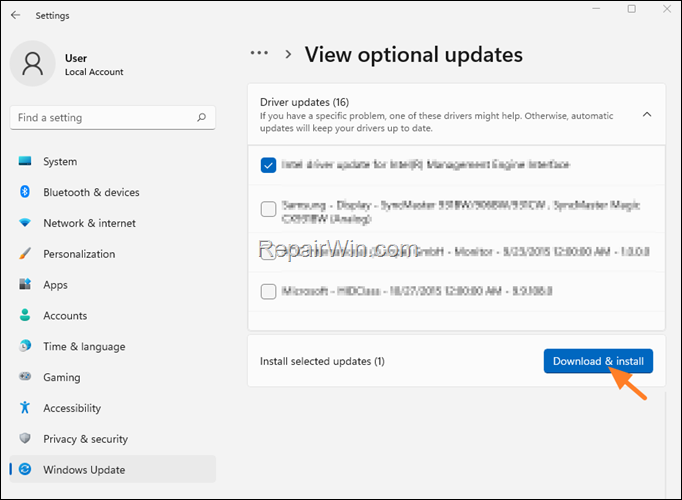
3. Click Optional Updates.
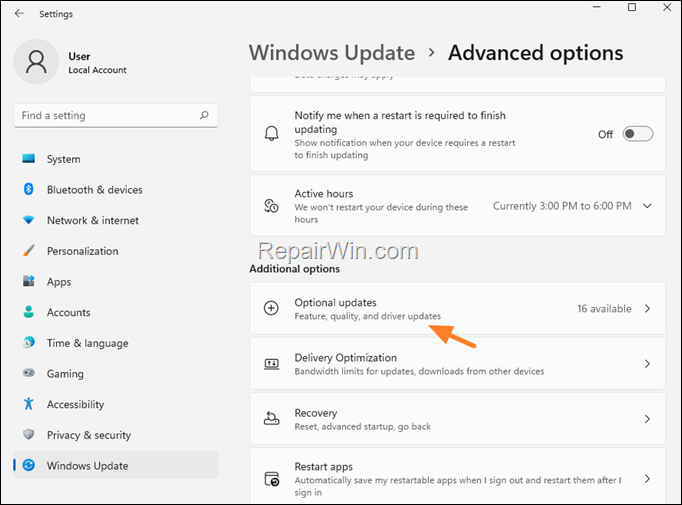

4. Now look at the list of all available driver updates to see if there is a driver for your printer. If yes, select it and then click Download and install. If you cannot find a driver for your printer in Windows Update, proceed to step-2..

Step 2. Manually Install Canon printer using Windows 10 driver.
The next step to install a Canon printer that doesn’t have an official Windows 11 driver from the manufacturer is to install it manually using the Windows 10 driver.
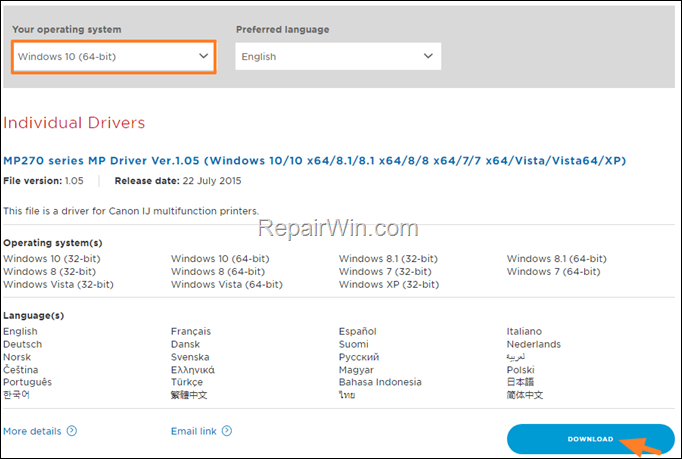
1. Navigate to Canon Support site and search for the drivers for your printer model.
2. At drivers download page, select Windows 10 (64-bit) Operating system and Download the drivers package.

3. When the download is completed double click at the downloaded file, and click Next to proceed to the driver installation.
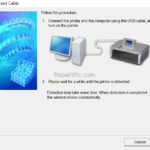
4. When you see the “Connect Cable” screen, try to disconnect and reconnect the USB cable and see if the printer is recognized from your computer. Now according the result, proceed as instructed below:
- If the printer is recognized the installation will continue automatically. At such case, leave the installation to complete and when it’s done, try to print to see if everything is OK.
- If the printer is not recognized, continue to next step.


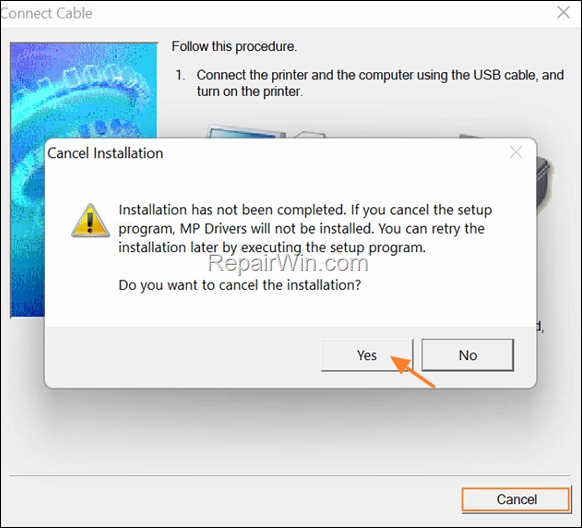
5. At the ‘Connect cable’ screen click Cancel and then click Yes.

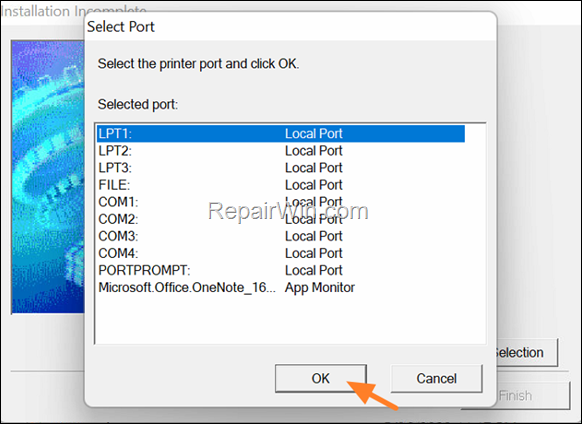
6a. Now at the next screen check Select printer port and then click Manual Selection,


6b. At the next screen select LPT1 and click OK.

7. Finally, click Finish to install the printer drivers.
8. At next, navigate to Control Panel (All Items) and open Devices and Printers.
9. Find your printer, right-click on it and choose Printer Properties.
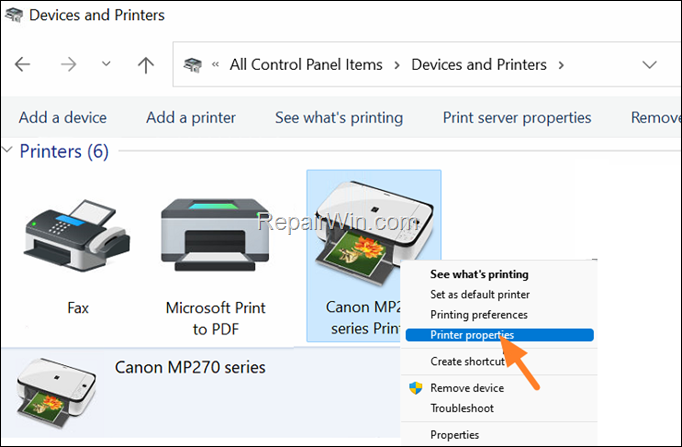

10. At Ports tab, select the USB port with your printer and click OK.
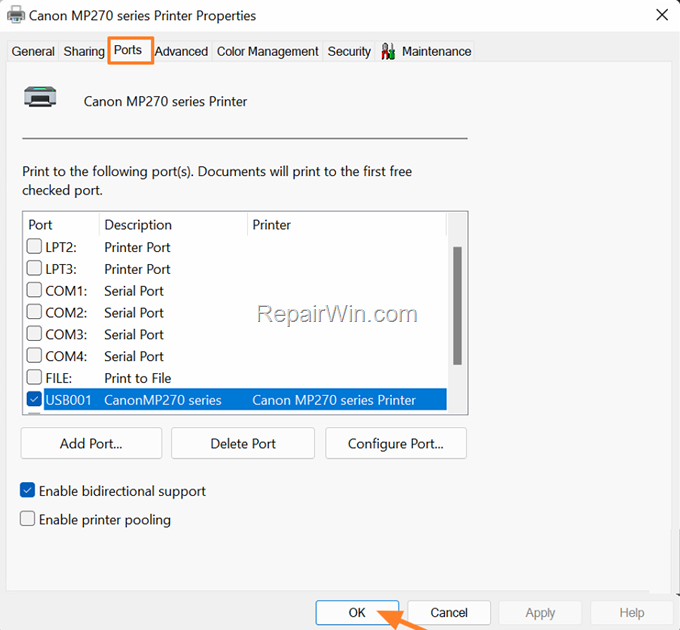

11. You ‘re done! Try to print now and check if everything is OK.
That’s it! Let me know if this guide has helped you by leaving your comment about your experience.
Please like and share this guide to help others.


