If when Windows 10 starts a pop-up window prompts you to “Back up your file encryption certificate and key” from “Encrypting File System” tool, continue reading below to fix the issue.
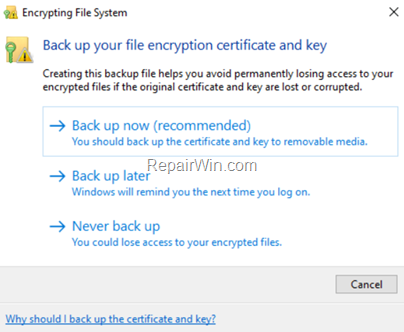
Some users have reported that they receive the message “Encrypting file system – Back up your file encryption” at Windows startup, without an obvious reason.
The “Encrypting File System” (aka “EFS”), is a Windows built in tool to encrypt your files and folder in NTFS file systems. So, normally the “Back up your file encryption certificate and key” prompt, appears only if you have enabled the EFS encryption. At this case, you have to backup the encryption certificate and key to avoid losing your files.
If you don’t use EFS to encrypt your files/folders and Windows asks you to backup the encryption certificate and key, this probably means that a third party software or a malware program has enabled EFS encryption and is trying to encrypt your files.
How to Get Rid Of: “Encrypting file system – Back up your file encryption certificate and key” pop up in Windows.
To remove the EFS prompt to back up your file encryption certificate and key in Windows 10, proceed as follows:
Step 1. Find EFS Encrypted Files.
First, proceed and check which files are encrypted on your system:
1. Open Command prompt as Administrator.
2. Type the following command and press Enter: *
- cipher /u /h > %UserProfile%DesktopEncrypted-Files.txt
* Note: The command will find all encrypted files (including the hidden files) on all local drive(s)

3. When the command is completed, navigate to your desktop and open the “Encrypted-Files.txt” in Notepad to view a list of the encrypted files and proceed to step-2 to decrypt them .*
* Note: If the list is empty skip to step-3..
Step 2. Decrypt EFS Encrypted files.
For each file/folder on the list, use one of the following methods to decrypt it:
Method 1. Decrypt Folder/Files by Changing Ownership.
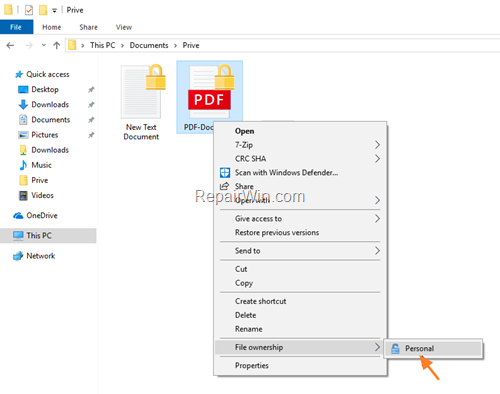
1. Right click at the encrypted folder/file* and change the File ownership to Personal.
* Note: All encrypted files are displayed with a padlock on their icon and after their decryption the padlock will be removed.
Method 2. Remove EFS Encryption in Advanced Properties.
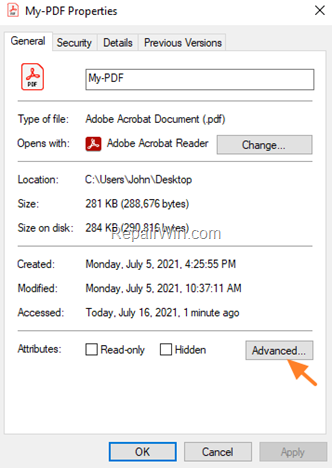
1. Right click at the encrypted folder/file and select Properties.
2. In General tab click Advanced.
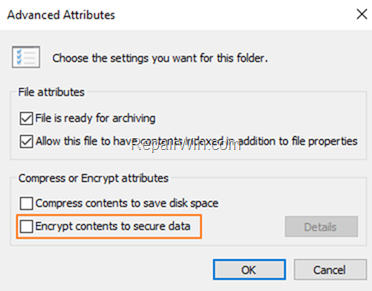
3. Uncheck the option Encrypt contents to secure data and click OK.
Step 3. Disable EFS Encryption on your system.
To disable the EFS encryption on Windows use one of the following methods:
Method 1. Turn Off EFS Encryption through registry.
1. Open Registry Editor. To do that:
1. Press Windows
+ R keys to open the run command box.
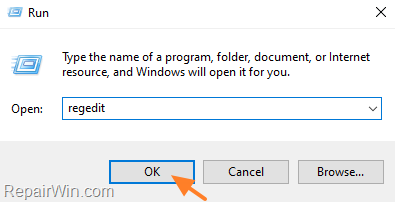
2. Type regedit and press Enter.
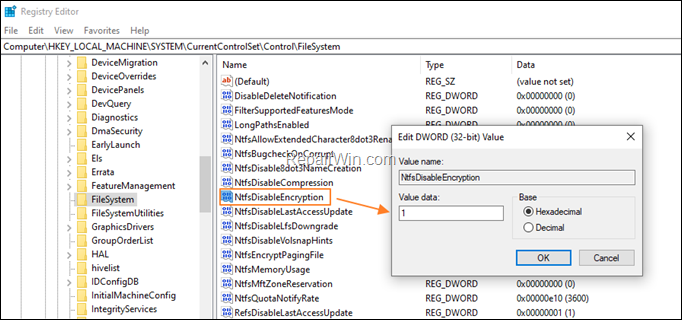
2. Navigate to the following key:
- HKEY_LOCAL_MACHINESYSTEMCurrentControlSetControlFileSystem
3. At the right pane, open the NtfsDisableEncryption value, set the value data to 1 and click OK.
4. Restart your PC.
Method 2. Disable Off EFS Encryption in Group[ Policy Editor.
1. Open the Group Policy Editor. To do that:
1. Press simultaneously the Windows
+ R keys to open the run command box.
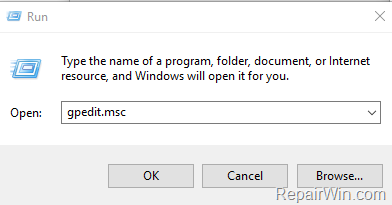
2. Type gpedit.msc & press Enter to open the Group Policy Editor.
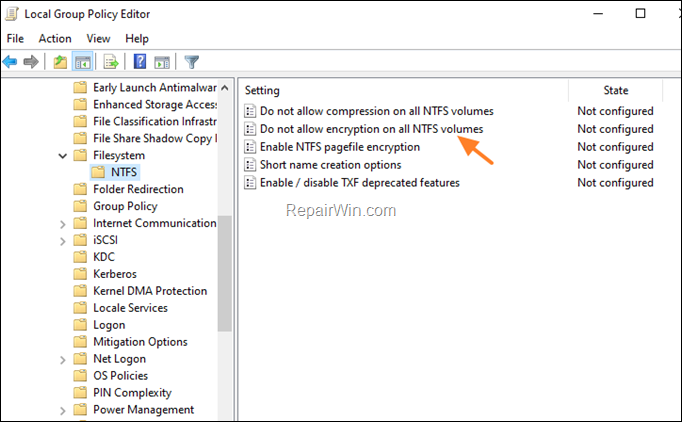
3. At the left pane navigate to:
- Computer Configuration > Administrative Templates > System > Filesystem > NTFS
4. At the right double-click at Do not allow encryption on all NTFS volumes policy.
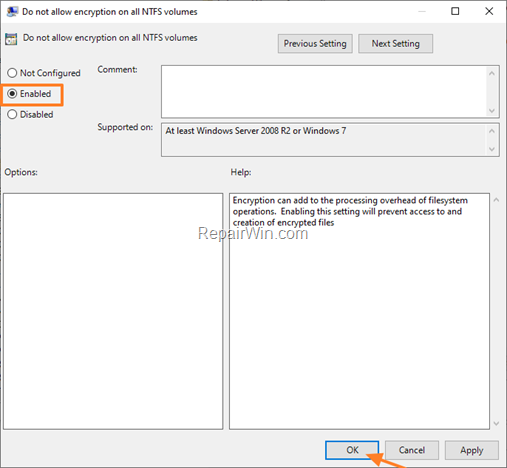
4. Set the policy to Enabled and click OK.
5. Restart your PC.
Step 4. Scan your system for Viruses and Malware.
The final step is to ensure that your system is virus/malware free. For that task follow the instructions in this guide: How To Scan Your Computer for Viruses and other Malicious Programs.
That’s all! Did it work for you?
Please leave a comment in the comment section below or even better: like and share this blog post in the social networks to help spread the word about this solution.

