If you want to change the schedule of the automatic send-receive task in Outlook, then continue reading below. By default Outlook checks for, and send new messages every 30 minutes. But, if you have to manage a lot of urgent messages during the day, you may want to set Outlook to perform the auto send-receive task more often.
This tutorial contains instructions on how often Outlook will perform the automatic send-receive task.
How to Change Auto Send-Receive Schedule in Outlook 2019, 2016, 2013 & 2010.
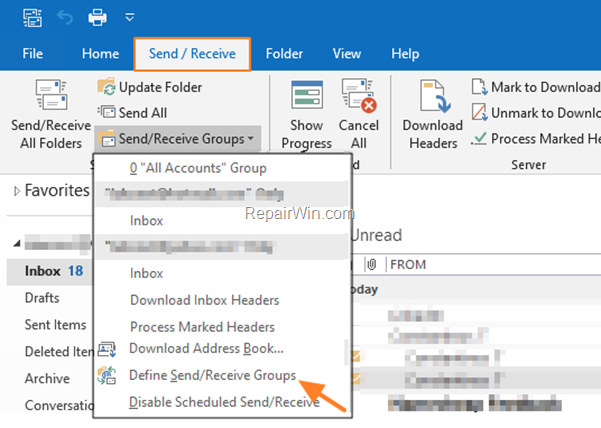
1. From ‘Send / Receive’ tab, click Send/Receive Groups -> Define Send/Receive Groups
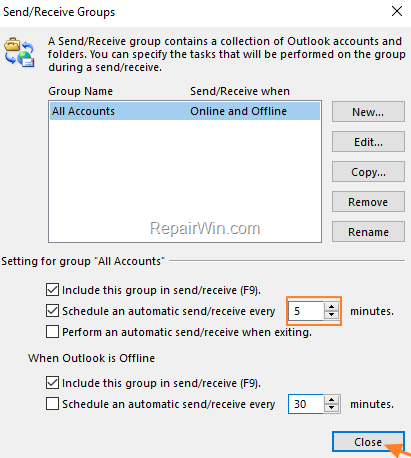
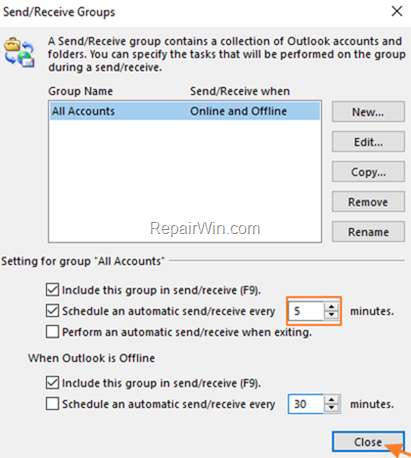
2. Check the ‘Schedule an automatic send//receive every’ checkbox, and then specify (in minutes) how often Outlook will perform the send/receive task. When done, click Close.
ALTERNATIVELY:
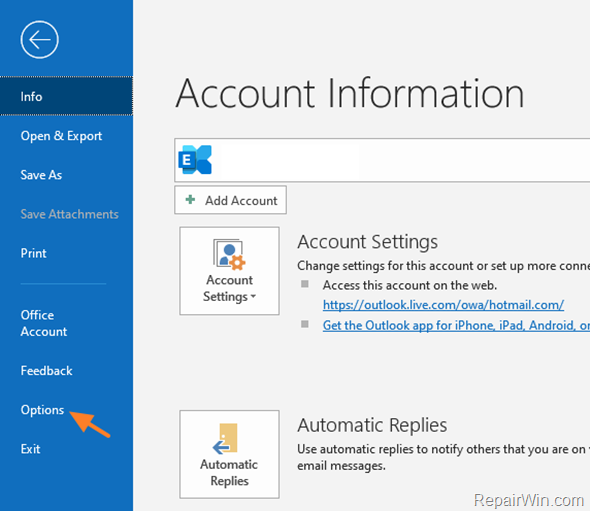
1. Click the File menu and then click Options.
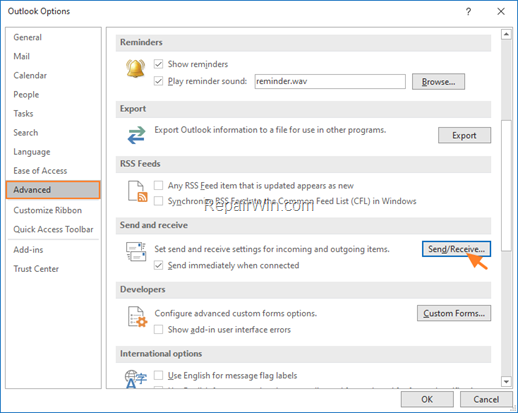
2. Select Advanced on the left.
3. At ‘Send and Receive’ options, click Send/Receive.
4. Check the ‘Schedule an automatic send//receive every’ checkbox, and then specify (in minutes) how often Outlook will perform the send/receive task. When done, click Close.
That’s all folks! Did it work for you?
Please leave a comment in the comment section below or even better: like and share this blog post in the social networks to help spread the word about this solution.
Bài liên quan
- FIX: Error 0x81000203 in System Restore. (Solved)
- Cannot Access Shared folder. User has not been granted the requested logon type at this computer. (Solved)
- FIX: Cannot clear TPM – 0x80284001, 0x80290300 or 0x80290304.
- Unable to Schedule Teams Meeting in 15 or 10 minutes slots (Solved)
- How to Share Folder without Username/Password on Windows 10/11.
- FIX: Thunderbird High CPU or Memory Usage issues.