Disk Cleanup, is a Windows utility that allows you to clean unnecessary files on your disk drive, in order to gain free disk space. Disk Cleanup tool, can be used in regular basis in order to delete files that don’t needed any more such the temporary Internet files, the log files, offline webpages, deleted files from recycle bin, etc..
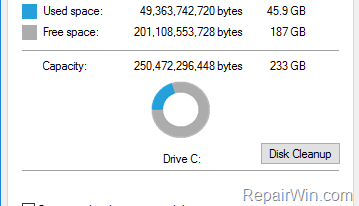
Disk Clean Up tool, is available on all Windows versions and can improve systems performance in a few clicks.
In this tutorial you will learn how to use Windows Disk Cleanup utility to gain free space in Windows 10, 8, 7 & Vista.
How to Use Disk Clean up to Remove Useless Files in Windows.
To free up drive space, by using the Disk Cleanup utility:
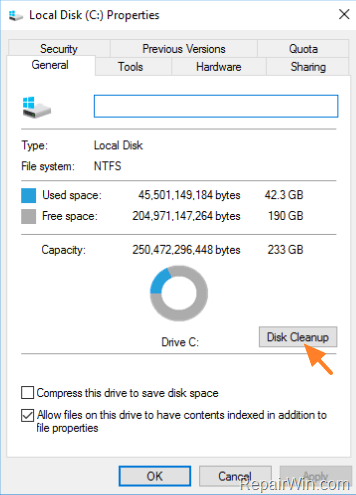
1. Open Windows Explorer.
2. Right click at the Local Disk C: (drive) and choose Properties.
3. Click the Disk Cleanup button.
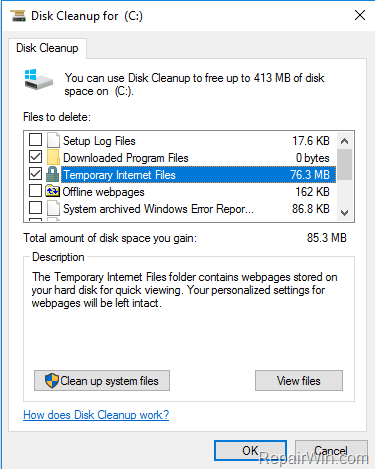
4. By default Windows have already choose the files that are useless for your system. You can proceed with the default selection, or you can make your own choices. If you are unsure which files to delete, then, proceed with the default choice or press the View files button to find out which files will be removed. When done, click OK and let Windows to clean your drive.
* For example the removal of the following files can be removed, without any problem: **
- Downloaded Program Files
- Temporary Internet Files.
- Offline Pages.
- Recycle Bin files
- Temporary Files
- Thumbnails
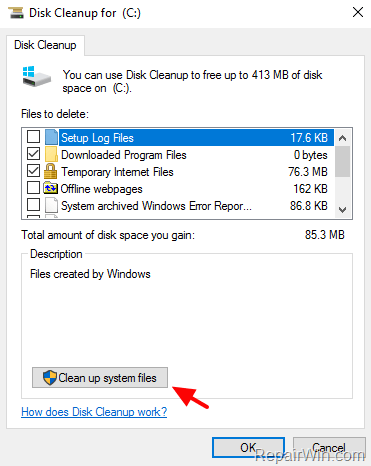
5. When the removal is completed, relaunch the Disk Cleanup and click the Clean up system files button and delete also the useless system files.*
* Note: The ‘Clean up system files’ feature, is useful especially if you have problems during Windows Update Installation. At such case remove the following:
- Temporary Windows installation files
- Previous Driver Setup Packages
- Windows Update Cleanup, etc..
That’s all! Did it work for you?
Please leave a comment in the comment section below or even better: like and share this blog post in the social networks to help spread the word about this solution.

