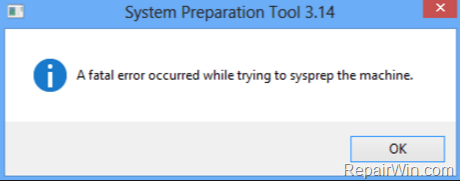
As you may know, Windows Vista, 7, 8.x or 10, cannot be rearmed more than three (3) times. This means that you can run Sysprep on the same machine (or image) only 3 times. If you try to run sysprep more than 3 times, then the “System Preparation Tool” will give you this error message: “A fatal error occurred while trying to Sysprep the machine” and the “Setuperr.log” file (in ‘C:WindowsSystem32SysprepPanther’ folder) is contain the following lines:
“Date Time, Error [0x0f0073] SYSPRP RunExternalDlls:Not running DLLs; either the machine is in an invalid state or we couldn’t update the recorded state, dwRet = 31“
or
“Error [0x0f0082] SYSPRP LaunchDll: Failure occurred while executing ‘C:WindowsSystem32slc.dll, SLReArmWindows’, returned error code -1073425657
Error [0x0f0070] SYSPRP RunExternalDlls: An error occurred while running registry sysprep DLLs, halting sysprep execution. dwRet = –1073425657
Error [0x0f00a8] SYSPRP WinMain:Hit failure while processing sysprep generalize internal providers; hr = 0xc004d307″
The three (3) times rearm (sysprep) limitation is applied because when you run sysprep, you reset the period (limit) of 30 days to activate your Windows copy. If you able to run Sysprep with no limits, you should run Windows forever without any activation.
The normal ways (according to Microsoft) to bypass Sysprep’s 3 times limit, is to create the Windows image from scratch or to capture an image from the machine before running sysprep (for first time) and when you reach the three (3) times rearm limit, you will deploy the captured image.
Fortunately there is another easy method to bypass Sysprep’s three (3) times limit and to run Sysprep as many times you want on the same machine. So, let’s start…
How to SYSPREP (ReArm)Windows more than three (3) times (Windows 10, 8, 7 or VIsta).
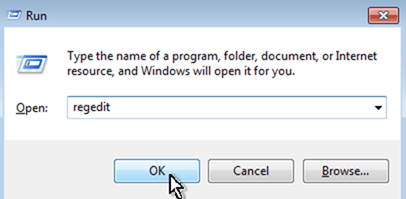
1. Open Registry Editor: To do that:
- Simultaneously press “Windows” + “R” keys to open the RUN window.
- In “RUN” window “Open” box, type: regedit
- Press Enter.
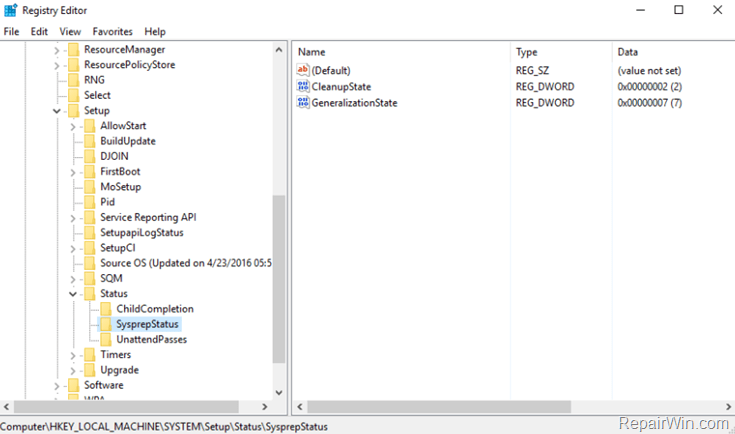
2. Inside Registry Editor click to expand at the left pane:
HKEY_LOCAL_MACHINESystemSetupStatusSysprepStatus
3. At the right pane, set the value of CleanupState to 2.
4. Then set the value of GeneralizationState to 7.
5. Then navigate to this key:
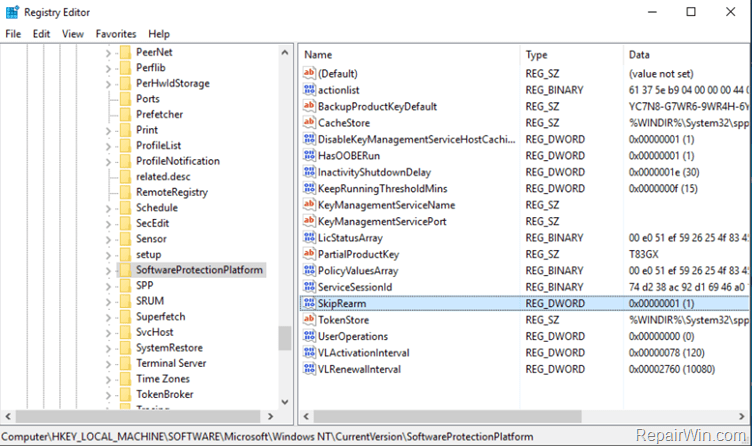
HKEY_LOCAL_MACHINESoftwareMicrosoftWindowsNTCurrentVersionSoftwareProtectionPlatform.
6. At the right pane, set the value of SkipRearm to 1.
7. Close Registry Editor.
8. Open Command Prompt with Administrative privileges. To do that:
- In Windows 7: Navigate to Start –> Programs –> Accessories. Then, right click at Command Prompt and select Run as Administrator
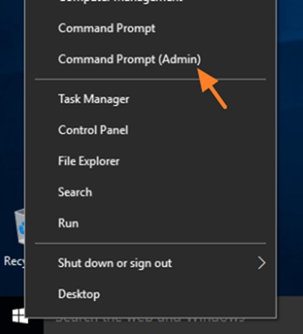
- In Windows 8 or 10: Right click on Start menu (Windows Flag) and select Command Prompt (Admin).
9. In command prompt window type the following command and press Enter:
- msdtc -uninstall
10. Then type the following command and press Enter:
- msdtc -install
111. Close Command Prompt.
12. Navigate to the following location on your disk:
- C:WindowsSystem32Sysprep.
13. Delete the Panther folder.
14. Now run sysprep.
That’s all! Did it work for you?
Please leave a comment in the comment section below or even better: like and share this blog post in the social networks to help spread the word about this solution.

