In this tutorial you will learn how you can use the “MS Windows Movie Maker” program to rotate a video (movie) and save it at your preferred angle in order to be able to watch it any media player or media device you prefer.
Step 1. Download & Install Windows Movie Maker (Windows Live Essentials).
1. Download and install* Microsoft Windows Movie Maker from this link: http://windows.microsoft.com/en-us/windows/get-movie-maker-download.
Notice*: At installation options choose to install only the “Photo Gallery and Movie Maker” program.
Step 2. Rotate your Video with Movie Maker
1. Open “Movie Maker” program.
2. From “Movie Maker” main menu, click at “Add Videos and Photos”.

3. Find & open your rotated video in “Movie Maker”
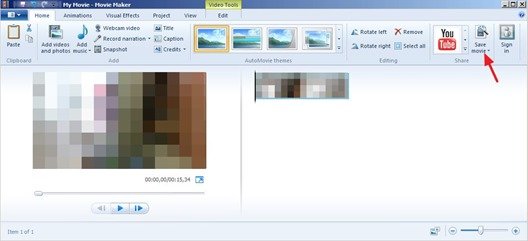
4. When your video is loaded in “Movie Maker”, click at the “Rotate Right” option (or the “Rotate Left”) to rotate your video at the direction you like.
![rotate-video-movie-maker[3] rotate-video-movie-maker[3]](https://qnet88.com/wp-content/uploads/2021/12/rotate-video-movie-maker3_thumb.jpg)
Step 3. Save your Video with Movie Maker
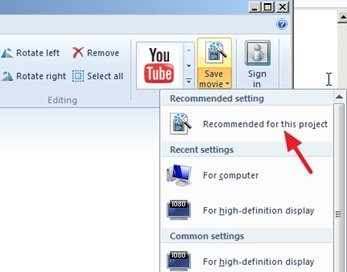
1. To save your recently rotated (final) video just go to “Save Movie” > “Recommended for this project” option.


2. Specify a new filename for your video and press the “Save” button.
3. Now wait until Windows Movie Maker saves your video.
4. Finally, click at the “Play” button to watch your video (or at the “Open Folder” option to navigate to the folder where you saved your new video).
That’s all folks.


