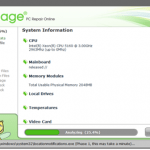
What is “Reimage – PC Repair Online” ?
Reimage Repair or Reimage PC Repair Online is a system optimizer utility that demands from the computer user to buy a license in order to use the program. According its developer the program fixes invalid registry entries and improves PC performance if you buy the program.
In this guide you can find detailed instructions on how to get rid of Reimage Repair system optimization utility.


Why should you remove it?
“PC Repair Online” (by reimageplus.com) is a Potentially Unwanted Program (PUP) & most probably installed on your computer without your knowledge as a bundled software. Programs like this are quite often bundled in the installation files of other legitimate programs (software tools and other stuff). People go through the installation (of the legitimate software) without noticing that they are also installing additional software (like toolbars) that are not necessary for the legitimate software to run.
The Reimage Repair utility program searches for security issues & invalid registry entries and then asks from the computer user to buy the paid version in order to fix them. The main problem with Reimage – PC Repair Online optimization utility is that you cannot be sure if the errors found are real or not, because the program doesn’t display a detailed report of errors found.
How to remove Reimage PC Repair Online from your computer?
You can easily get rid of “Reimage PC Repair Online” software by following the steps given below:
Step 1: Remove Reimage PC Repair Online with Rogue Killer:
- Download and run RogueKiller.
- Press the “Scan” button (when pre-scan operation is complete).
- Be patient until Rogue Killer scans your system.
- When the scan is finished select all items found at “Registry” & “Web Browsers” tabs.
- Press the “Delete” button to clean them.
Step 2: Uninstall Reimage Repair from Control Panel.
- Open Windows Control Panel. In case you don’t know how to do that, here is what you have to do:
- Windows 8:
- Simultaneously press “Windows” + “R” keys to open the RUN window.
- In Open Box, type: control panel
- Press Enter.
- Windows 7 or Vista:
- Go to Start > Control Panel.
- Windows XP:
- Go to Start > Settings > Control Panel.
- Open Programs and Features (Add or Remove Programs). *
- Windows 8:
* Note: If you cannot see Programs And Features, change the “View by:” to Small Icons (on top right). (In Windows XP: click Switch to Classic view on the left).
1. From the program list, find and uninstall the following applications:
- Reimage Repair
2. Sort the installed programs by “Installed On” date and remove any other unknown or unwanted program that was recently installed on your computer.
Step 3. Remove Reimage – Pc Repair with AdwCleaner.
- Download “AdwCleaner” utility to your computer (e.g. your desktop).
- After you download it, close all open programs and run AdwCleaner.
- At the main window, press the “Scan” button and wait until the scan is completed.
- Finally press the “Clean” button to remove all the entries it has found and restart your computer.
Step 4: Remove “PC Repair Online” Junk ware files with by using JRT
- Download and run Junkware Removal Tool.
- Be patient until JRT scans and cleans your system and then reboot your computer again.
Step 5: Remove remaining malicious registry entries and files.
- Download and install “Malwarebytes Anti-Malware Free“. (Beware: at the last screen of installation, uncheck the box next to “Enable free Trial of Malwarebytes Anti-Malware PRO” in order to use the free version of this GREAT software).
- Run Malwarebytes Anti-Malware.
- Update the Database.
- Press the “Scan Now” button and then wait until the scan process is finished.
- When the scan is completed select all items found and then press “Quarantine All”.
- Restart your computer if needed and you ‘re done.
One final step: Restart your computer and perform a full scan with your antivirus program.
That’s all folks! It might sound like a lot of work, but in reality you’ll be free from the “BrowseStudio“ adware infection in less than 20 minutes, if you follow these instructions. Did it work for you? Please leave a comment in the comment section below or even better: like and share this blog post in the social networks to help spread the word about these really annoying crap Windows infections.


