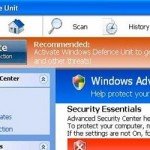
What is Windows Defence Unit?
Windows Defence Unit is a ransomware software. More specifically, “Windows Defence Uni” is a fake antivirus program that pretends that your computer is under security risks due to vulnerabilities found on it and demands that you buy a license to clean your computer.
![Windows-Defence-Unit-Fake-AV_thumb[3] Windows-Defence-Unit-Fake-AV_thumb[3]](https://qnet88.com/wp-content/uploads/2023/04/windows-defence-unit-fake-av_thumb3_thumb.jpg)
![Windows-Defence-Unit-Fake-AV_thumb[3] Windows-Defence-Unit-Fake-AV_thumb[3]](https://qnet88.com/wp-content/uploads/2023/04/windows-defence-unit-fake-av_thumb3_thumb.jpg)
Why you should remove it?
“Windows Defence Unit” was most probably installed on your computer without your knowledge. This kind of unwanted programs are quite often bundled in the installation files of other legitimate programs (software tools and stuff). People go through the installation without noticing that this kind of software is rogue.
Rogue programs are all the programs that behave as legitimate and request the user to purchase a license to continue to operate. Windows Defence Unit (in this case) requires the user to buy a license in order to clean the infected system from all viruses and vulnerabilities found on it. Users must ignore these kind of warning messages because they are fake and should not purchase such programs.
How to remove it
1. First of all, from another clean computer download & transfer RogueKiller program to a USB Disk.
2. Plug the USB disk with the RogueKiller program to the infected computer.
3. Power on the infected computer and repeatedly press the “F8” key while your computer is starting up (before the appearance of Windows Logo).
4. When “advanced options” menu appears on your screen, navigate to “Safe Mode with Command Prompt” option and hit “Enter”.
5. When Windows loads, inside command prompt window type the following command (inside the command prompt window) to open Windows Explorer: explorer.exe
Notice*: If “Windows Defence Unit” prevents you from using your computer, then press the question mark (?) button on the right top corner, click “Register” and use this key to activate the fake antivirus in order to be able to work with your computer: 0W000-000B0-00T00-E0021 or 0W000-000B0-00T00-E0011
6. Navigate to your USB disk and double-click to run RogueKiller. Let the program terminate the malicious running processes and then press the “Scan” button to find and “Delete” all malicious entries.
7. Reboot you computer into Normal Windows Mode.
8. Download and install “Malwarebytes Anti-Malware Free“. (Beware: at the last screen of installation, uncheck the box next to “Enable free Trial of Malwarebytes Anti-Malware PRO” in order to use the free version of this GREAT software). Run it and go to the “Scanner” tab and click “Quick Scan” and wait until this process is finished. Click the “Show Results” button and review its findings and then select all of them (right click to “Select All” of them). Click the “Remove Selected” button.
9. One final step: Restart your computer and perform a full scan with your antivirus program.
That’s all folks! It might sound like a lot of work, but in reality you’ll be free from “Windows Defence Unit” infection in less than 30 minutes, if you follow these instructions. Did it work for you? Please leave a comment in the comment section below or even better: like and share this blog post in the social networks to help spread the word about these really annoying crap Windows infections.


