if you want to know how you can trim a video in Windows 10/11, then keep reading below.
Nowadays many of us use our smartphones to record videos of memorable moments with our friends and family, on holidays or for work or advertising purposes. But these videos sometimes contain content at the beginning or the end that we do not want to keep or share with others. For such cases we can use the free PHOTOS tool offered in Windows 10 to cut part of the beginning or end of a video we do not want.
In this tutorial you’ll find step-by-steps instructions on how to cut the beginning or the end of a video in Windows 10 Photos app. *
* Note: Video trimming is the process of removing part of the beginning or end of a video file to reduce its overall length and preserve the desired content. If you want to remove another part of a video, then read this article: How to Remove a Video Part in Windows 10/11.
How to Trim a Video with Photos app on Windows 10/11.
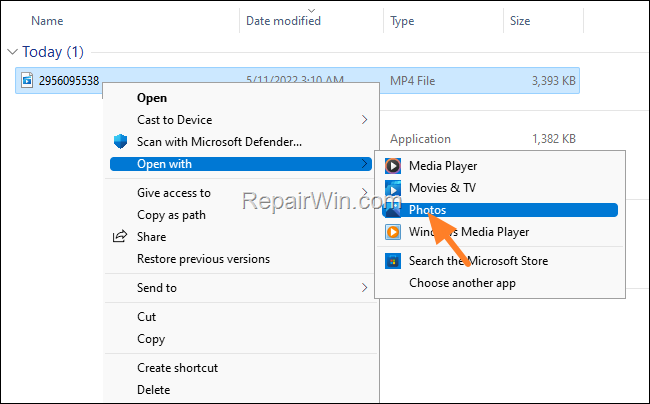
1. Right-click on the video that you want to trim and open it with Photos App.


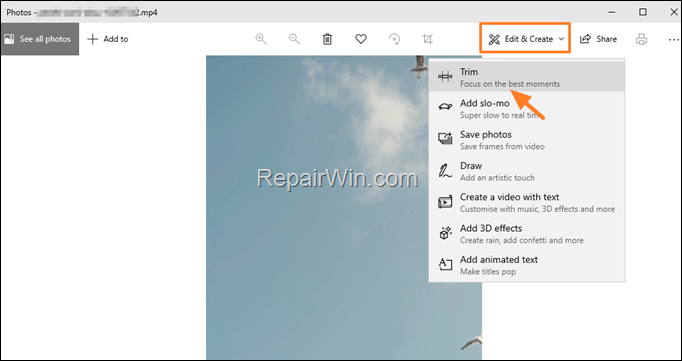
2. Click on Edit & Create menu and select Trim.


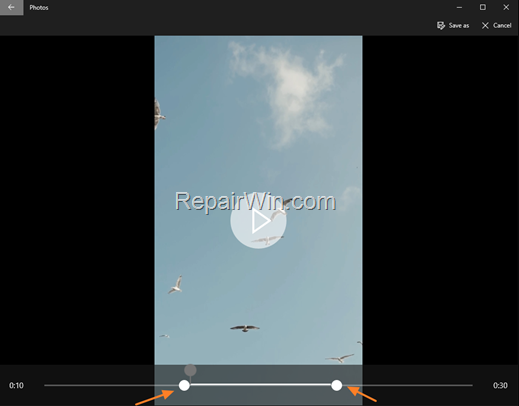
3. Drag and two white sliders to select the part of video that you want to keep.


4. Once done, click the Save as button and then type a new file name, to save the selected video part as a new video file.


5. After saving, Photos will automatically play the new trimmed video to see the result of the trimming.
That’s all folks! Did it work for you?
Please leave a comment in the comment section below or even better: like and share this blog post in the social networks to help spread the word about this solution.


