If you cannot logon to Windows 10/11 because of problem “Your Account Has Been Disabled, Please See Your System Administrator”, continue reading below.
The error message “Your Account Has Been Disabled, Please See Your System Administrator” in Windows 10, may appear after accidentally disabling the main user account, or after reinstalling Windows 10/11. As a result of the problem, the user is unable to log into their account and is locked out of their computer.


How to FIX: Cannot Login because Account Has Been Disabled in Windows 10/11.
Method 1. Fix your account is disabled by Restarting your PC in Safe Mode.
The first method to enable your disabled account, is to start Windows in Safe Mode and to enable your account using the Administrator account.
1. At the login screen, press and hold down the SHIFT key and click Power > Restart, to restart your computer in Windows Recovery Environment (WinRE).


2. At the next screen, click Troubleshoot > Advanced Options > and then Startup Settings.
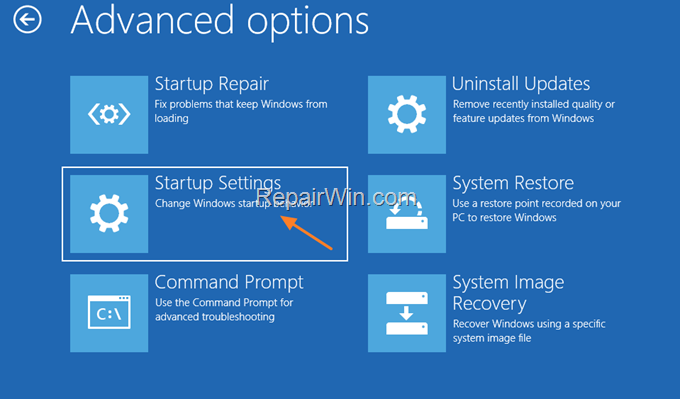

3. Then click Restart.


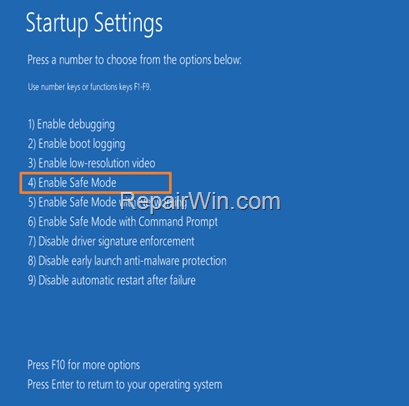
4. At the next screen press 4 (or F4) to Enable Safe Mode or 5 (F5) to Enable Safe Mode with Networking.

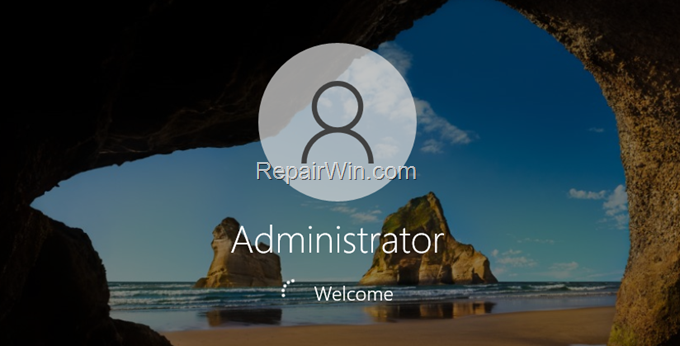
5. After restart, normally, Windows will login into the Administrator account. (If this doesn’t happen, see the instructions on Method-2 below).

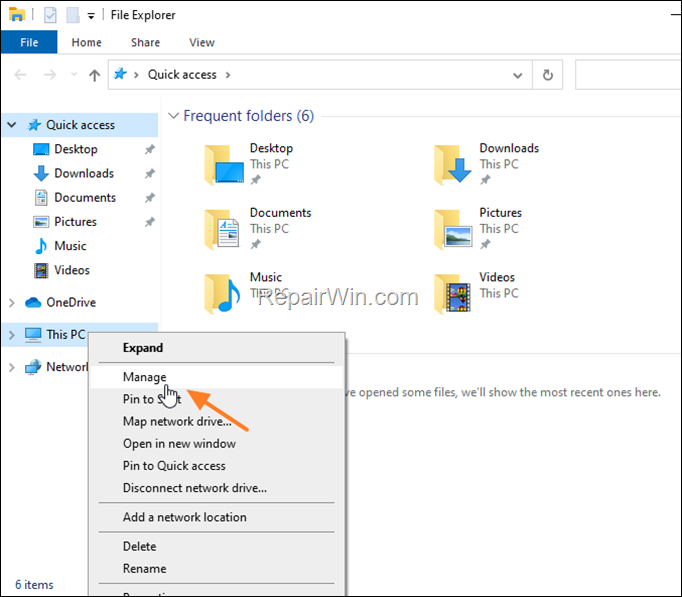
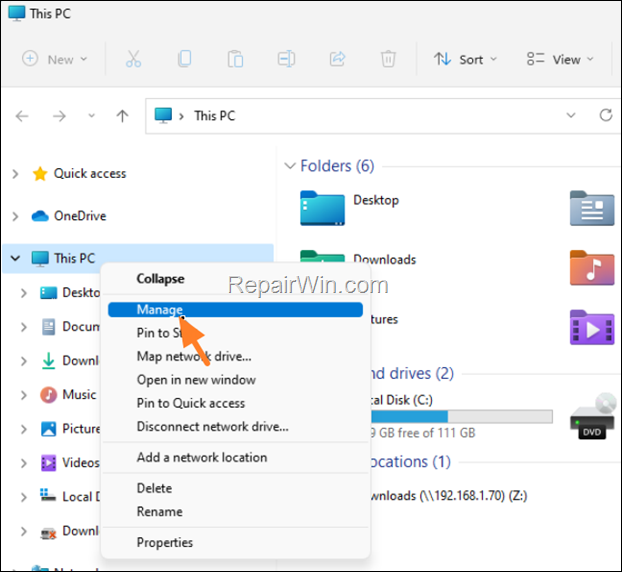
6. Open Explorer, right-click on This PC icon and choose Manage.

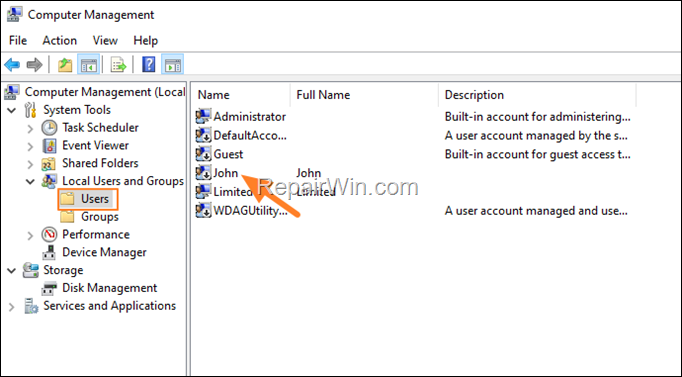
7. At the left, go to Local Users and Groups and select Users.
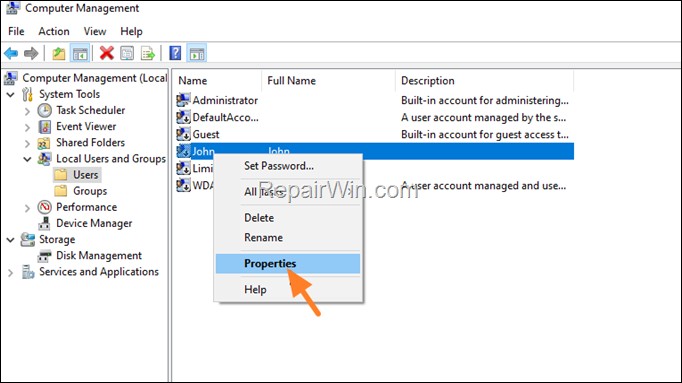
8. At the right side, right-click on the disabled user account and click Properties.

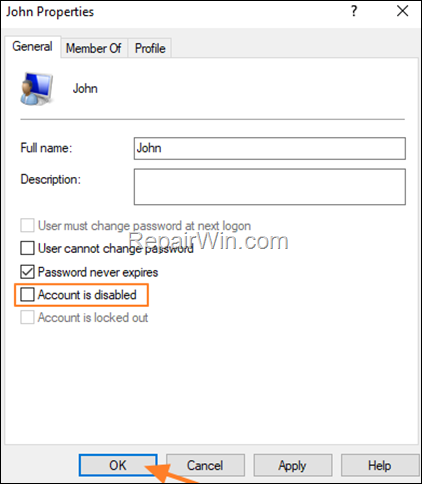
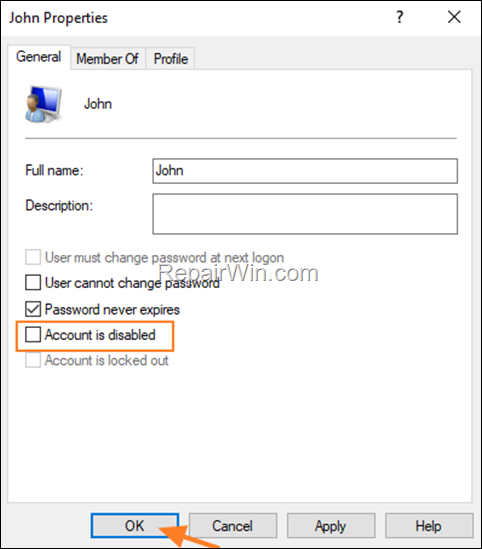
9. Uncheck the Account is disabled checkbox and click OK.

10. Restart your PC and login to your account as usually.
Method 2. FIX ‘Account Has Been Disabled’ by Enabling the Administrator account in WinRE .
The second method to solve the “Your Account Has Been Disabled” problem, is to activate the Administrator account in registry from the Windows Recovery Environment (WinRE), in order to be able to enable your account. To do that, follow the steps below:
Step 1. Enter in Windows Recovery Environment (WinRE).
Proceed and enter in the WinRE options, by using one of the following methods (and then continue to step-2):
- Method 1: At the login screen, press and hold down the SHIFT key and click Power > Restart.
or… - Method 2: Boot from a USB Windows Installation Media* (according your OS) and at the Windows Setup screen click Next and then Repair your computer.
* Note: If you don’t own a USB Installation Media of Windows 10 (or Windows 11), you can create one by using Microsoft’s Media Creation tool.
- Create Windows 11 Installation Media
- Create Windows 10 Installation Media
- Related article: How to create a Windows 10/11 USB installation media.
Step 2. Enable the Administrator account from WinRE.
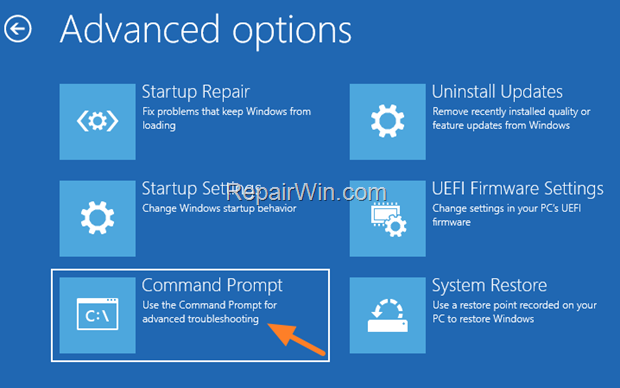
1. In WinRE, go to Troubleshoot > Advanced Options > Command Prompt.

2. In command prompt type regedit and press Enter.


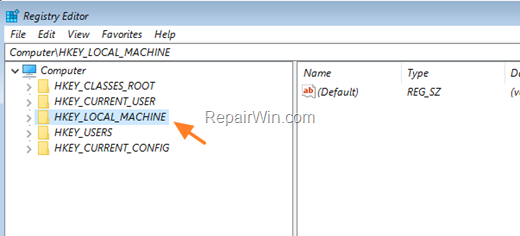
3. In Registry Editor, click to highlight the HKEY_LOCAL_MACHINE key.

4. From the File menu, select Load Hive.
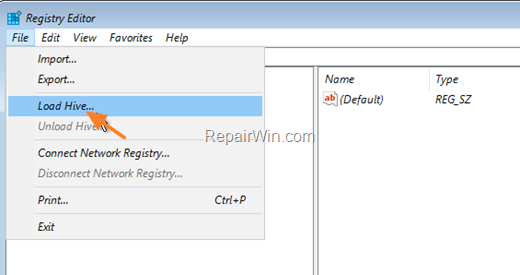

5. At “Load Hive” screen:
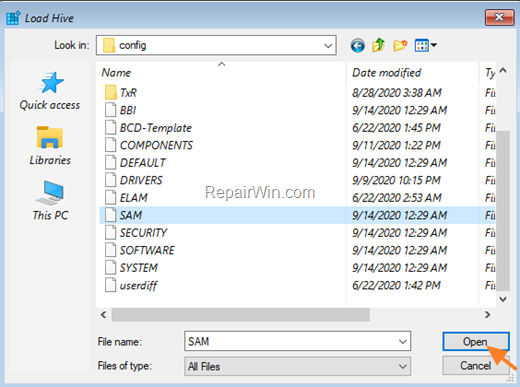
a. Locate the Windows drive (where Windows are installed on), and navigate to this folder: WindowsSystem32config
b. Explore the contents of the config folder, select the SAM file and click Open.

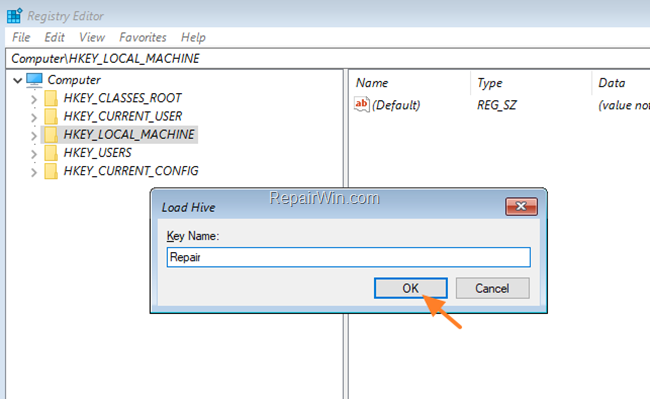
6. Then type a name for the new Key: (e.g. “Repair“) and press OK.

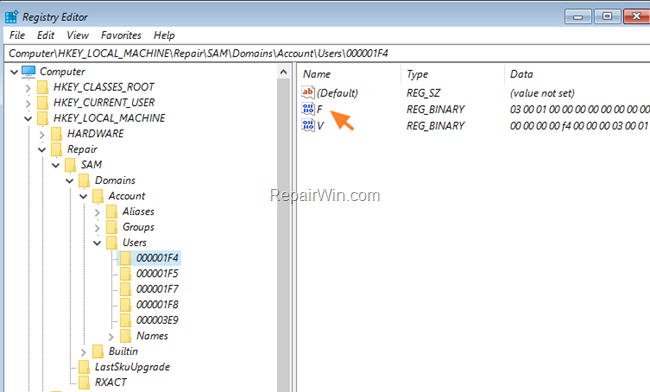
7. Now navigate to the following key (from the left side):
- HKEY_LOCAL_MACHINERepairSAMDomainsAccountUsers00001F4
8. Double click at F value on the right.

9. By pressing the Down arrow key navigate to the line 0038.
10. Press the Delete key once to delete the number 11
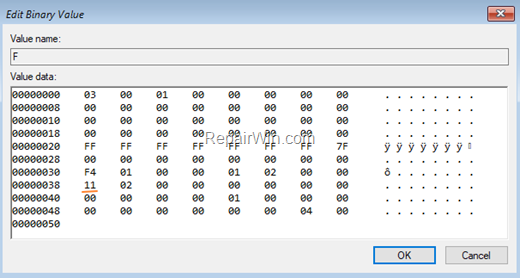

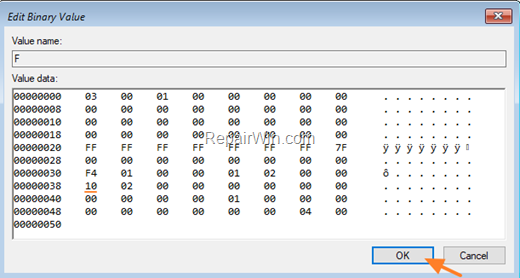
11. Then type 10 and click OK.

12. Now on the left side click to highlight again the New Key you created before under the HKEY_LOCAL_MACHINE (e.g. the “Repair” key in this example)…
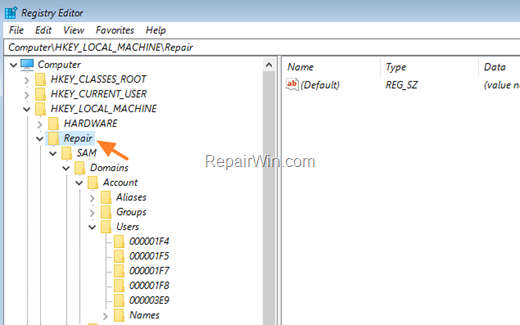

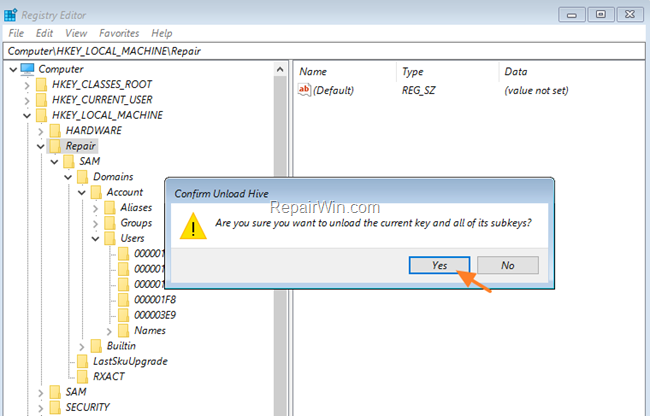
13a. …and from the File menu click Unload Hive and…


13b. …click Yes to confirm.

14. Close the Registry Editor & the Command Prompt windows.
15. Restart your PC, or click Continue to Windows 10 and let your system to boot to Windows.
16. At the login screen click at the Administrator account to login to Windows.
17. Right-click on This PC icon on Explorer or in your Desktop and choose Manage.

18. In Computer Management, expand the Local Users and Groups and select Users.
19. At the right pane, double click at the disabled user.

20. Uncheck the Account is disabled checkbox and click OK.

21. Sign-out from the Administrator account and login to your account. The “Your account has been disabled” issue should be resolved and you will be able to log back into your account. *
* Advice: For safety reasons, I suggest to disable the Administrator account in Computer Management, after the issue is resolved.
That’s all folks! Did it work for you?
Please leave a comment in the comment section below or even better: like and share this blog post in the social networks to help spread the word about this solution.

Proceed and enter in the WinRE options, by using one of the following methods (and then continue to step-2):


