This tutorial contains instructions on how to install Windows 11 on VirtualBox 7.0 and later versions that support TPM emulation and Secure Boot.
On a previous tutorial, I mentioned the way to install Microsoft Windows 11 on a virtual machine in VirtualBox version 6.1. However, since Oracle with its latest hypervisor version 7, supports TPM emulation and the Secure Boot option, in this guide you will find instructions on how to install and run Windows 11 on a Virtual Machine on VirtualBox v7.0 or later.
How to Setup Windows 11 on VirtualBox 7.0.
Step 1. Install VirtualBox 7.0
* Note: If you’re already have installed VirtualBox 7.0, skip to next step.
1. Navigate to VirtualBox download site and…
- Download and Install the latest VirtualBox version for Windows hosts (Version 7 or later).
- Download and install the Oracle VM VirtualBox Extension Pack.


Step 2. Download Windows 11 on a ISO file.*
Note: If you’re already have downloaded the Windows 11.iso file, skip to next step.
1. Download the Windows 11 Media Creation Tool. (Source).
2. Run the downloaded file and when prompted Accept the license terms.
3. Choose the Windows 11 language and click Next.
4. Choose which ISO File and click Next.


4. Save the the ISO file with name “Windows11″ (e.g. “Windows11.iso”) on your Downloads folder.
Step 3. Create a New Virtual Machine for Windows 11 in VirtualBox.
1. Open Oracle VM VirtualBox VirtualBox Manager and click New.


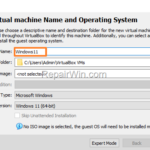
2. Type a name for the VM machine (e.g. “Windows11”).
3. Click the drop-down arrow next to ISO image, and select the Windows 11 ISO file.


4. When done, click Next.


5. At the next screen drag the slider to set the Memory size to at least 4GB (4096MB), Enable EFI and click Next. *
* Note: Optionally here, you can also assign more processors to the VM if you want, but you can do that later (after installing Windows).


6. Then set the hard disk size to at least 80GB and click Next.


7. Finally review your settings and click Finish.


8. In VirtualBox Manager window, select the Virtual Machine you created and open Settings.


9. At the System tab, apply the following steps to enable the TPM and Secure Boot features:
1. Choose TPM: v2.0
2a. Enable EFI (Special OSes only)
2b. Enable Secure Boot *
3. Click Reset keys to Default and then click OK.
4. Finally click OK to save the changes.


10. Proceed to next step to install Windows 11 on the VirtualBox.
Step 4. Install Windows 11 on VirtualBox Guest Machine.
1. Start the Virtual Machine machine and when prompted press any key to boot from CD or DVD..


2. At the next screen, click Next.


3. Click Install now.


4. At next screen choose I don’t have a product key. *


5. Select the Windows 11 edition you want to install and click Next.


6. Accept the license terms and click Next.


7. Choose Custom: Install Windows only (Advanced) to perform a clean installation of Windows 11.


8. At next screen, select the drive with Unallocated space and click Next.


8. At this point the Windows 11 installation will start and the system will reboot 2-3 times during the process. Wait while Windows is being installed and do not turn off your computer.


9. When prompted, select your country and then follow the remaining steps in the wizard to complete the installation.*
* Note: If you want to setup Windows 11 with a Local Account and not with a Microsoft Account, follow the instructions on this tutorial: How to Install Windows 11 22H2 without Microsoft Account.


10. When the installation is complete, the Windows 11 desktop will appear on your screen.
11. Now, proceed and install the VirtualBox Guest additions, by going from the menu to Devices > Install Guest Additions CD Image.


12. Then, click Next to install VirtualBox VM Guest additions and then restart the virtual machine. *
* Note: If the installer does not start automatically, open Windows Explorer, and run the “VBox WindowsAdditions” application from the CD Image.


That’s all folks! Did it work for you?
Please leave a comment in the comment section below or even better: like and share this blog post in the social networks to help spread the word about this.


