.single .post-author, .post-date {
text-transform: none;
}
,
Last updated: January 21st, 2025
Are you stuck with the error “We couldn’t find disks. To get a storage driver, click Load driver” when installing Windows 10 or 11?
This frustrating issue often arises when trying to install Windows on a laptop or desktop with an NVMe drive or a RAID storage controller. Don’t worry—this guide will show you step-by-step how to resolve the problem and successfully complete your Windows installation.


Why Does the “We Couldn’t Find Disks” Error Happen?
This error occurs because Windows Setup cannot detect your computer’s hard drive. The main reasons include:
- No disk is installed on the system.
- The system’s storage controller requires a specific driver that is missing from the Windows installation media.
The second reason is especially common with modern systems using NVMe storage drives or RAID configurations. Windows lacks the appropriate Intel Rapid Storage Technology (Intel RST) drivers required to recognize these devices.
To fix this, you’ll need to manually load the correct drivers during the Windows installation process.
How to FIX the problem: “We Couldn’t Find Disks” when installing Windows 11/10 on an NVME disk.
Follow the steps below if Windows Setup does not recognize the NVME drive when installing Windows 10/11.
Step 1: Download Intel RST Drivers and Copy Them to a USB Drive
From another working computer, download the necessary Intel RST drivers to the USB drive you use to install Windows.
1. Click the below link to visit Intel’s RST support page: *
- https://www.intel.com/content/www/us/en/support/products/55005/technologies/intel-rapid-storage-technology-intel-rst.html
* Note: If you own a laptop, you can download the Intel RST drivers from your laptop’s manufacturer support page.
2. Scroll down to ‘Latest Drivers & Software” section and according the generation of your Intel Processor, download the corresponding Intel RST drivers for your system.
3. Right click on the folder where you saved the downloaded SetupRST.exe (e.g. in”Downloads” in this example) and select Open in terminal.*
* Note: On Windows 10, hold down the SHIFT key, then right-click on the folder and select Open PowerShell window here.


4. In terminal/powershell window give the below command to extract the “SetupRST.exe” file
./SetupRST.exe -extractdrivers SetupRST_extracted


5. Close the terminal window and then copy the SetupRST_extracted folder to to your Windows installation USB drive.


Step 2: Load Intel RST Drivers During Windows Installation
Now that you have the Intel RST drivers on the Windows install USB drive, you can load them during the Windows installation process on the computer showing the error.
1. Boot the affected PC from the Windows installation USB drive.
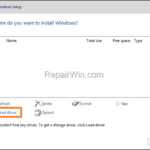
2. When you see the error “We couldn’t find disks” and asked “Where do you want to install Windows?”, click the Load driver option.


3. Click the Browse button, explore the contents of the USB drive and navigate to this path:
- SetupRST_extractedproductionWindows10-x6419041DriversVMD
4. Select the “VMD” folder and click OK.
- Now, choose the appropriate Intel RST controller driver from the list and click Next.
- Once the driver is loaded, Windows will detect your NVMe disk.
- Once this done, continue to install Windows on the detected disk.
Conclusion
The error “We couldn’t find disks” during Windows 10/11 installation is usually caused by missing drivers for NVMe drives or RAID storage controllers. By downloading and loading the correct Intel RST driver during setup, you can resolve this issue and install Windows without further interruptions.
Did this guide help you fix the problem? Share your experience in the comments below.

- Author
- Recent Posts
- FIX: Windows 11 Setup cannot find NVMe drive. – January 21, 2025
- How to Uninstall or Disable Copilot on Windows 11. – January 15, 2025
- How to Fix error 0x80070035 on Windows 11 24H2 (Network Path Not Found) – January 10, 2025


