If you cannot open .JAR JAVA files on a Windows 10, 8 or 7 based computer, with error “Unable to install Java. There are errors in the following switches: filename.jar. Check that the commands are valid and try again“, continue reading below.
The error “There are errors in the following switches” while trying to open a JAVA .JAR file usually occurs because of multiple installed versions of Java on the PC, or because the the .jar association has been hijacked.
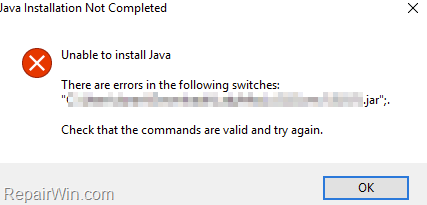
This tutorial contains instructions to fix the following Java error while trying to open a .jar file:
“Java Installation Not Completed.
Unable to install Java. There are error in the following switches: ‘C:Users…file.jar’;.
Check that the commands are valid and try again.”
- Related article: Java Installation Not Completed – Unable to install Java in JAVA JNLP files.
How to FIX: Unable to Open Java JAR Files – There are errors in the following switches: ‘file.jar’.
Method 1. Uninstall and re-Install JAVA on your system.
The first step, to resolve problems with JAVA, is to uninstall all installed versions of Java and to re-install the correct and most recent version of JAVA on your PC. To do that:
1. Download and run the Java Uninstall tool.
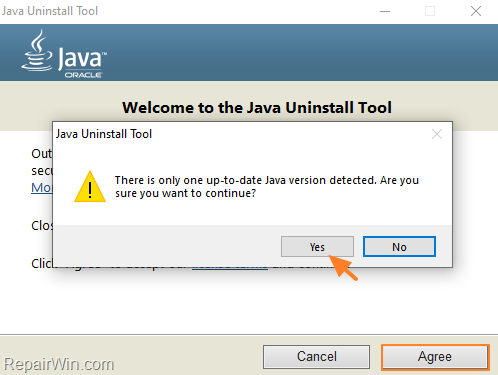
2. Choose Agree at the first screen. *
* Note: If prompted that “There is only one up-to-date Java version detected. Are you sure to continue?” click Yes.
3. Select all the installed Java versions and click Next.
![image_thumb[37] image_thumb[37]](https://qnet88.com/wp-content/uploads/2021/12/image_thumb37_thumb.png)
4. Click Yes again to clean the cache
![image_thumb[43] image_thumb[43]](https://qnet88.com/wp-content/uploads/2021/12/image_thumb43_thumb.png)
5. When the uninstall is completed, click the Get Java button or navigate to Java Download page to download and install the latest Java version. *
* Note: If you use 32-bit and 64-bit browsers, you will need to install both 32-bit and 64-bit Java in order to have the Java plug-in for both browsers. You can download both Java versions from here.
![image_thumb[44] image_thumb[44]](https://qnet88.com/wp-content/uploads/2021/12/image_thumb44_thumb.png)
6. After installing Java on your system, try to open the JAR file again and if you still face the same error, apply the instructions at method-2 below.
Method 2. Set “Java Platform SE Binary” as the Default program to Open .JAR files.
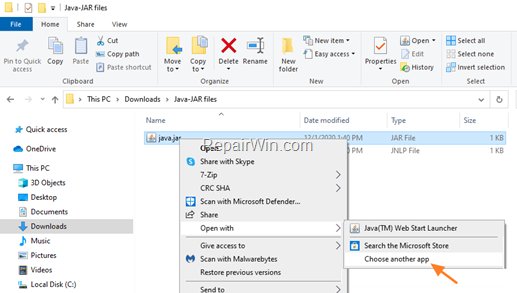
1. Right-click on the .jar file and choose Open with… -> Choose another app
2. Check Always use this app to open .jar files and click More apps.
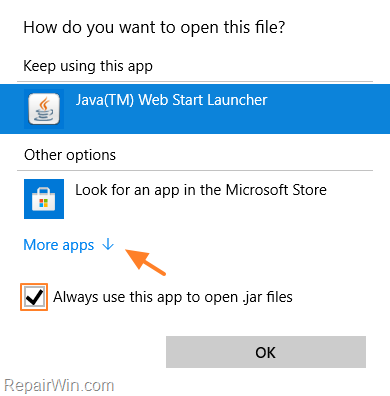
3. Scroll down and click Look for another app in this PC.

4. Now navigate to the folder where JAVA is installed.
- For 64-bit versions of Java navigate to C:Program FilesJavajre_versionbin
- For 32-bit versions of Java navigate to C:Program Files(x86)Javajre_versionbin
5. Select the “javaw.exe” application (Java Platform SE Binary) and click Open.
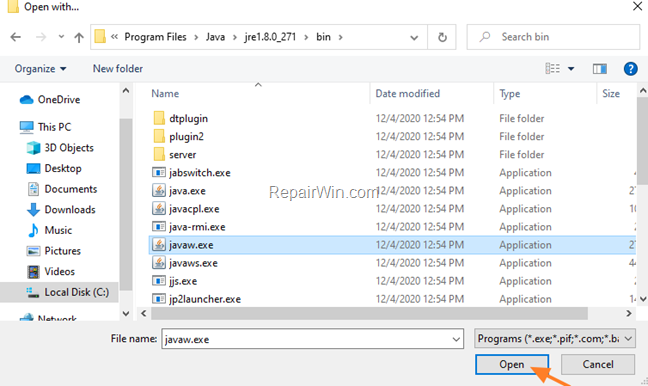
6. Now, the jar file should open without problem, but If you still face the sane error, follow the instructions on method-3 below.
Method 3. Repair Invalid Java files Association with Jarfix.
1. Download the Jarfix.exe tool from here.
2. Double-click to run the Jarfix tool to restore the .jar file association.
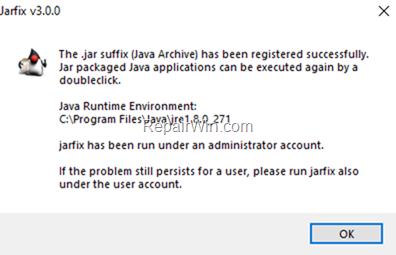
That’s all folks! Did it work for you?
Please leave a comment in the comment section below or even better: like and share this blog post in the social networks to help spread the word about this solution.

