The Startup folder in Windows, is the location where are stored all the shortcuts of applications that start with Windows. There are two different startup folders in Windows: there is a startup folder which contains all the applications that runs for all users, and there is a different startup folder, which contains only the applications that run for the current user.
This tutorial contains instructions on how to locate the startup folders in Windows 10, 8 or 7 OS, in order to manage (add or remove) the applications that starting with Windows.
How to View the Windows Startup Folder(s) – Programs. *
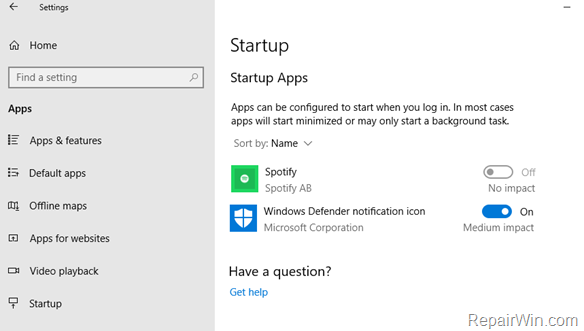
* Note: If want to manage the startup apps (Store Apps) in Windows 10, navigate to:
- Go to Start menu
 , click Settings
  and then click Apps -> Startup.

To Navigate to “All Users” Startup Folder.
If you want to locate the folder that contains all the applications which run automatically at Windows startup, for all the user accounts, open Windows Explorer and navigate to the following path: *
- C:ProgramDataMicrosoftWindowsStart MenuProgramsStartUp
* Note: To view the “ProgramData” folder in Windows Explorer, you must enable the hidden files view.
TIP: To make your life easier, you can use the following way to navigate to above location:
- Press Windows
 + R keys to open the run command box.
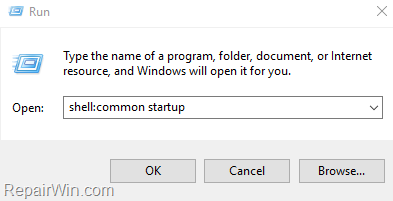
 - In the Search box, type: shell:common startup & click OK
- Press Windows

To Navigate to “Current Account” Startup Folder.
If you want to locate the startup folder that contains all the applications which run automatically at Windows startup, for the current user account (only), open Windows Explorer and navigate to the following path: *
- C:Users<Username>AppDataRoamingMicrosoftWindowsStart MenuProgramsStartup
* Note: To view the “AppData” folder in Windows Explorer, you must enable the hidden files view.
TIP: Here, is another easier way to navigate at the above location:
- Press Windows
 + R keys to open the run command box.
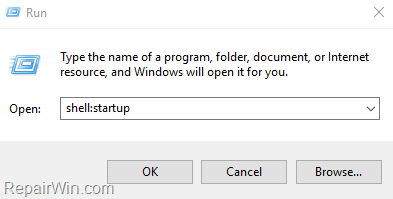
 - In the Search box, type: shell:startup & click OK
- Press Windows

That’s all! Did it work for you?
Please leave a comment in the comment section below or even better: like and share this blog post in the social networks to help spread the word about this solution.


