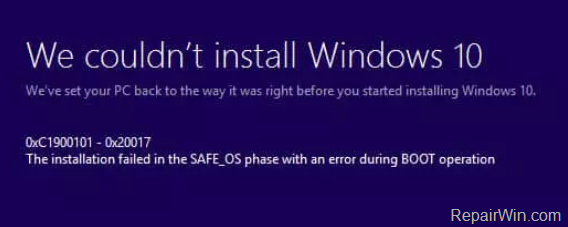
How to FIX Windows 10 Update Error 0XC1900101 – 0x20017 “Installation failed in the SAFE_OS phase with an error during BOOT operation”
Usually, the update error 0XC1900101 – 0x20017 in Windows 10, indicates a problem with the device drivers and in most cases with the Network adapter’s drivers. So, before you continue to apply the methods below, check and try the following:
1. First of all, make sure that the Date & Time settings are correct.
2. Then, ensure that you have enough free space. Your device requires at least 20GB of free space to upgrade a 32-bit OS, or 32GB for a 64-bit OS. To free up disk space use Disk Cleanup.
3. Install the latest drivers for all the devices on your system, especially for the Ethernet & the Wireless adapter (if any). *
4. Temporarily uninstall any non-Microsoft security software (Antivirus, Firewall).
5. Disable the Hard Drive Encryption (If enabled).
6. After the first system restart and before the Windows boot:
Method 1. Disable the Secure Boot .
1. Power On your system and press the corresponding key* to enter into BIOS SETUP.
* Note: Usually to enter in BIOS, you have to press the DEL or F1 or F2 or F10 key. (depends on manufacturer)
2. Look at Security or at Boot Options settings,* to find the Secure Boot option and Disable it.
* Note: The location of the ‘Secure Boot’ setting in BIOS, depends on device’s manufacturer.
3. Save settings and EXIT BIOS Setup.
4. Let Windows to boot normally and try to install the update. If the update fails again continue to next method.
Method 2. Run the Windows Update Troubleshooter.
The first method to fix the Windows 10 update error 0XC1900101 – 0x20017, is to run the Windows Update Troubleshooter.
1. Navigate to Windows Control Panel, set the ‘View By’ to Small icons and open Troubleshooting.
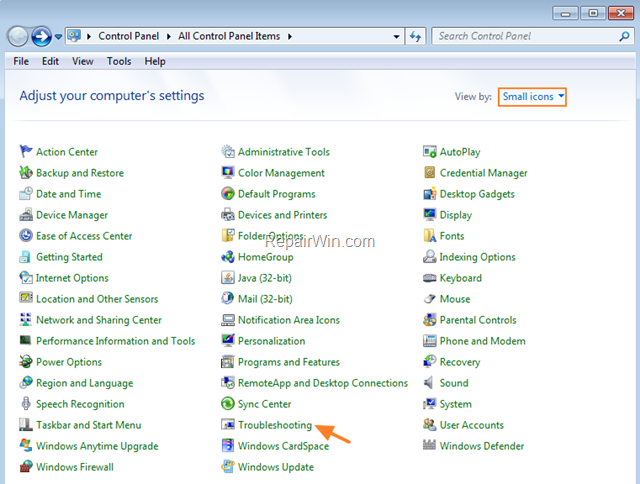
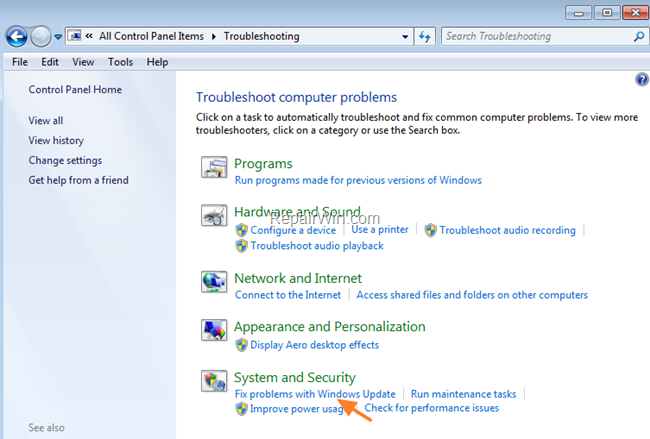
2. In Troubleshooting options, click Fix problems with Windows Update.
3. Click Next to troubleshoot Windows update problems.
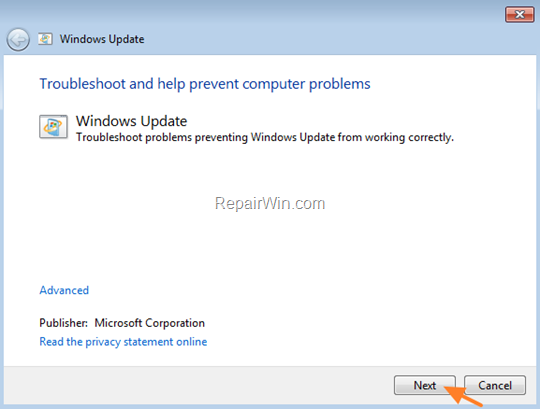
5. When the troubleshooting process is complete, close the troubleshooter and restart your PC.
6. Check for updates.
Method 3. Delete the SoftwareDistribution Folder.
The “C:WindowsSoftwareDistribution“, is the location where Windows store the Windows Updates. Many times this folder becomes corrupted and you must re-create it in order to download updates and install from scratch. To rebuild (re-create) the “SoftwareDistribution” folder follow the steps below:
Step 1: Stop Windows Update Service.
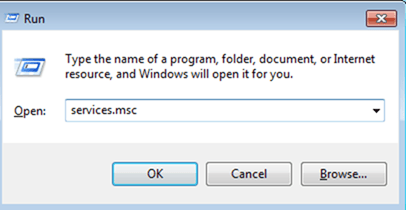
1. Open Windows Services control panel: To do that:
- Press Windows
 + R keys to open the run command box.
 - In the Search box, type: services.msc & click OK.
- (Accept the UAC warning if appears).
2. In Services control panel locate the Windows Update service.
3. Right-click on Windows Update service and select “Stop”.

Step 2: Delete the SoftwareDistribution folder.
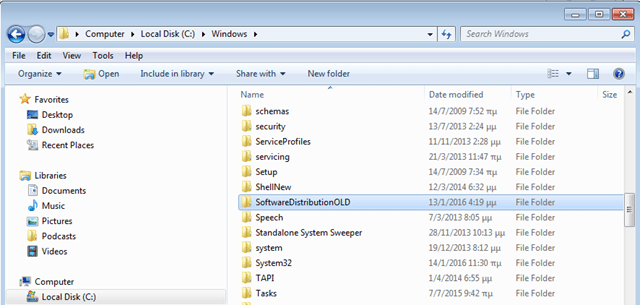
1. Open Windows Explorer and navigate to: C:Windows folder.
2. Find and Delete the “SoftwareDistribution” folder (or rename it. e.g. to “SoftwareDistributionOLD”) .
Step 3: Start the Windows Update Service.
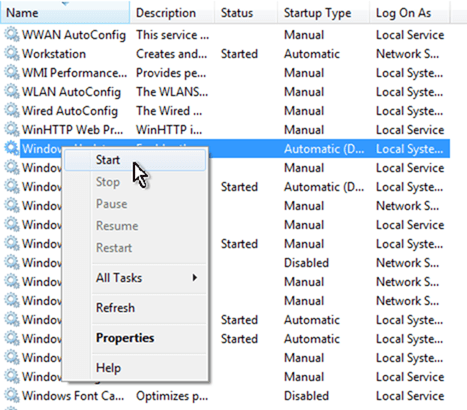
1. Open Windows Services control panel.
2. Right-click on Windows Update service and select “Start”.
Step 4: Check and Install Windows 10 Update.
1. Navigate to Settings -> Update and Security and click Check for Updates.
Method 4. Disable the Intel Virtualization Technology.
In some cases, the Windows 10 update error 0XC1900101 – 0x20017, appears if the Intel Virtual Techonology is enabled on your system. So, proceed and disable the Intel_VT technology from Bios settings. To do that:
1. Enter BIOS settings.
2. Disable the Intel VT-d features in Advanced settings -> Chipset.
3. Save and Exit from BIOS settings.
4. Try to install the update.
Method 5. Repair Windows 10.
The final method to resolve Windows 10 Update installation problems, is to repair Windows 10 with In-Place Upgrade.
That’s all folks! Did it work for you?
Please leave a comment in the comment section below or even better: like and share this blog post in the social networks to help spread the word about this solution.
This tutorial contains instructions to fix the Windows 10 Upgrade Error 0XC1900101 – 0x20017: “The installation failed in the SAFE_OS phase with an error during BOOT operation”. The error 0XC1900101 – 0x20017 may appear when updating Windows 10 to the latest build, or when you upgrade your system from Windows 7 or 8 to Windows 10. When the error is occurred, the upgrade stops and then the system reverts back to the previous version of Windows.
a. Disconnect any external devices that don’t needed during the installation (e.g. USB drives, Printers, etc.).
b. Disable the Wireless and the Bluetooth adapter from BIOS settings.
* Note: If after applying all the above suggestions and the methods below, the Windows 10 Update installation still fails, proceed and update also the BIOS (Firmware) on your system.


