If you are having problems and your camera is not working on your Asus X509DA laptop (or in another laptop brand/model), keep reading below to see how you can fix the problem.
When the camera doesn’t work when you want it for a web meeting it’s frustrating but don’t worry – there are some steps you can try to get your camera working again.
Problem in details: On an Asus X509DA laptop with Windows 10/11, the camera stopped working suddenly and for no apparent reason. (The mentioned problem may appear on any laptop model)
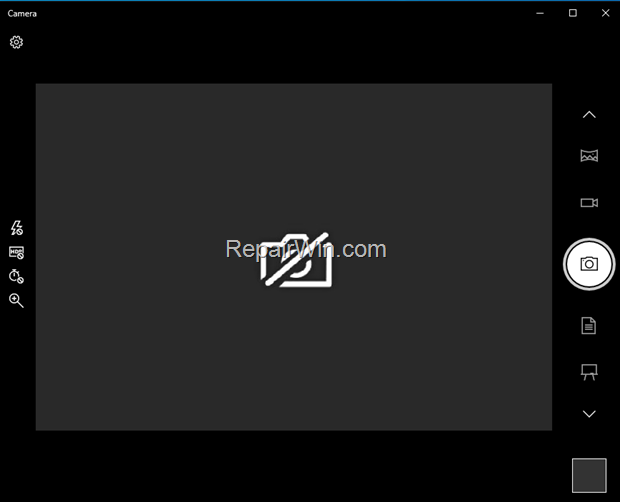

How to FIX: Camera Stopped Working on Asus Laptop. *
Nội dung
* Note: The following instructions apply to any Windows 10/11 PC or Laptop.
Method 1. Press Once the Camera Switch – key.
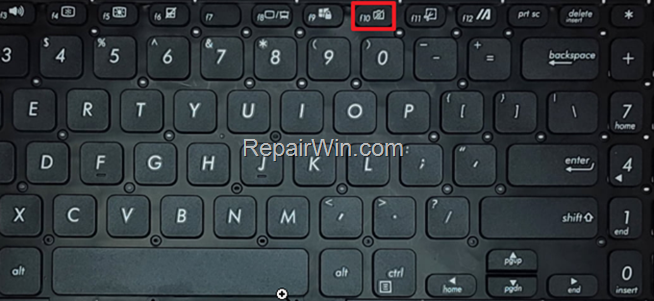
Modern laptops owns a camera ON/OFF switch to turn on or off the camera. e.g. On a ASUS X509DA laptop, press once the F10 key and see if your camera is working.
If you own a different laptop model, see on your keyboard if there is a key with the camera icon ![]()
![]() on it, or refer to laptop’s User Manual to see if there is a key-switch to enable/disable your camera. *
on it, or refer to laptop’s User Manual to see if there is a key-switch to enable/disable your camera. *
* Note: On some models the camera switch works after you first press and hold the Fn key,

Method 2. Check if Camera is Used from Another Apps.
If your camera is used from another app in the background, then it can cause it to not work in the application you want. So,
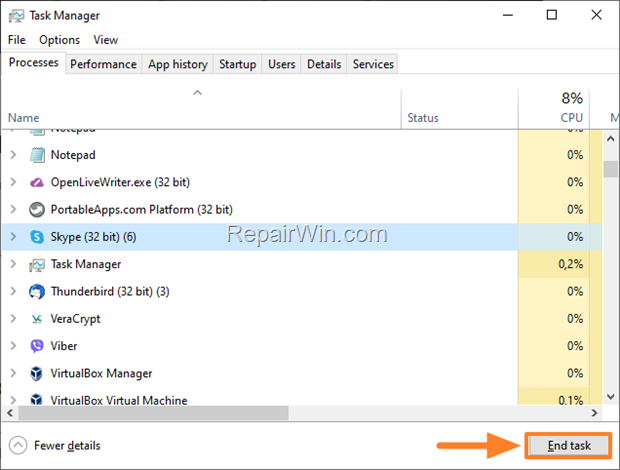
1. Press CTRL + SHIFT + ESC to open the Task Manager.
2. See if any other application(s) using your camera (Skype, Viber, WebEx, etc.) and if so, select that application and click the End Task button.

3. Try your camera again and if it still doesn’t work, do the following:
4. Open again the Task Manager and go to Startup tab.
5. Select any startup application that may use the camera (e.g. Skype, Teams, Viber, Zoom, etc.) and click Disable.
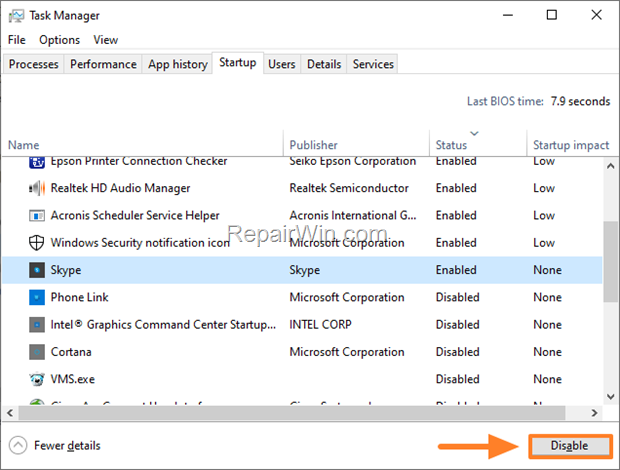

6. When done, restart your laptop and then check if the camera is working.
Method 3. Allow Apps to Access the Camera.
On Windows 10/11 the Camera may not work, if you don’t allow apps to access the Camera in Privacy settings. So, make sure that the camera is enabled in the Windows settings. To do this:
1. Navigate to go to Start menu ![]()
![]() -> Settings -> Privacy.
-> Settings -> Privacy.
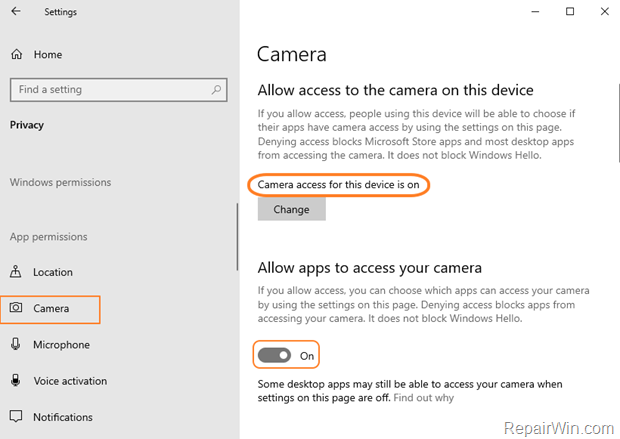
2. Select Camera on the left pane, and on the right do the following:
a. Ensure that Camera access for this device is on. If not, click Change and set to ON.
b. Then set to On the Allow apps to access your camera switch.

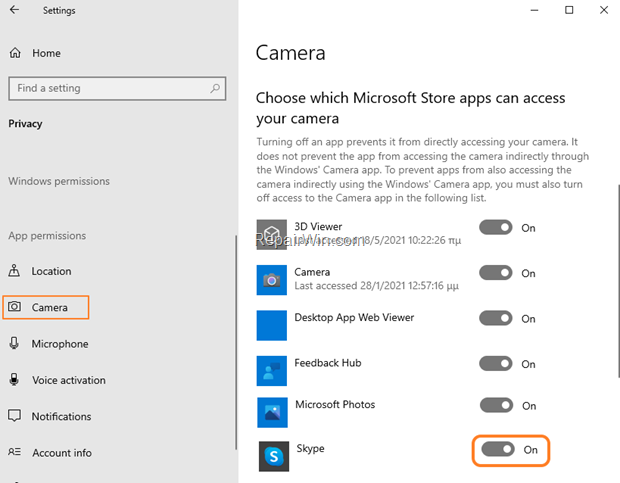
c. Next, under “Choose which Microsoft Store apps can access your camera”, make sure the app you want to use your camera (e.g. “Skype”), is allowed by turning the relevant switch to On.

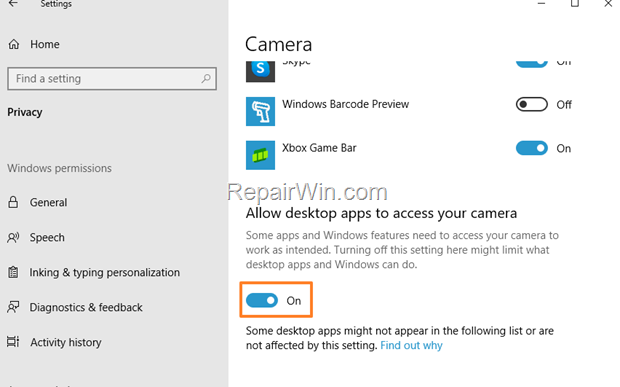
d. Finally, scroll down and at the end of the Camera settings page, ensure that the Allow desktop apps to access your camera switch is On.

3. Now check if your camera is working,
Method 4. Test your Camera with the Camera App.
The next step to troubleshoot the “camera not working” problem in Windows 10/11, is to confirm that your webcam works with the Camera app. To do this:
1. At Search box, type camera and then open the Camera app from the results.
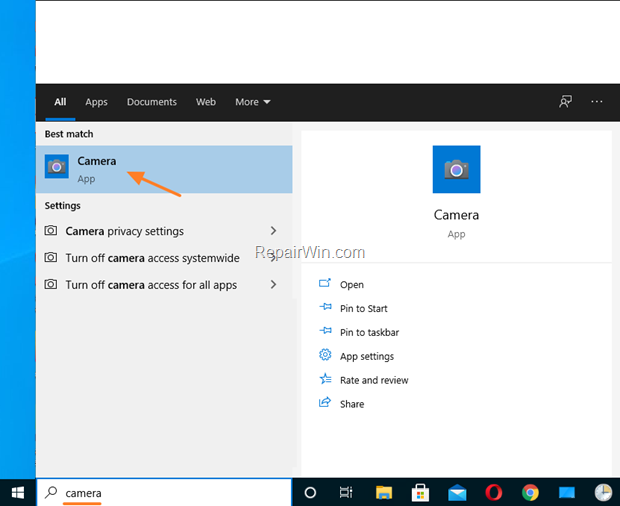

2. Now, according the result, proceed as follows:
- If your camera doesn’t work either in Camera app, proceed to next method.
- If your camera works fine with the Camera app, then do the following:
3. Open the 3rd party app where the camera is not working and check if the camera is recognized in the app’s camera/video settings. If not, proceed with uninstalling and reinstalling the third-party app and If the problem is still not resolved, proceed to the next method.
Method 5. Roll Back, Update or Reinstall Camera’s Driver.
If the above methods did not help, then the problem is probably the camera driver.
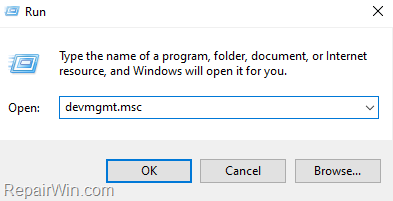
1. Open Device Manager. To do that:
1. Press Windows
+ R keys to open the run command box.
2. In the “Open” box, type: devmgmt.msc & click OK.
2. Expand Imagine Devices (or Cameras)
3. Right-click on your Camera and choose Properties.
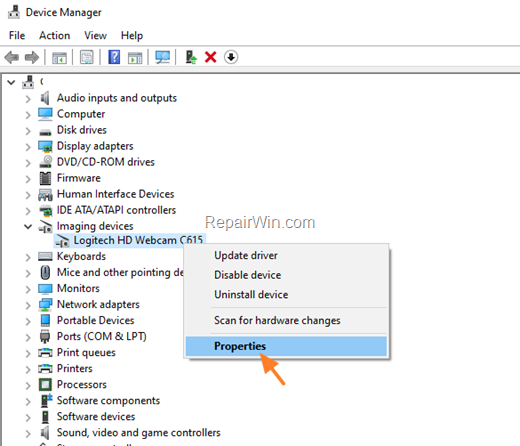

4. Select the Driver tab and proceed as follows:
A. If you can press the Roll Back Driver button, then press it to restore the previously installed driver for the camera and see if that fixes the problem. (If not, proceed reading below…)
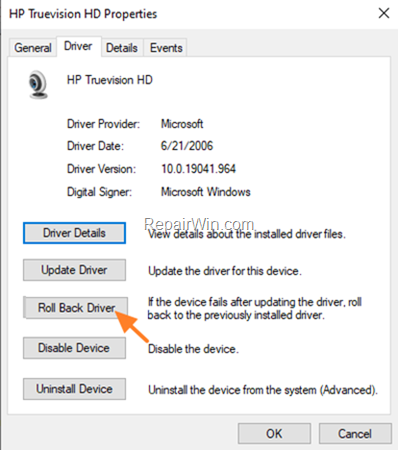

B. If you cannot press the Roll Back Driver button (because it is disabled) or the problem is not fixed after rolling back the camera driver, perform the following steps in order:
- Click the Update Driver option, to check for an updated driver of your camera. If Windows finds a new driver, install it, and then check if your camera is working.
- If Windows cannot find an updated driver for your camera, click the Uninstall Device button, to uninstall the camera and then restart your PC. After restart, check if your camera is working. If not…
- Navigate to your laptop manufacturer support site and check if its available a new driver for your Webcam and install it.
Additional Steps to fix Camera’s Problems on Windows 10/11.
If you’re still having problems with your webcam after trying the methods above, there some additional steps your can try to fix the camera’s issues.
- Install all available Windows 10/11 updates, by navigating to Start -> Settings -> Update & Security > Check for updates.
- Proceed to update Windows 10/11 to latest version by using the Update Assistant. (To do that navigate to this Microsoft Download Site, select your Windows version and then click the Update Now button).
- If none of the above steps fixes the problem, then try to Reset your PC to a clean state, or replace your camera.
In conclusion, these are some of the steps you can try to resolve camera issues on your Windows 10/11 laptop or PC. If none of these steps work, you may need to contact laptop’s support for further assistance.
That’s all folks! Did it work for you?
Please leave a comment in the comment section below or even better: like and share this blog post in the social networks to help spread the word about this solution.

Bài liên quan
- FIX: Error 0x81000203 in System Restore. (Solved)
- Cannot Access Shared folder. User has not been granted the requested logon type at this computer. (Solved)
- FIX: Cannot clear TPM – 0x80284001, 0x80290300 or 0x80290304.
- Unable to Schedule Teams Meeting in 15 or 10 minutes slots (Solved)
- How to Share Folder without Username/Password on Windows 10/11.
- FIX: Thunderbird High CPU or Memory Usage issues.
