If you have bought a Windows 10 or 8/8.1 branded PC (desktop or laptop) then you ‘ll realize that there is not exist a sticker in computer chassis with the Windows Product Key. This is happen, because starting with Windows 8, the Windows Product key is burnt into BIOS from the manufacturer, so is needless to be attached the Windows product key label in the chassis, because, during the installation, Windows read the product key from BIOS and are activated automatically.
But, in some cases, especially if you need to perform a fresh Windows installation, without using the bloatware recovery image, or when Windows cannot find automatically the product key from BIOS, there is the need to retrieve manually the embedded Windows product key (from BIOS/UEFI), in order to activate Windows.
How to Find Windows 10/8/8.1 Product Key from BIOS/UEFI.
Method 1. Find BIOS/UEFI Windows Product key using Command Prompt.
1. Open Command Prompt.
2. In command prompt window, type this command and press Enter: *
- wmic path softwarelicensingservice get /all /format:list | findstr OA3
3. Your Windows product key will be displayed on the screen. *
* Note: Keep in mind, that the above command will show the embedded (preinstalled OEM key) Windows 10, 8 or 8.1 product key, from BIOS/UEFI. If you own a Retail, VL or an upgraded version of Windows, the result will be empty. At these cases, to retrieve the Windows key see the method-3 below..

Method 2. Retrieve BIOS/UEFI Windows Product key using PowerShell.
1. Open PowerShell.
2. In PowerShell windows, type this command and press Enter: *
- powershell “(Get-WmiObject -query ‘select * from SoftwareLicensingService’).OA3xOriginalProductKey”
* Note: Keep in mind, that the above command will show the embedded (preinstalled ) Windows 10, 8 or 8.1 product key from BIOS/UEFI. If you own a Retail, VL or an upgraded version of Windows, the result will be empty. At these cases, if you want to retrieve the Windows product key follow the instructions in method-3 below.

Method 3. Find Windows Product key using Belarc Advisor.
If the above methods doesn’t work for you, then you probably own a Retail, VL or an upgraded version of Windows. At this case(s):
1. Download a free copy of Belarc Advisor.

2. Double click ‘advisorinstaller.exe’ and then follow the on-screen instructions, to install Belarc Advisor on your system.
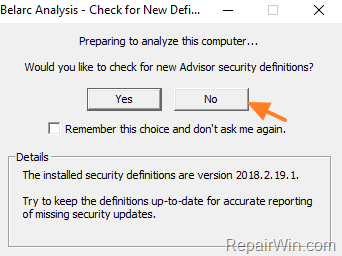
3. Click No, to avoid Belarc Advisor to check for security definitions.

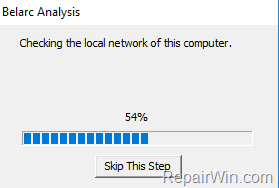
4. Wait Belarc Advisor to generate a report for your system.

5. Click Software Licenses on the left, to view all the installed licenses on your system.
Did it work for you?
Please leave a comment in the comment section below or even better: like and share this blog post in the social networks to help spread the word about this solution.


