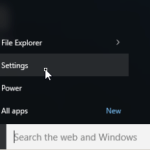
Problem description: In a Windows 10 based computer, the Settings app, the Windows Store or several Store Apps, won’t open or crash. When this issue happen, the user cannot launch Settings or an App from Windows Store.The Windows Apps or Settings, working problems, commonly occurred after a Windows Update or a corrupted file system.
In this tutorial you can find several methods on how to fix the Settings or Store Apps not working issue(s) in a Windows 10 OS.
How to fix: Cannot launch Windows Store, Settings or Store Apps on Windows 10.
Method 1. Using AppsTroubleshooter utility.
The first method to resolve the “Windows Store Cache may be Damaged” problem is to run Microsoft’s Apps Troubleshooter utility. to do that:
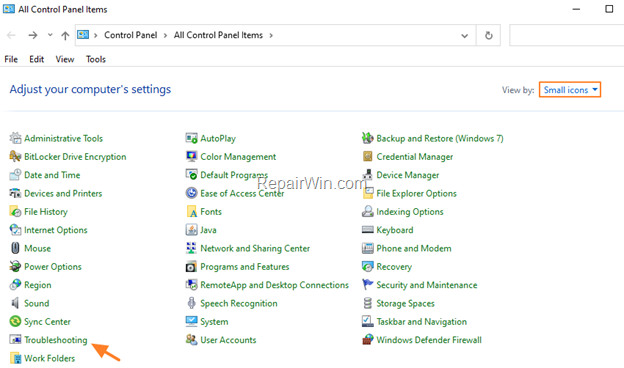
1. Navigate to Windows Control Panel set the ‘View By’ to Small icons and open Troubleshooting.
2. In Troubleshooting options, click View all.
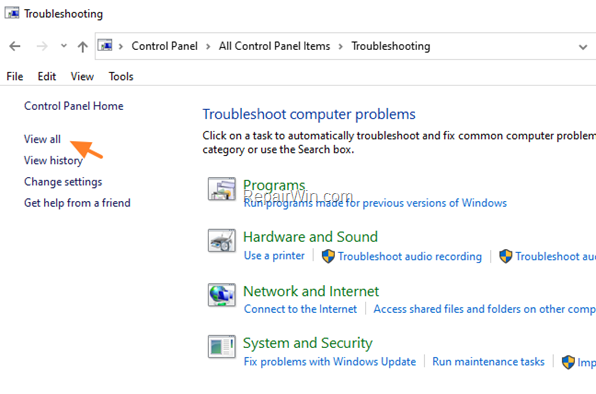
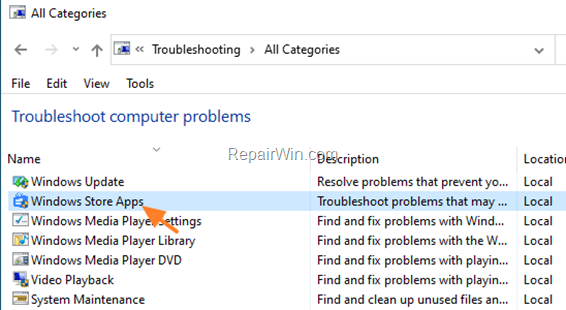
3. Open the Windows Store Apps troubleshooter.
4. Click Next and let the troubleshooter to fix the problem..
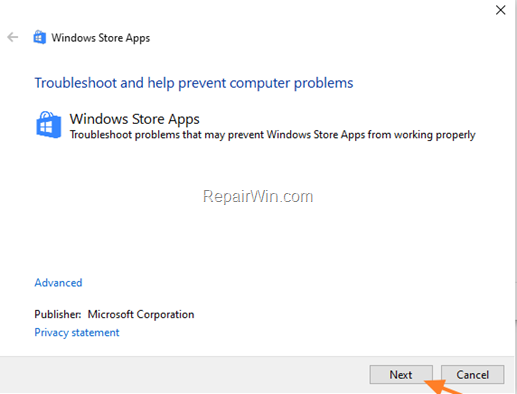
5. When the troubleshooting process is complete, close the troubleshooter and then check if your problem is solved.
Method 2. Reset Windows Store Cache.
1. Press Windows ![]() + R keys to open the run command box.
+ R keys to open the run command box.
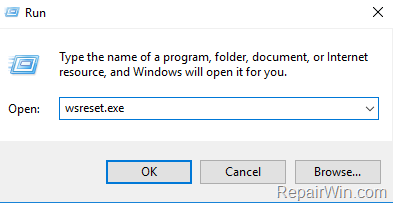
2. Type wsreset.exe and press Enter
Method 3. Enable Developer Mode.
1. At Cortana‘s search box, type “update“.
2. Open Check for updates result.
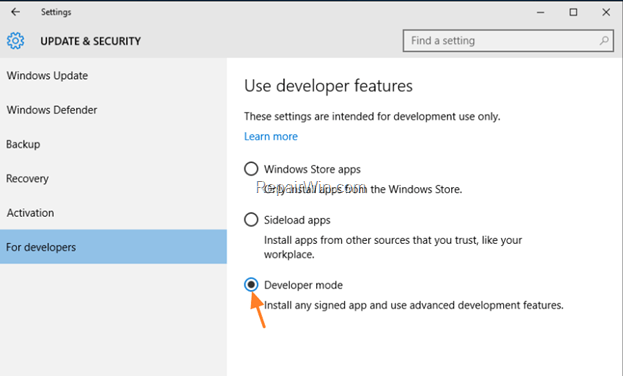
3. Select For Developers at the left pane.
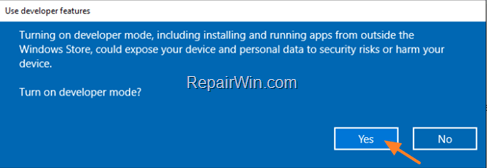
4. Place a dot at Developer mode and then ask Yes at the popup window.
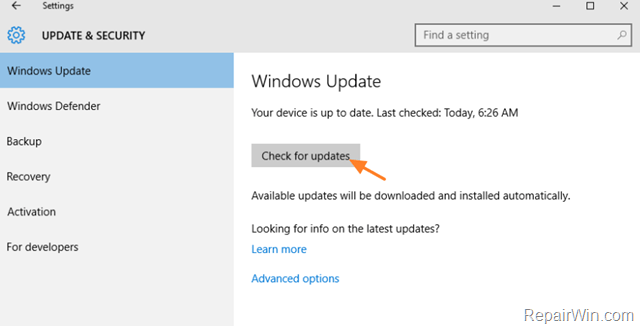
5. Then select Windows Update (at the left pane) and force Windows to find and install all available updates.
6. After update, restart your computer.
Method 4. Troubleshoot Windows problems by Running the Maintenance Tasks.
– You this method to troubleshoot several problems on your computer:
1. Right click to Start menu ![]() and select Control Panel.
and select Control Panel.
2. Open Troubleshooting.
* {If you don’t see the Indexing options, set the View (View by) to Small icons
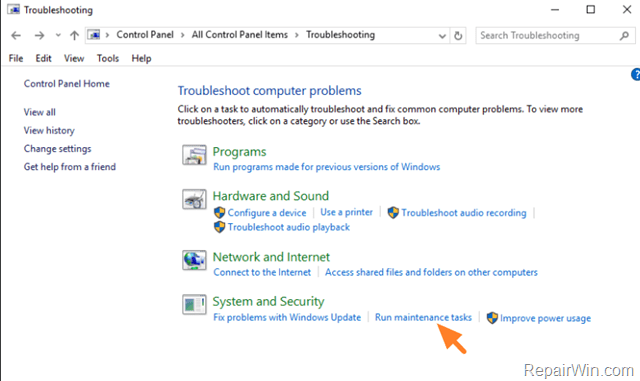
3. Under System and Security select Run Maintenance Tasks.
3. Press Next and then wait until the System Maintenance utility detecting problems.
4. Follow the on screen instructions to fix the problems found.
Method 5. Re-register modern apps using PowerShell.
1. At Cortana‘s search box, type powershell
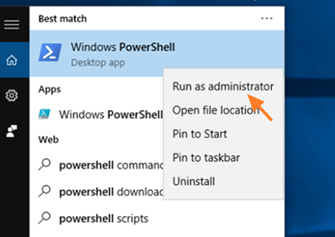
2. Right click on Windows PowerShell result and select Run as administrator.
1. Run the following command from PowerShell.
- Get-AppXPackage | Foreach {Add-AppxPackage -DisableDevelopmentMode -Register “$($_.InstallLocation)AppXManifest.xml”}
2. Restart you computer.
Method 6. Restore your computer to previous working state.
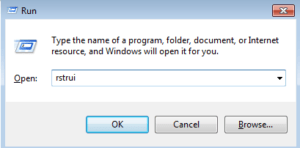
1. Right click on the Start button (Windows flag on bottom left corner) and choose Run,
2. Type rstrui & click OK.
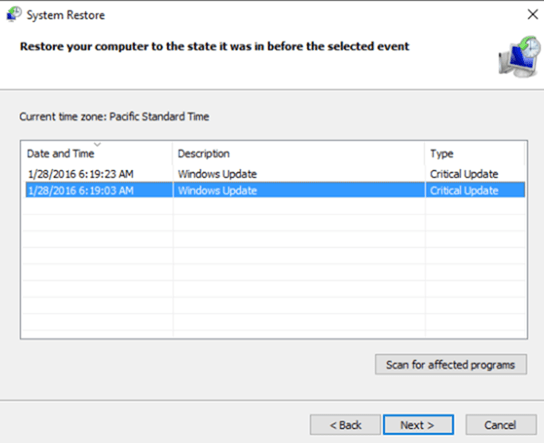
3. Click Next at the first screen.
3. Choose an earlier date (that your computer is working normally) and then click Next to start the restore process.
Method 7. Create a new User Account on your computer.
Use this method to create an new local account on your computer (with Administrative privileges) and sign-in with the new account.
If the Settings app or all other apps are working, then transfer your personal data from the old account to the new one.
1. Right click on Start menu (Windows Flag) and select Command Prompt (Admin).
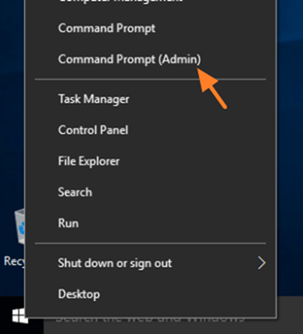
2. At command prompt window, type the following command to create a new user account* on your computer and press Enter.
net user %UserName% /add
* Replace the %UserName% with your preferred username:
e.g. if you want to create a new account with name “User1” then you have to give the command:
net user User1 /add
3. Then give this command to add the new user account to the Local Administrators Group:
net localgroup administrators %UserName% /add
e.g. If the new username is “User1” then you have to give this command:
net localgroup administrators User1 /add
4. Sign-out and logon with the new user.
Method 8. Perform a Windows 10 Repair Upgrade.
If you still cannot launch Store Apps or Settings, then perform a repair upgrade of your Windows 10 installation by using the instructions mentioned in this article:
- How to repair Windows 10.
That’s it! Did it work for you?
Please leave a comment in the comment section below or even better: like and share this blog post in the social networks to help spread the word about this.

