The following error may occurred when trying to install Malwarebytes Antimalware v3.0 (latest version), over Malwarebytes Antimalware v2.x (previous version): “C:Windowssystem32driversmbae64.sys. An error occurred while trying to replace the existing file. DeleteFile failed: Code 5. Access is denied. Click Retry to try again, ignore to skip this file (not recommended) or abort to cancel the installation.“
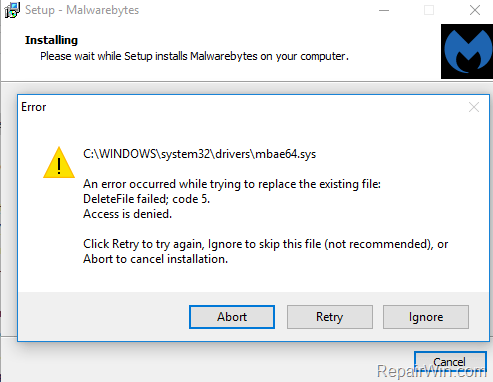
The “Cannot Replace mbae64.sys” error –issue- is caused because the Malwarebytes installer program cannot delete the “mbae64.sys” driver in order to replace it with the new version.
In this tutorial II ‘ll you how you can bypass the “mbae64.sys” error during Malwarebytes v3 installation on Windows 10/8.1.8/7/Vista
How to fix Malwarebytes 3.0 Setup Error: Cannot Delete MBAE64.SYS.
Method 1. Uninstall previous version of Malwarebytes Antimalware.
– Before installing the latest version of Malwarebytes, proceed and uninstall the previous version. To do that:
1. Navigate to Windows Control Panel.
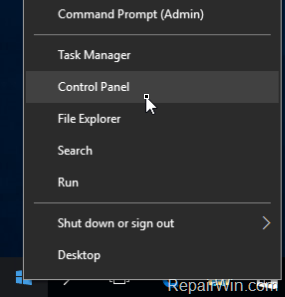
- Windows 10, 8: Right click on the Start
 menu and select Control Panel.
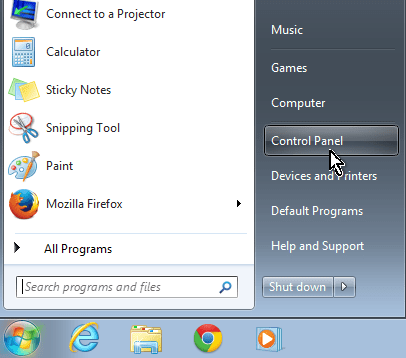
- Windows 7, Vista & XP: Go to Start > Control Panel.
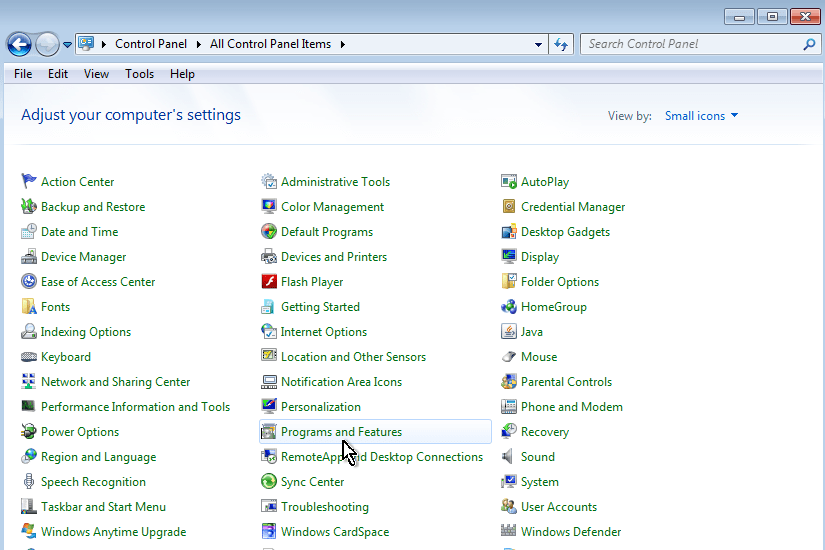
2. Set the View By to Small icons. (On Windows XP: click Switch to Classic view on the left).

3. Open Programs and Features (On Windows XP open Add or Remove Programs).
4. Select the Malwarebytes Antimalware and click Uninstall.
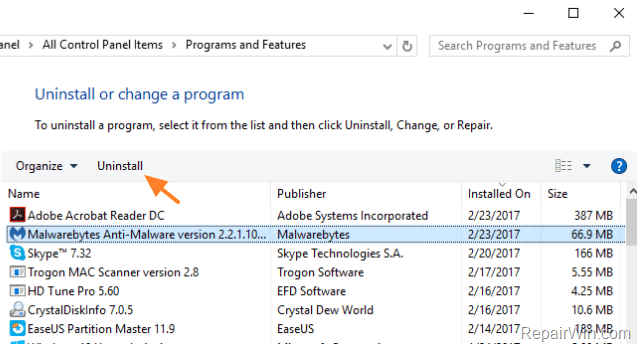
5. When the uninstall process is completed, restart your computer.
6. Install Malwarebytes Antimalware 3.0.
Method 2. Rename the MBAE64.SYS file.
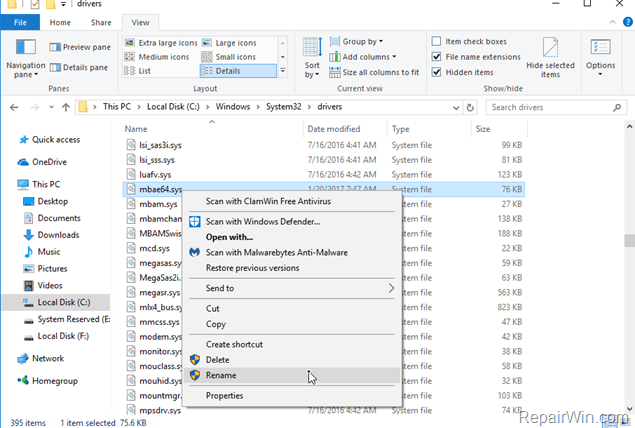
1. Navigate to the following location on your disk:
- C:Windowssystem32drivers
2. Rename the mbae64.sys file to mbae64BAK.sys *
3. Install Malwarebytes Antimalware 3.0.
* Note: If you cannot rename the file, (file in use) then try to delete the file by starting Windows in Safe Mode. To start Windows in Safe Mode
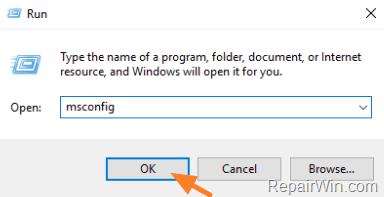
1. Press Win + R keys to open the RUN command box.
2. Type msconfig and press Enter.
3. At Boot tab, check the Safe boot option and click OK.
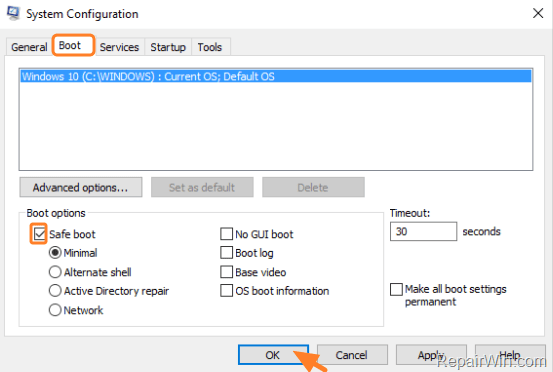
4. Restart your computer. *
* To exit Safe Mode, run msconfig again, uncheck the Safe boot option, and restart.
Did it work for you?
Please leave a comment in the comment section below or even better: like and share this blog post in the social networks to help spread the word about this solution.
Bài liên quan
- FIX: Error 0x81000203 in System Restore. (Solved)
- Cannot Access Shared folder. User has not been granted the requested logon type at this computer. (Solved)
- FIX: Cannot clear TPM – 0x80284001, 0x80290300 or 0x80290304.
- Unable to Schedule Teams Meeting in 15 or 10 minutes slots (Solved)
- How to Share Folder without Username/Password on Windows 10/11.
- FIX: Thunderbird High CPU or Memory Usage issues.