As you may have already noticed, Google Chrome opens many background processes, even when you have only opened a few Chrome windows / tabs. This is happens, because Google Chrome is designed in a such way to create an individual process for every plugin or extension installed when you open a new windows or tab.
Although the opening of multiple processes from Google Chrome is a normal behavior, it is actually a problem, because, this behavior causes a lot of memory usage and makes the computer unresponsive.
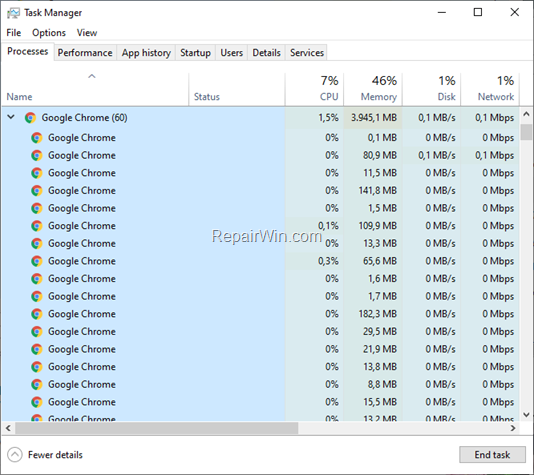
This tutorial contains step by step instructions on how to prevent Chrome to open multiple processes for every window or tab, in order to resolve the Chrome high memory usage issue.
How To Disable Multiple Chrome Processes in Windows 10.
Step 1. Scan your computer for Malware & Viruses.
The first step before troubleshooting the error “ERR_CONNECTION_CLOSED” in Chrome, is to ensure that your system is virus/malware free. For that task follow the instructions in this guide: How To Scan Your Computer for Viruses and other Malicious Programs.
Step 2. Disable Unwanted Chrome Extensions.
First of all, check if you need all installed Chrome extensions and disable those you don’t need. To do that:
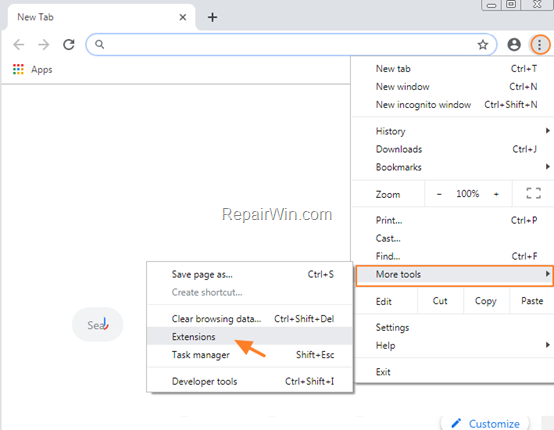
1. From Chrome’s menu ![]() , go to More Tools -> Extensions
, go to More Tools -> Extensions
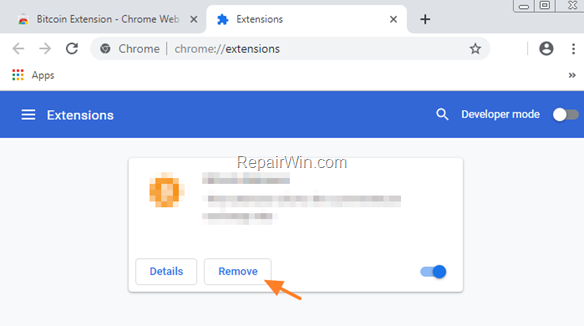
2. Remove (or disable) any extension that you don’t need or you don’t recognize.
Step 3. Prevent Chrome to Run in Background when Chrome is Closed.
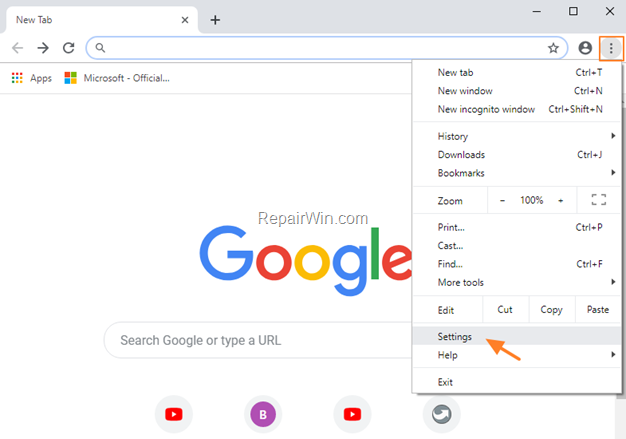
1. From the Chrome menu ![]() select Settings.
select Settings.
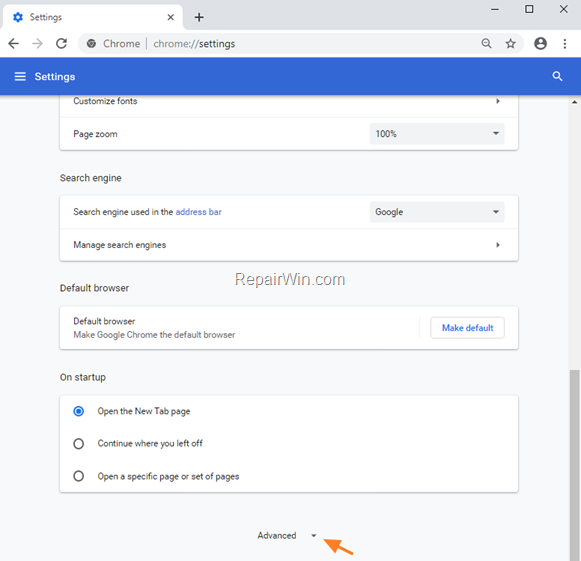
2. At Settings page, scroll down and click Advanced.
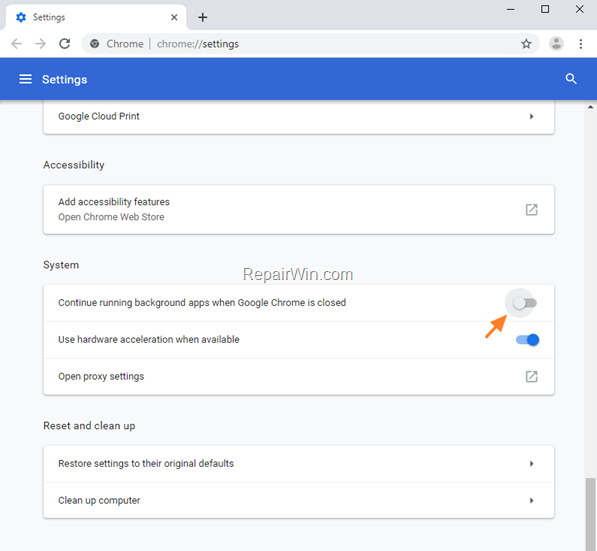
3. Set the “Continue running background apps when Google Chrome is closed” switch to OFF.
Step 4. Prevent Chrome to Open Multiple Processes for the Same Site.
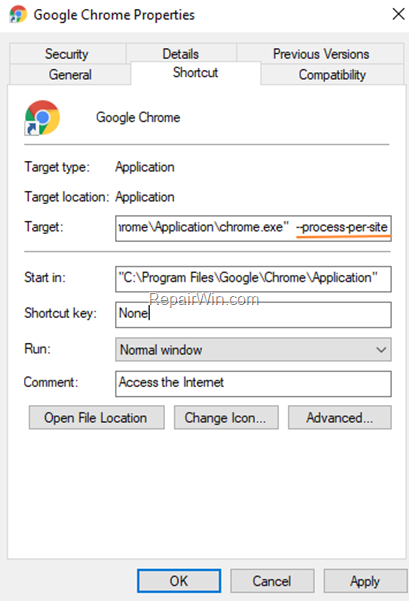
1, Right-click on Google Chrome shortcut and select Properties.
2. At General tab, add the switch ” –process-per-site” (without quotes), at the end of the target line and click OK and Continue to apply the change. *
e.g. “C:Program FilesGoogleChromeApplicationchrome.exe” –process-per-site
Note: There is a space before –process-per-site
Step 5. Disable Google Chrome Site Isolation.
In Site Isolation mode, Chrome will load each website in its own process. This is in fact an additional security feature to prevent a website from stealing your data from another website that is open to another window / tab. But, the “Site Isolation” mode, will increase Chrome’s memory use by approximately 10%.
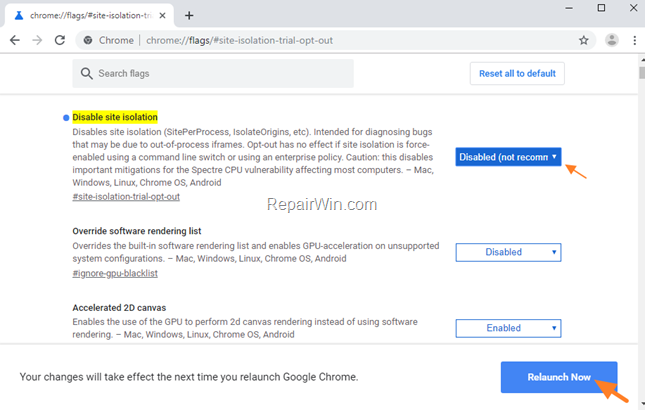
1. On Chrome address bar, type chrome://flags/#site-isolation-trial-opt-out and click enter.
2. Set the Disable site isolation mode to Disabled and then click Relaunch Now. *
* Note:
That’s all folks! Did it work for you?
Please leave a comment in the comment section below or even better: like and share this blog post in the social networks to help spread the word about this solution.

