.single .post-author, .post-date {
text-transform: none;
}
,
Last updated: February 13th, 2024
if you cannot install updates through Windows Update due to error “Your Device is Missing Important Security and Quality Fixes” with Error Code: 0x80073712, continue reading below to fix the problem.
The error 0x80073712 in Windows Update, usually means that your device for some reason failing to install the required updates and warns you that your device may be vulnerable to malware attacks or other security threats.
In this guide you’ll find several methods to fix the Windows Update error 0x80073712 “Your Device is Missing Important Security and Quality Fixes”, on Windows 10/11.
How to FIX: Your Device is Missing Important Security and Quality Fixes on Windows 11/10.
Method 1. Delete the Windows Update Store folder.
The first method to fix the error “Device is Missing Important Security and Quality Fixes”, is to force Windows to download all the available update from scratch.
Step 1: Stop the ‘Windows Update’ service.
1. Go to Windows Services control panel: To do that:
- Press Windows

 + R keys to open the run command box.
 - In the Search box, type: services.msc & click OK.
- Press Windows


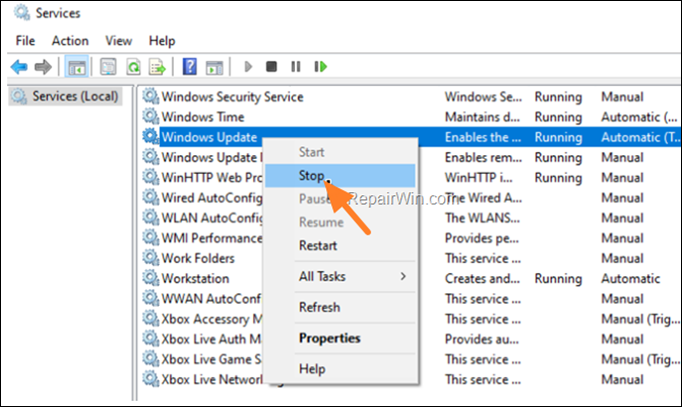
2. In Services control panel locate the Windows Update service.
2a. Right-click on Windows Update service and select Stop.

3. Now, without closing the Services window proceed to Step-2 below.
Step 2: Delete the ‘SoftwareDistribution’ folder. *
* Info: The “C:WindowsSoftwareDistribution“ folder, is the location where Windows store the Windows Updates. Many times, this folder becomes corrupted and you must re-create it in order to download the updates from scratch.
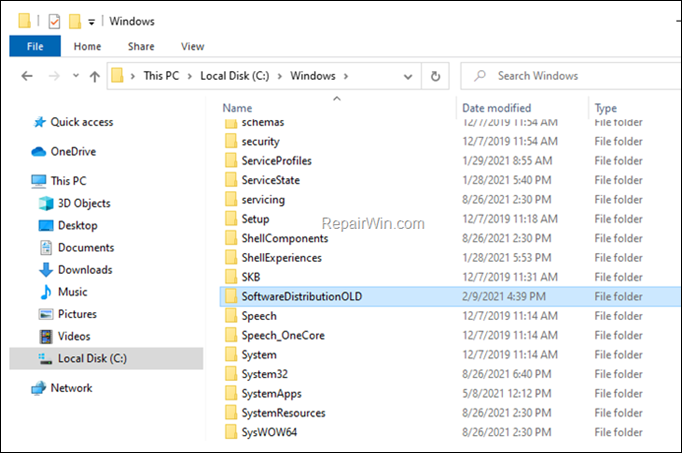
1. Open Windows Explorer and navigate to: C:Windows folder.
2. Find and Delete the SoftwareDistribution folder (or rename it. e.g. to “SoftwareDistributionOLD”) .

Step 3. Start the ‘Windows Update’ service.
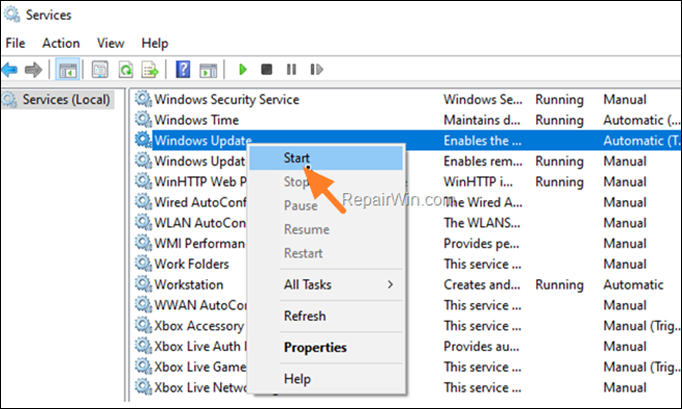
In Windows Services control panel, apply the following actions:
1. Right-click on Windows Update service and select Start.

Step 4: Check and Install Windows 10 Updates.
1. Finally, navigate to Settings -> Update and Security -> and click Check for Updates.
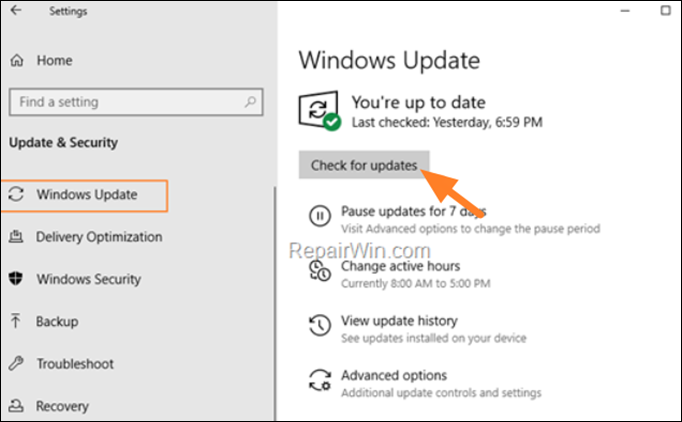

2. After Windows finds the available updates, try to install them. If you receive the same error, proceed to method 2 below.
Method 2. Repair Windows System Files with DISM & SFC Tools.
If the above method do not solve the problem, try checking and repairing any errors in the Windows system files as follows:
1. Open Command Prompt as Administrator.
2. In command prompt give the following command and press Enter:
- DISM /Online /Cleanup-Image /StartComponentCleanup


3. When the process is completed, give the following command:
- DISM.exe /Online /Cleanup-image /Restorehealth


4. When the DISM operation is completed, type the following command and hit Enter:
- sfc /scannow


5. Now wait until the System File Checker (SFC), repairs the Windows System Files.
6. When this done, restart your computer.
7. Open Windows Update and try to install the failed update(s).
Method 3. Update Windows using the Update Assistant.
If Windows fails to install updates via Windows Update, the next solution to update your system is the Windows Update Assistant.
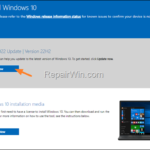
1. Navigate to Windows 10 download site* and click the Update now button.
* Note: For Windows 11, go to Windows 11 download page and download the Windows 11 Installation Assistant


2. Double click at the downloaded file to open the Windows Upgrade Assistant.
3. Click Update Now to start the update process.


4. Let Windows to finish the downloading and the verification.
5. When the verification is reaches 100%, disconnect your computer from the Internet, (or set it to “Airplane mode” if you own a laptop).
6. Wait until Windows updating your system.
7. When prompted, restart your system update it.
Method 4. Update Windows from ISO file.
The next method to fix the “Your Device is Missing Important Security and Quality Fixes” update error, is to update Windows 10/11, from the Windows ISO file. To do that:
Step 1. Download Windows 10 in a ISO File.
1. Navigate to Windows 10 download page* and under the “Create Windows 10 installation media” section, click Download Tool now to download the Media Creation Tool.
* Note: For Windows 11, go to Windows 11 download page and download the Windows 11 Installation Media tool.


2. Run the downloaded file and Accept the License Terms at the first screen.
3. At “What do you want to do?” screen select Create installation media for another PC.


4. At ‘Language, architecture and edition’ screen click Next.
5. Select ISO file and click Next.


6. Save the ‘Windows.iso’ file to your desktop.
7. Wait for the ‘Media Creation Tool’ to download Windows 10/11 to an ISO file.
8. When the download is completed, close the Media Creation Tool wizard.
Step 2. Run Disk Cleanup.
Now proceed and clean the already downloaded update files, using the Disk Cleanup tool.
1. Type “disk cleanup” in the search bar and then open the Disk Cleanup App.
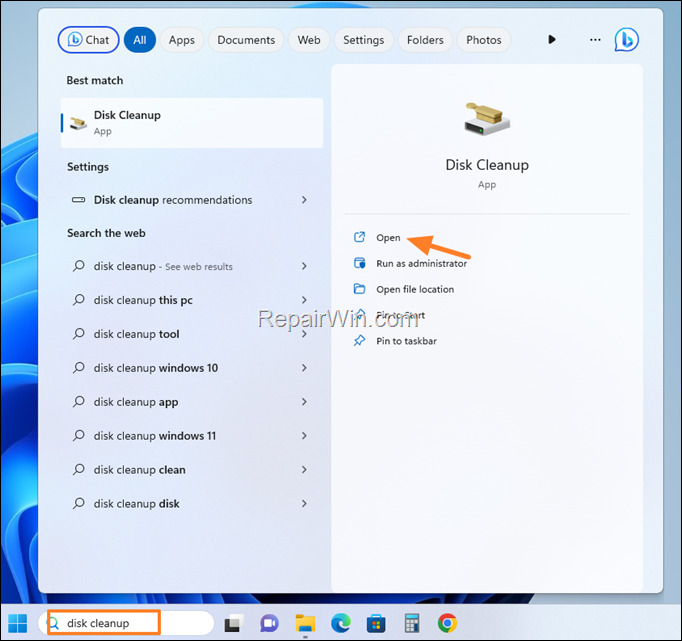

2. At ‘Disk Cleanup’ window, click Clean up system files.


4.In addition to the files selected for deletion, select the following and click OK to delete them.
- Windows Update Cleanup
- Windows upgrade log files
- Temporary Windows installation files


5. Close the Disk Cleanup tool and continue to next step.
Step 3. Update Windows 10 from the ISO file.
1. IMPORTANT: Disconnect your computer from the Internet, (or set it to “Airplane mode” if you own a laptop).
2. IMPORTANT: Disable or temporarily uninstall any third-party antivirus.
3. Then, right-click on the “Windows.iso” file (on your desktop) and click Mount.
4. Double click at Setup application.


5. Click Next to install Windows 10.


6. Follow the rest onscreen instructions to update your system.
That’s all folks! Which method worked for you?
Please leave a comment in the comment section below or even better: like and share this blog post in the social networks to help spread the word about this solution.

- Author
- Recent Posts
- FIX: Device is Missing Important Security and Quality Fixes in Windows 11/10. – February 13, 2024
- FIX: Facebook Messenger forces to create a PIN to access chat history. (Solved) – February 7, 2024
- Disable Let’s finish setting up your PC on Windows 11. (How to) – February 5, 2024

