Several users have reported that File Explorer is slow, hangs or freezes after upgrading their system to Windows 11 from Windows 10 or after installing Windows updates.
As you know, File Explorer is one of the most frequently used Windows tools for accessing and working with files and folders. However, this essential tool in Windows 11 can lag, freeze suddenly, and become unresponsive.
In this article, we will list all possible reasons and solutions for the slow operation or freezing of Windows 11 File Explorer. So, if you are facing similar issues in File Explorer, follow the instructions below to regain efficiency and responsiveness of File Explorer on your Windows 11 PC.
How to FIX Windows 11 File Explorer Slowness and Freezing issues.
Method 1. Restart Windows Explorer Task.
Before proceeding with more advanced methods to fix File Explorer problems, try restarting the File Explorer task and see if that fixes the problem(s).
1. Press Ctrl + Alt + Del to open Task Manager.
2. At Processes tab, highlight the Windows Explorer process and click Restart task.


3. Now, check if the problem has been resolved and if not, continue to the methods below. *
* Note: Some users claim that File Explorer’s slow speed and “stuck” problems disappear when they open the File Explorer in full screen. So, give it a try.
Method 2. Quit OneDrive, Google Drive or Dropbox.
If you’re using a cloud-based file hosting and synchronization app, like OneDrive, Google Drive or Dropbox, then this can cause your File Explorer to lag or crash. At such case:
1. Press Ctrl + Alt + Del to open Task Manager.
2. At Processes tab, locate and select the cloud synchronization app you’re using (eg “Microsoft OneDrive”), and then click End Task.


3. When done, proceed and restart also the Windows Explorer task (see method-1 above), and then check if the problem is fixed.
Method 3. Fix Slow File Explorer on Windows 11 by Uninstalling Last Update(s).*
The slow performance of Windows Explorer in Windows 11, usually is caused after installing updates. So, if your File Explorer becomes slow after installing an update, proceed to uninstall it.
1. From the Start ![]()
![]() menu choose Settings
menu choose Settings ![]()
![]() .
.
2. Select Windows Update on the left and then on the right click Update history.


3. In Update history, scroll down and click Uninstall Updates under the “Related settings”.


4. In the list of installed updates, select the latest installed update and click the Uninstall button to remove it. *
* Note: If you see more than one updates installed on the same date, then uninstall all of them.


5. Finally, restart your PC and check if the problem is solved.
Method 4. Install KB5030310 Cumulative Update.
Some users reported that the slow operation of File Explorer was eliminated after installing the September 26, 2023—KB5030310 Update. To try that solution:
1. Proceed and download the 2023-09 Cumulative Update Preview for Windows 11 Version 22H2 for x64-based Systems (KB5030310) for the Microsoft Update Catalog.


2. In the window that opens, click on the “.msu” file to download the update.


3. When the download is complete, double-click on the downloaded file and follow the on-screen instructions to install the update. *
* Note: If you receive the error message: “The update is not applicable to your computer“, proceed and install the KB5031354 update.
4. When the installation is complete, restart the computer and check if the problem is solved.
Method 5. Clear Recent Items History.
1. Open Windows Explorer.
2. Copy and paste the following address in the address bar and press Enter:
- %AppData%MicrosoftWindowsRecentAutomaticDestinations


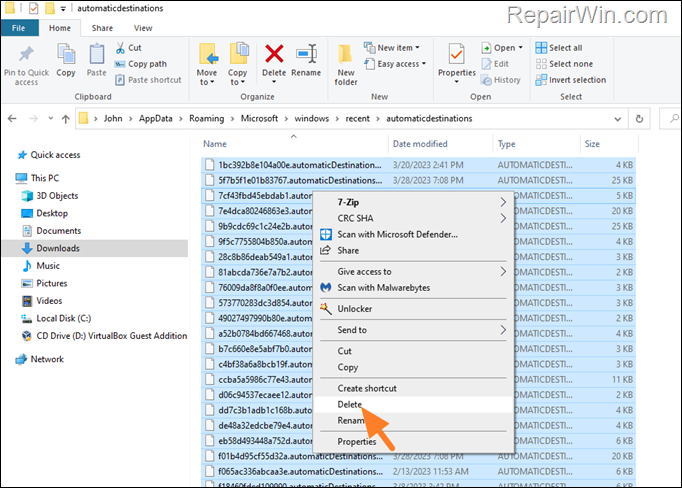
3. Press Ctrl + A (to select all items) and hit Delete (or right-click > Delete).


4. Then copy & paste the following address in address bar and press Enter.
- %AppData%MicrosoftWindowsRecentCustomDestinations
5. Press Ctrl + A again (to select all items) and hit Delete.


6. Now press Ctrl + Alt + Del to open Task Manager.
7. At Processes tab, highlight the Windows Explorer process and click Restart.


8. Now, check if the problem has been resolved.
Method 6. Disable Third-party Shell extensions in File Explorer’s Right-click Context menu.
Shell extensions are all the additional commands that are added to the right-click context menu of File Explorer to extend its functionality. Because many third-party programs (such as WinRAR, WinZip, etc.), add their own commands to the right-click menu, this may cause a problem with the functionality and performance of File Explorer on Windows 11.
To find out if a Shell extension is the culprit for the slow performance of File Explorer, do the following:
1. Download Download ShellExView for x64 utility in a ZIP file and extract it to a folder.
2. From the extracted folder run the shexview.exe application as administrator.


3. At Options menu, click on Hide All Microsoft Extensions.


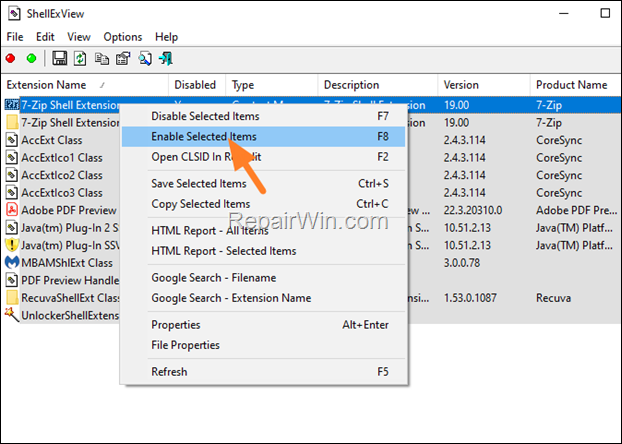
4. Now press CTRL + A to select all the third-party extensions and then right-click and select Disable Selected items. (or press “F7“).


.
5. Restart your computer and check if the problem persist. If not, then one of the installed third-party shell extensions is the culprit. At such case, open the ShellExView utility again and enable one by one the disabled extensions and restart your PC, until you find which one causes the problem. *
* Notes:
1. If the problem persists with all the third-party shell extensions disabled, then re-enable all of them and continue to next method.
2. To re-enable a shell extension, right-click on it and select “Enable Selected items“, or simply click on it and press “F8“


Method 7. FIX Slow File Explorer by Repairing Windows System Files.
Another method to fix the slowness of Windows 11 File Explorer continues is to repair the Windows system files.
1. Open Command Prompt as Administrator. To do that:
1. Press the Windows
+ R keys to open the ‘Run’ command box
2. Type CMD and then press CTRL + SHIFT + ENTER.


2. In command prompt give the following dism command and press Enter:
- DISM.exe /Online /Cleanup-image /Restorehealth


3. When the DISM operation is completed, type the following command and hit Enter:
- sfc /scannow


4. Now wait until the System File Checker repairs the Windows System Files.
5. When this done, restart your computer.
Method 8. Perform a Windows 11 Repair/Upgrade.
If, after following the above methods, File Explorer is still slow, try to repair Windows by using the instructions mentioned in this article: How To Repair Windows 11 With In-Place Upgrade.
That’s all folks! Did it work for you? If so, by what method?
Please leave a comment in the comment section below or even better: like and share this blog post in the social networks to help spread the word about this solution.


