If you try to open or change your printer’s properties and you face the error “Function address 0x00007FF… caused a protection fault. (exception code 0x00000505). Some or all properties page(s) may not be displayed”, continue below to fix the problem.
The error code 0x00000505 in Printer Properties usually occurs because of a corrupt printer driver. As a result of the error, the user cannot change some of the printer properties or cannot open the printer properties at all.
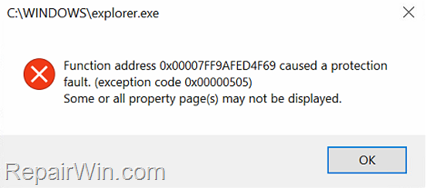

In this guide you’ll find step-by-step instructions to resolve the printer error “Function address caused a protection fault (0x00000505)” in Windows 10, 8 or 7 OS.
How to FIX: Cannot Open or Modify Printer Properties with Exception code 0x00000505.
To fix printer error 0x00000505 “Function address caused a protection fault”, you must completely remove the affected printer and its driver, and then reinstall the printer from scratch as described below:
Step 1. Stop Print Spooler Service & Clear Print Spooler Jobs.
1. Press Windows ![]()
![]() + R keys to open the run command box.
+ R keys to open the run command box.
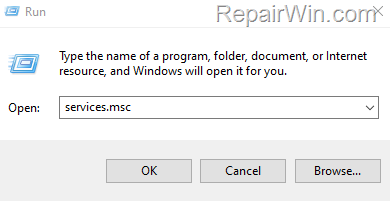
2. In the Search box, type: services.msc & click OK.

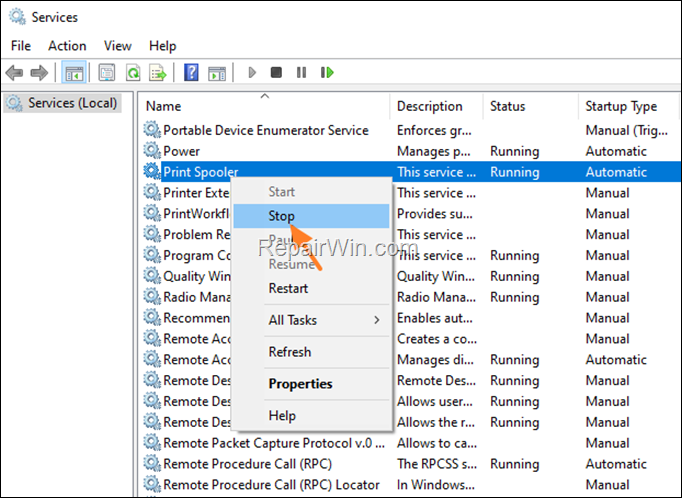
3. In Services panel, right-click on Print Spooler service and click Stop.

4. Without closing the Services window, open File Explorer and navigate to the following location on disk.
- C:Windowssystem32spoolprinters
5. Delete all files inside the “PRINTERS” folder and close Explorer to remove the print spooler jobs.
Step 2. Rename Print Processors subkeys in Registry.
1. Press Windows ![]()
![]() + R keys to open the run command box.
+ R keys to open the run command box.
2. Type regedit and press Enter.
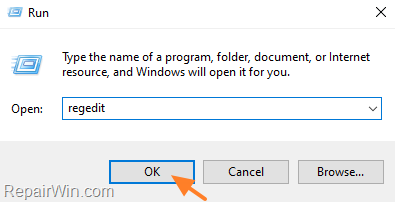

3. In Registry Editor navigate to the following key:
- HKEY_LOCAL_MACHINESYSTEMCurrentControlSetControlPrintEnvironmentsWindows x64Print Processors
4. Proceed and rename all the folders/subkeys under “Print Processors” key to .old *
* e.g. For example rename “winprint” key to “winprint.old”
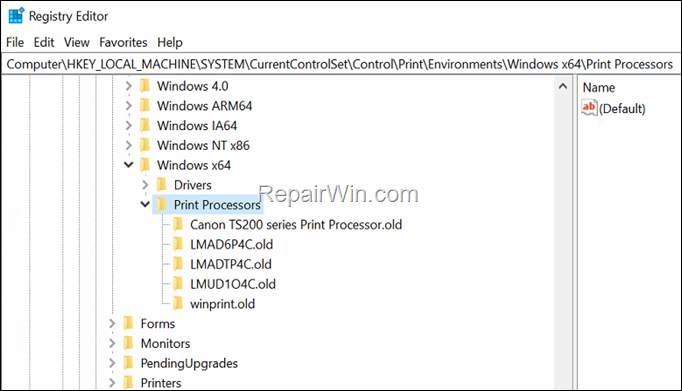

5. Keep the Registry Editor window open and continue to the next step
Step 3. Completely Remove Printer’s Drivers.
1. Press Windows ![]()
![]() + R keys to open the run command box.
+ R keys to open the run command box.
2. Type the following command and hit OK.
- printui.exe /s
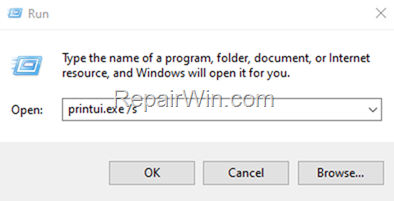

3. At Printer Server Properties window select the Drivers tab.
4. Now, select the affected printer and click Remove to delete its driver from your system.
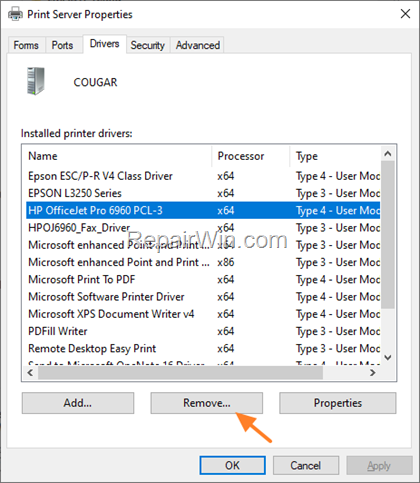

5. At the next window, select Remove driver and driver package and hit OK.
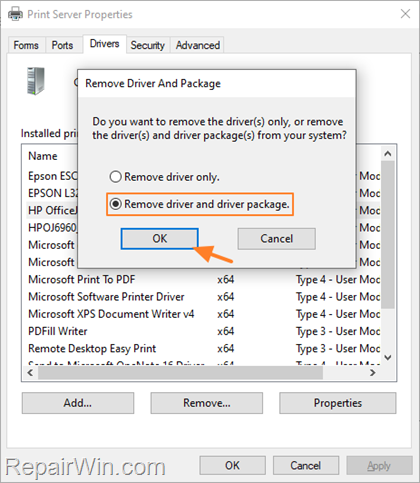

6. Finally, click Yes to delete the printer’s driver package, and then click the Delete button at the next window.
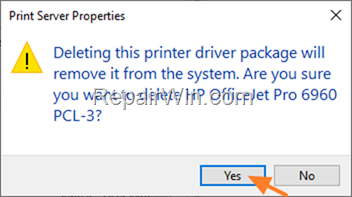

7. When the removal is done, close the ‘Printer Server Properties’ window and continue to next step.
Step 4. Restore Renamed Registry keys to their original name.
1. Back to Registry Editor, navigate again to the same location:
- HKEY_LOCAL_MACHINESYSTEMCurrentControlSetControlPrintEnvironmentsWindows x64Print Processors
2. Remove the .old extension from all subkeys you renamed before to restore their original name. *
* e.g. For example rename “winprint.old” key to “winprint”
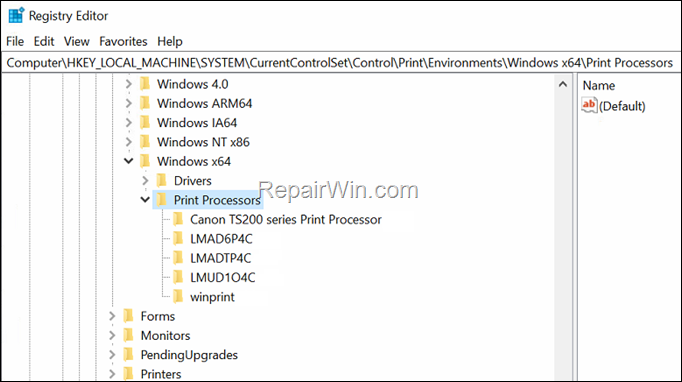

3. When done, close the Registry Editor.
Step 5. Start the Print Spooler Service.
1. In Services panel, right-click on Print Spooler service and click Start.
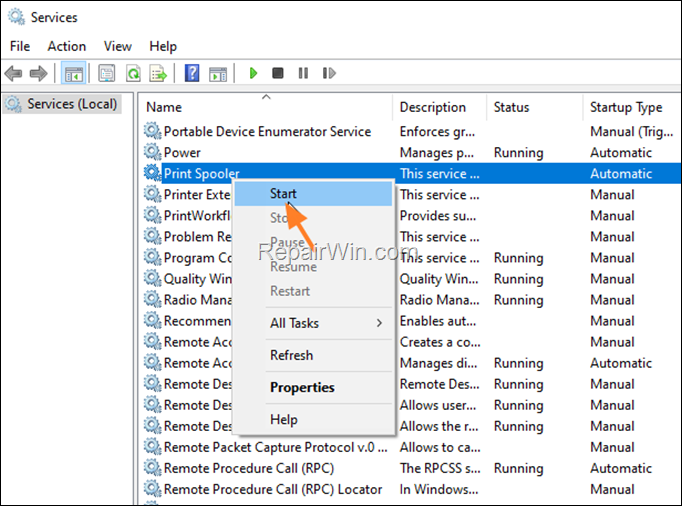

2. Close the Services window and continue to next step.
Step 6. Install your Printer.
1. Navigate to Control Panel > Devices and Printers.
2. Click Add a printer. *
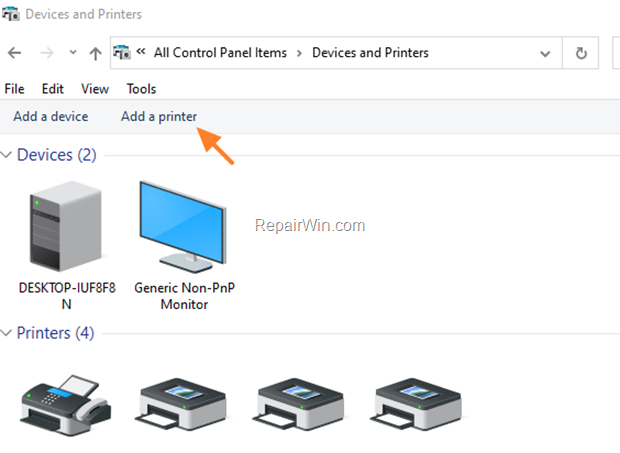

2. Let Windows to find your printer and follow the onscreen instructions to re-install it on your computer. *
* Note: If Windows cannot locate your printer try the following:
a. Restart your printer (Turn it off and turn it on again).
b. Restart your PC.
c. Navigate to the printer manufacturer’s support website and download and install the printer software manually.
3. After installation, you will be able to modify the printer properties without error.
That’s all folks! Did it work for you?
Please leave a comment in the comment section below or even better: like and share this blog post in the social networks to help spread the word about this.


