.single .post-author, .post-date {
text-transform: none;
}
,
Last updated: July 3rd, 2024
A few days ago I tried to delete all volumes of a hard disk on a DELL laptop, using the DISKPART utility via the WinRE Command Prompt. But after giving the “list disk” command, I received the message “There are no fixed disks to show”.
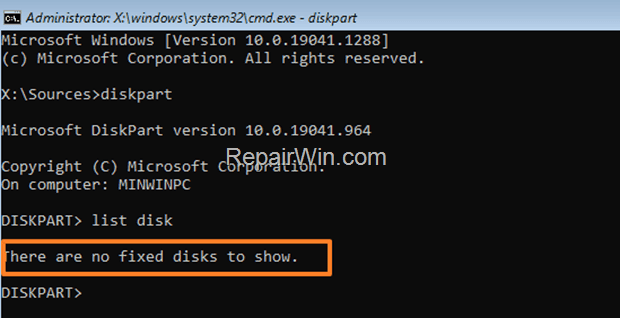

The error message “No fixed disks to display” in DISKPART, may appear for one of the following reasons:
- There is no disk installed on your system
- The disk is damaged.
- The SATA Operation mode in BIOS is configured as RAID and not as AHCI/NVMe.*
- Missing Device Driver for the Storage Controller.*
* Note: Usually in Dell or HP laptops.
How to FIX “No Fixed disk to show” in DISKPART.
If you unable to see the disk in DISKPART because of error “There are no fixed disks to show”, continue reading below to fix the problem.
1.Make sure the disk is properly connected to the computer and recognized in the BIOS.
2. Make sure that the disk is not damaged. To determine that the disk is okay, connect it to another computer and use one of the hard disk diagnostic tools mentioned in this guide.
Method 1. Change the SATA Mode in BIOS.
The easiest method to solve the problem “There are no fixed disks to show” in DISKPART, is to change the SATA Mode in BIOS settings. To do that:
1. Turn On your system and and when you see the manufacturer’s logo press the corresponding key* to enter into BIOS SETUP.
* Usually is the DEL or F1 or F2 or F10 key. (depends on manufacturer)
2. Find and change the SATA Mode from RAID to AHCI.*
* Note: In DELL laptops, this setting is under System Configuration > SATA operation.
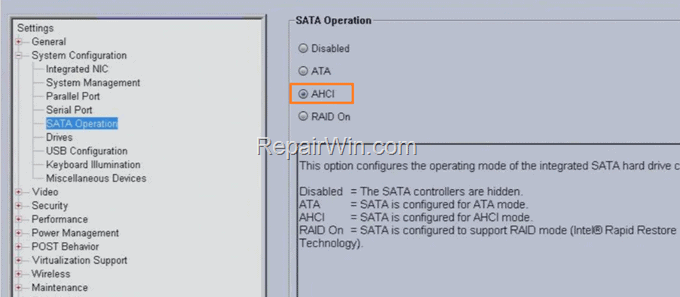

3. Save settings and EXIT BIOS Setup.
4. Now run the DISKPART tool again and normally this time you’ll see the drive after giving the “list disk” command.
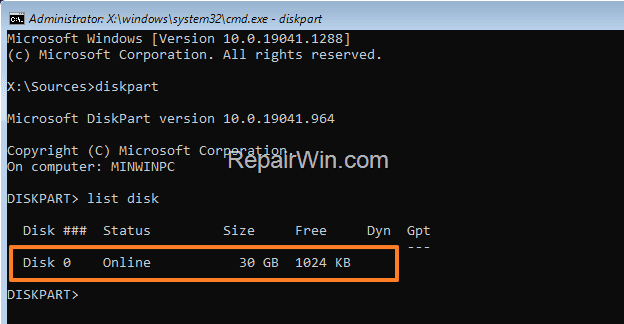

Method 2. Add Missing INTEL RST Drivers to USB.
The second method to fix the problem “no fixed disks to show” in diskpart, is to include the missing INTEL storage controller drivers to your USB Windows installation media. To do that:
1. From another computer, navigate to Intel® Rapid Storage Technology Driver download page.
2. Click Download F6flpy-x64 – VMD.zip.
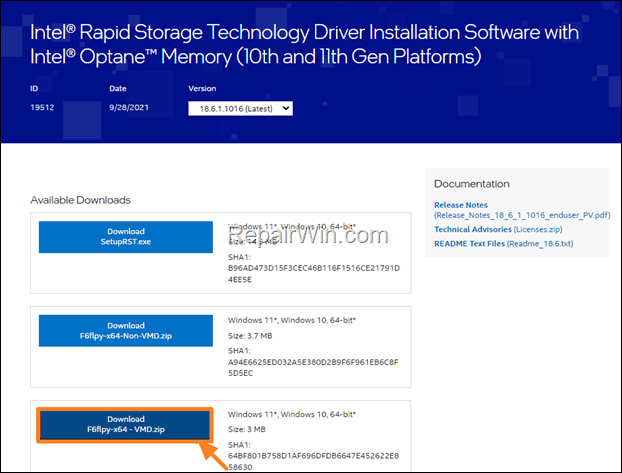

3. When the download is completed copy the downloaded zip file to your USB Windows Installation Media.
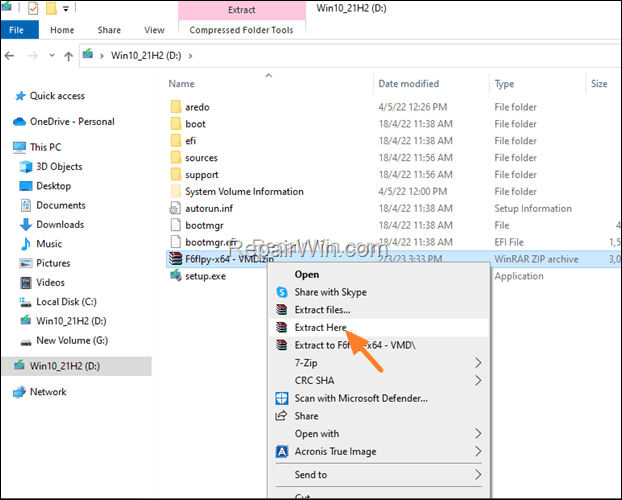
4. Then right-click on the F6flpy-x64 – VMD.zip file and choose Extract Here to extract it inside the USB drive.

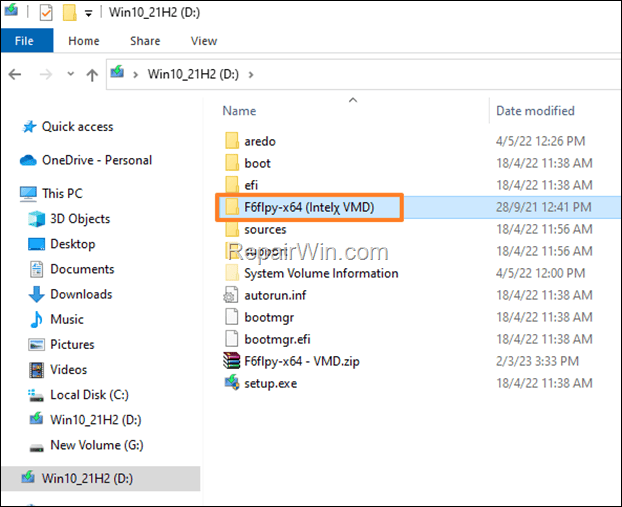
5. After extracting the ZIP file you should have a new folder inside the USB installation media named “F6flpy-x64 (Intelχ VMD) “

6. Unplug the USB drive and plug it into the laptop you’re getting the message “No hard drives to show”.
7. Turn on the affected laptop and boot from the modified USB Windows 10/11 Installation media.
8. Click Next at the first screen, then click Install Now and then Accept the License Terms.
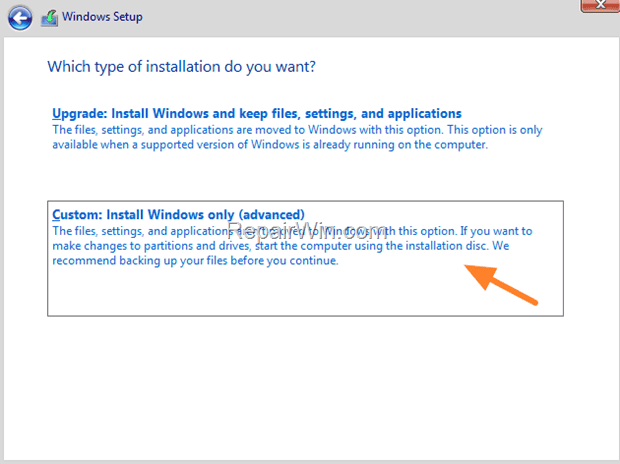
9. At the next screen choose Custom Install.

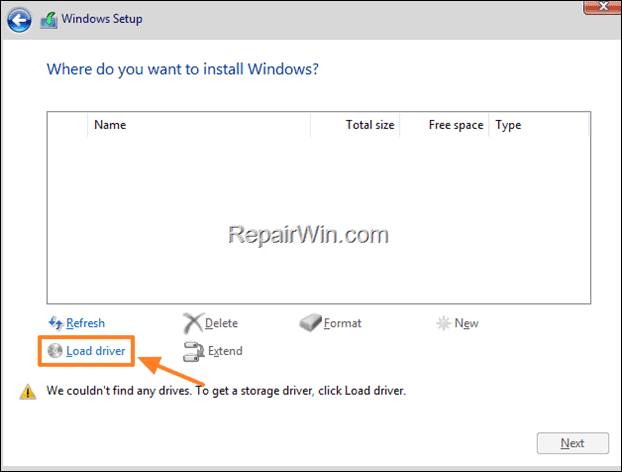
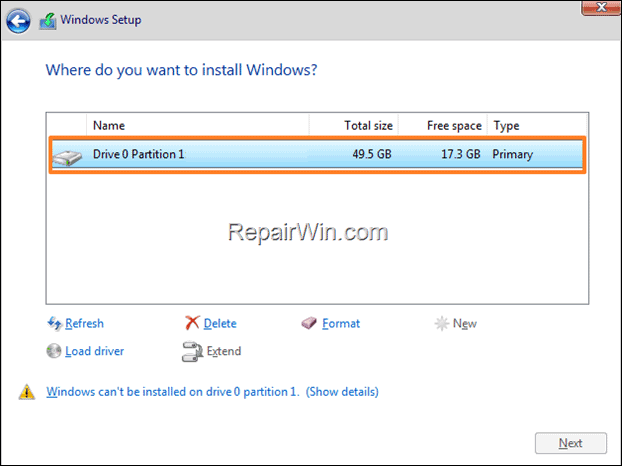
10. At “Where do you want to install Windows?” screen, click Load driver.

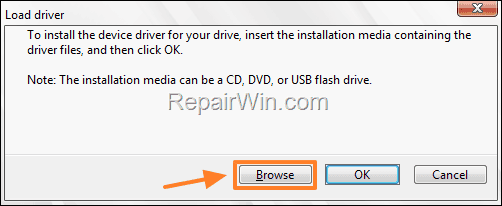
11. Click Browse at Load driver window.

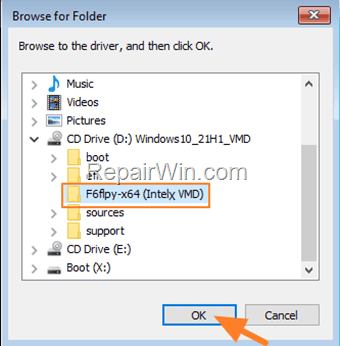
12. From the USB drive, select the “F6flpy-x64 (Intelχ VMD)” folder and click OK.

13. Select the Intel RST VMD Controller and select Next.
14. After doing the above, you should be able to see the drive with its partitions.*
* Note: If you own an HP laptop and don’t see the drive at this point, read the Additional Help at the end of this article.

15. Now, press SHIFT + F10 to open Command Prompt.
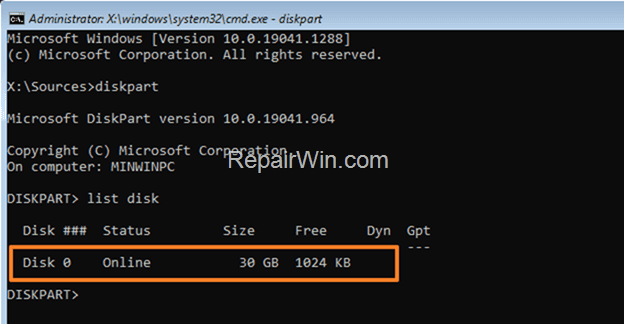
16. Finally, type diskpart tool and then list disk to see the installed disk.

* Additional Help.
If Windows cannot “see” the drive using the Intel RST drivers as described above, do the following:
1. Navigate to HP Laptop Software & Drivers Download page.
2. Type your Laptop’s serial number and click Submit to navigate to the Software and Drivers pages for your product
3. Under Driver select Storage and download the Intel RST driver (RAID) driver.
4. Copy the downloaded “spxxxxxx” file to your USB Windows installation media.
5. Right-click on the file, select Extract to, to extract its contents to the USB drive.
6. Follow the steps 1-5 above and at step-6 (Browse for Folder), open the “spxxxxxx” folder , then open the “F6” folder, select the “VMD” folder and click OK.
7. After the disk is recognized, follow the steps 8 & 9 above to continue to Windows installation.
That’s all folks! Did it work for you? If so, by what method?
Please leave a comment in the comment section below or even better: like and share this blog post in the social networks to help spread the word about this.

- Author
- Recent Posts
- FIX: There are no fixed disks to show in DISKPART (Solved) – July 3, 2024
- Cannot Print in Color in Excel. (Quick FIX) – June 26, 2024
- FIX: A VPN connection to the remote computer could not be established. You might need to change the network settings for this connection. (Solved) – June 18, 2024


