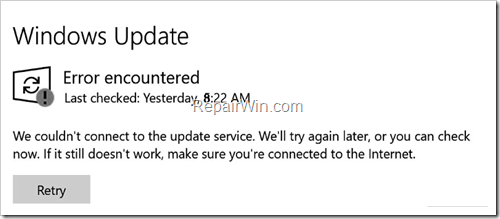
This tutorial contains instructions to fix the following error in Windows 10 update: “We couldn’t connect to the update service. We’ll try again later, or you can check now. If it still doesn’t work, make sure you’re connected to the Internet.”
Microsoft is aware of the above update problem and as it has announced at February 4, 2019: “The Windows Update service was impacted by a data corruption issue in an external DNS service provider global outage on January 29, 2019. The issue was resolved on the same day and Windows Update is now operating normally, but a few customers have continued to report issues connecting to the Windows Update service. We expect these issues will go away as downstream DNS servers are updated with the corrected Windows Update DNS entries”.
Because many users reported, that the problem has not fixed yet, and impacts also the Windows Defender (cannot update Defender definitions) and the Microsoft Store (Store is not working), read the instructions below to resolve any update issues in Windows 10, or in Windows Defender and in Windows Store.
How to FIX: Could Not Connect to Update Service in Windows 10.
Method 1. Change DNS Settings
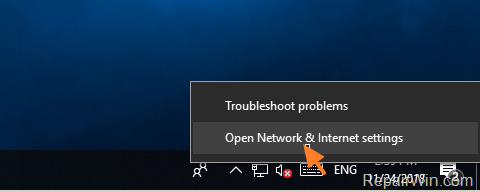
1. Right click on the Network icon ![]() in Taskbar and click Open Network and Sharing Center. *
in Taskbar and click Open Network and Sharing Center. *
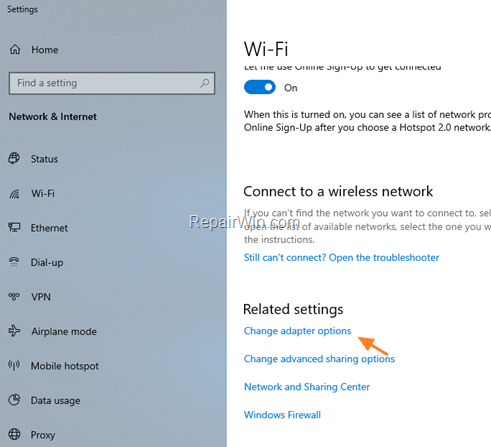
2. Select Ethernet (or Wi-Fi) on the left, and then at ‘Related settings’ section, click Change adapter options.
3. Right click on the active Network Adapter (Ethernet or Wi-Fi) and select Properties.
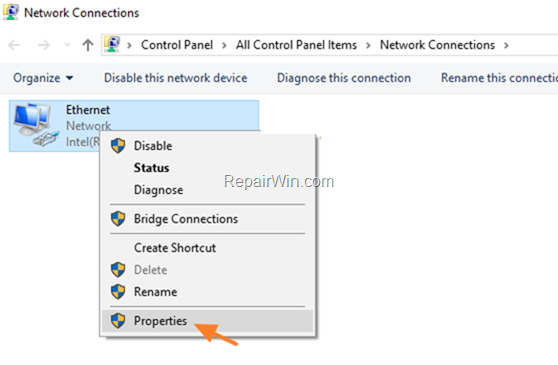
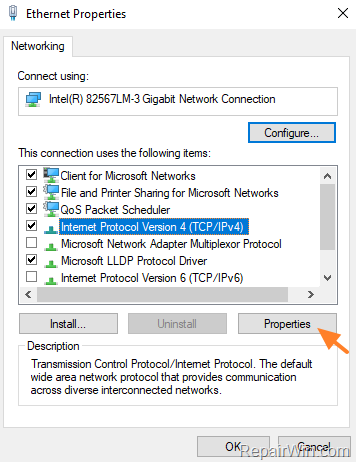
4. Select the ‘Internet Protocol Version 4 (TCP/IPv4)’ and click Properties
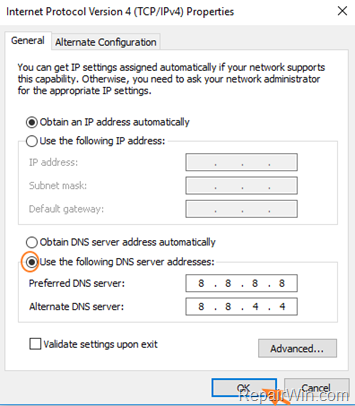
5. At Internet Protocol Version 4 (TCP/IPv4) properties:
a. Check the Use the following DNS server addresses: radio button.
b. Then, type the following DNS server addresses (Google’s public DNS Servers) and click OK.
- 8.8.8.8
- 8.8.4.4
6. Restart your computer.
Method 2. Run the Windows Update Troubleshooter.
Method 2. Run the Windows Update Troubleshooter.
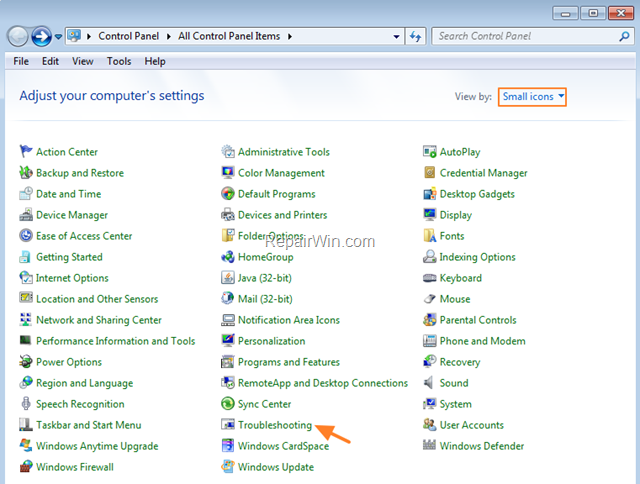
1. Navigate to Windows Control Panel, set the ‘View By’ to Small icons and open Troubleshooting.
2. In Troubleshooting options, click Fix problems with Windows Update.
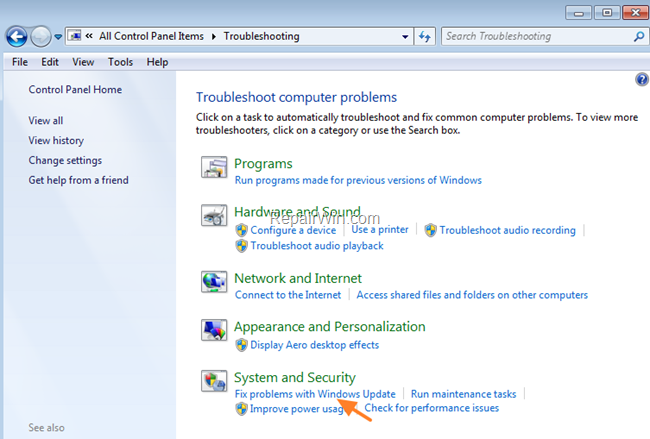
3. Click Next to troubleshoot Windows update problems.
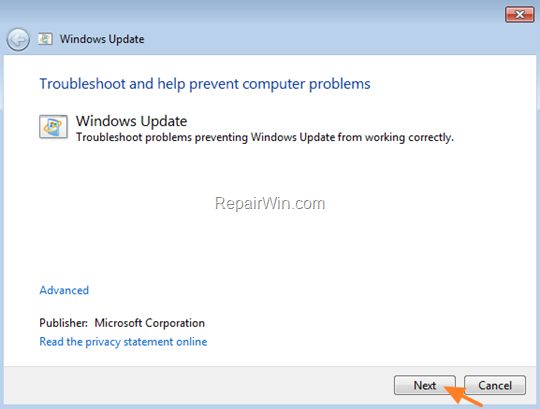
5. When the troubleshooting process is complete, close the troubleshooter and restart your PC.
6. Check for updates.
Method 3. Delete the Update Store Folder.
The “C:WindowsSoftwareDistribution“, is the location where Windows stores the Windows Updates. Many times this folder becomes corrupted and you must re-create it in order to download updates and install from scratch. To rebuild (re-create) the “SoftwareDistribution” folder follow the steps below:
Step 1: Stop the Windows Update Service.
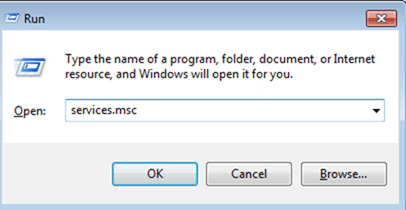
1. Press Windows ![]() + R keys to open the run command box.
+ R keys to open the run command box.
2. In the Search box, type: services.msc & click OK.
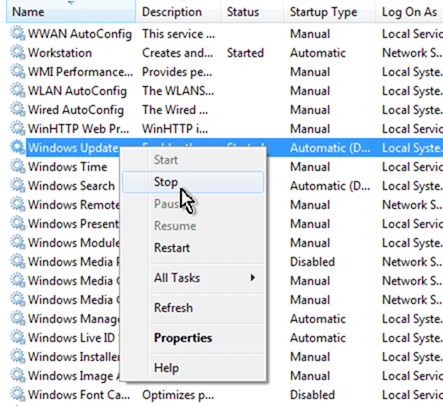
3. In Services control panel locate the Windows Update service.
4. Right-click on Windows Update service and select Stop.
Step 2: Delete the SoftwareDistribution folder.
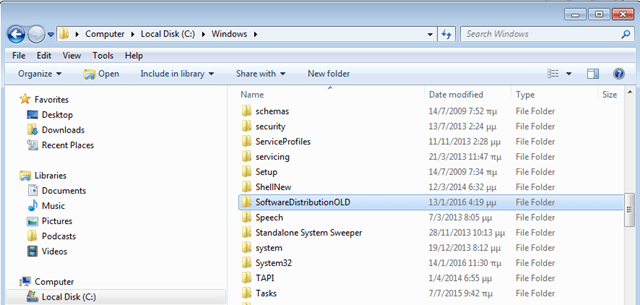
1. Open Windows Explorer and navigate to: C:Windows folder.
2. Find and Delete the SoftwareDistribution folder (or rename it. e.g. to “SoftwareDistributionOLD”) .
Step 3: Start the Windows Update Service.
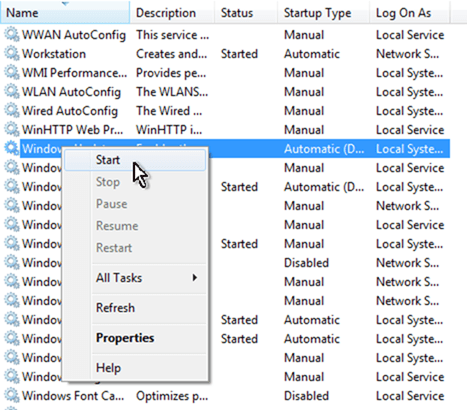
1. Open Windows Services control panel.
2. Right-click on Windows Update service and select Start.
Step 4: Check and Install Windows 10 Update.
1. Navigate to Settings -> Update and Security and click Check for Updates.
That’s all folks! Did it work for you?
Please leave a comment in the comment section below or even better: like and share this blog post in the social networks to help spread the word about this solution.

