If Windows 10 Search crashes and Explorer restarts, continue reading below to fix the problem.
Problem description: Whenever the search function is used in Windows 10, the searching interrupted and causes Windows Explorer to restart, with the following error in Event Viewer (Application Event Log):
“Faulting application name: SearchApp.exe, version: 10.0.19041.964, time stamp: 0x49647dad
Faulting module name: KERNELBASE.dll, version: 10.0.19041.964, time stamp: 0x812662a7
Exception code: 0xc0000409
Fault offset: 0x000000000010b39c
Faulting process id: 0xb88
Faulting application start time: 0x01d756be7ec4f8d9
Faulting application path: C:WINDOWSSystemAppsMicrosoft.Windows.Search_cw5n1h2txyewySearchApp.exe
Faulting module path: C:WINDOWSSystem32KERNELBASE.dll
Report Id: 23442324-288c-4545-9b27-a8bdc59dd81b
Faulting package full name: Microsoft.Windows.Search_1.14.1.19041_neutral_neutral_cw5n1h2txyewy
Faulting package-relative application ID: CortanaUI
This guide contains several solutions to solve the following problem in Windows 10 “The Search stops and closes and the Windows Explorer restarts”.
How to FIX: Windows 10 SearchApp.exe Crashes and Closes.
Method 1. Delete Corrupt Registry Entries for ‘Search’.
Usually when the Windows Search is not working, this indicates a corrupted entry in ‘Search’ registry key. To delete corrupted ‘Search’ registry entries, proceed as follows:
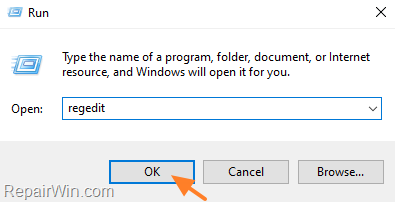
1. Open Registry Editor: to do that:
1. Press Windows
+ R keys to open the run command box.
2. Type regedit and press Enter.
3. In Registry Editor navigate to the following key at the left pane:
- HKEY_CURRENT_USERSOFTWAREMicrosoftWindowsCurrentVersionSearch
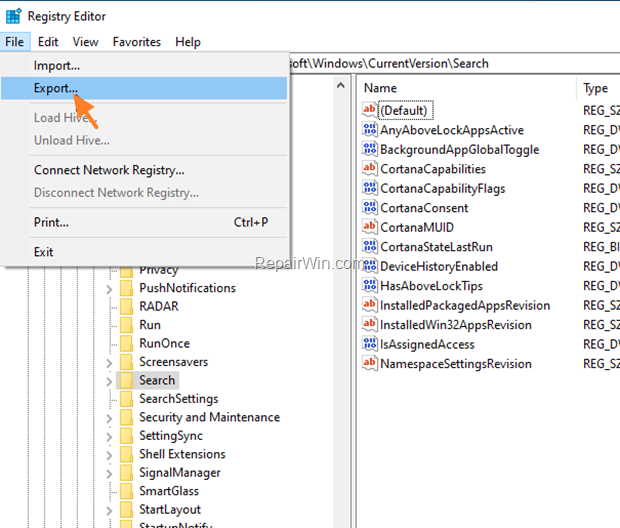
4. Highlight the Search key on left pane and go to File > Export to take a backup of the current registry entries in case something goes wrong.
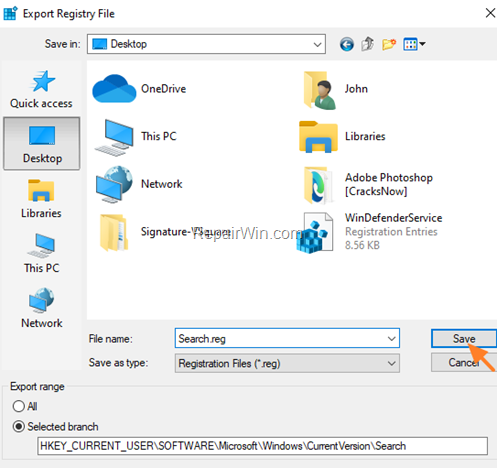
5. Give a name for the exported registry file (e.g. “Search.reg”) and Save the file to your Desktop.
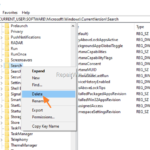
6. When done, right-click at the Search key and Delete it. (Click Yes when prompted).
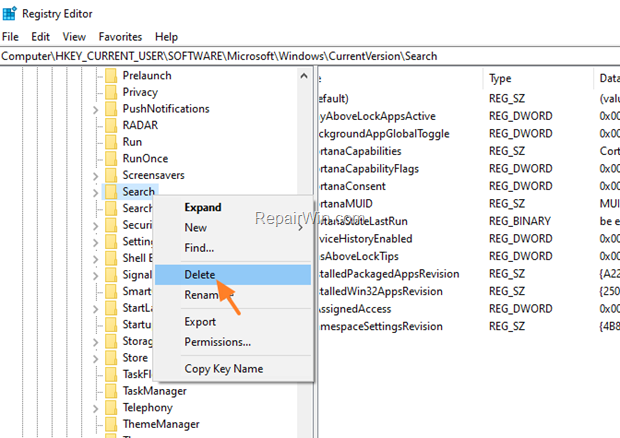
7. Close the Registry Editor and restart your PC.
8. After restart, try 2-3 times to perform a search. (At first nothing will happen, but after trying 2-3 times the Search will start working without crashing)
Method 2. Stop Windows 10 Search crashes using PowerShell.
Another method to fix interruptions when searching for Windows 10, is to reset the Windows 10 Search function with a PowerShell Script.
1. Download the Reset Windows Search PowerShell script from Microsoft.
2. Right-click at the download file and select Run with PowerShell.
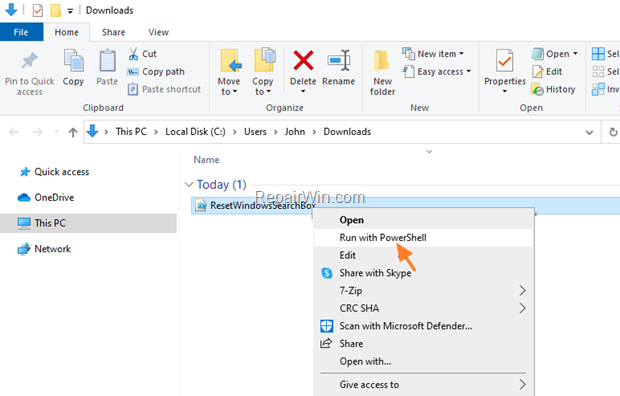
3. At Execution Policy Change notification press Y (yes) and then hit Enter. *
* Note: If – at this point – you receive the error “ResetWindowsSearchBox.ps1 cannot be loaded because running scripts is disabled on this system”, follow the instructions to allow running scripts in this tutorial and then come back here and run the script again.

4. At UAC warming click Yes.

5. When the ‘Resetting Windows Search Box’ process is completed, close the PowerShell window and check if the Search function is working normally with crash.
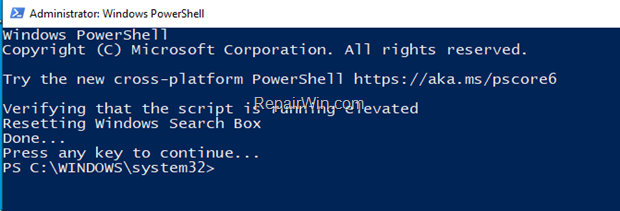
Method 3. Re-Install & Re-Register the Cortana App to fix crashes during Search.
1. Open PowerShell as Administrator. To do that:
1. Press the Windows
+ R keys to open the ‘Run’ command box
2. Type powershell and then press CTRL + SHIFT + ENTER.

2. At PowerShell and according your Windows 10 version, copy/paste the corresponding command below and press Enter:
For Windows 10 2004 or later, give this command:
- Get-AppxPackage Microsoft.549981C3F5F10 | Foreach {Add-AppxPackage -DisableDevelopmentMode -Register “$($_.InstallLocation)AppXManifest.xml”}

For Windows 10 1909 or lower, give this command:
- Get-AppXPackage -AllUsers | Foreach {Add-AppxPackage -DisableDevelopmentMode -Register “$($_.InstallLocation)AppXManifest.xml”}

3. When the command is completed, restart your computer and try to search.
Method 4. Repair Windows System Files.
The next method to resolve the search problems in Windows 10, is to repair Windows by using the DISM and SFC commands.
1. Open Command Prompt as Administrator. To do that:
1. Press the Windows ![]() + R keys to open the ‘Run’ command box
+ R keys to open the ‘Run’ command box
2. Type CMD and then press CTRL + SHIFT + ENTER.
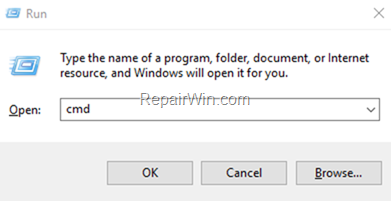
2. In command prompt give the following dism command and press Enter:
- DISM.exe /Online /Cleanup-image /Restorehealth

3. When the DISM operation is completed, type the following command and hit Enter:
- sfc /scannow

4. Now wait until the System File Checker repairs the Windows System Files.
5. When this done, restart your computer.
Method 5. Perform a Windows 10 Repair.
If you still face problems with the search function in Windows 10, then perform a repair of your Windows 10 installation by using the instructions mentioned in this article: How to repair Windows 10.
That’s all folks! Did it work for you?
Please leave a comment in the comment section below or even better: like and share this blog post in the social networks to help spread the word about this solution.

