Until today, I have encountered many problems with the ‘Search’ function in Windows Explorer and the Cortana in Windows 10 computers. The most common search problems in Windows 10 are the following: The search is not working at all (not showing results), or your cannot type anything in Cortana’s search box.
This tutorial contains step-by-step instructions to resolve the Cortana search problems in Windows 10.
How to FIX Search Problems in Windows 10.
Method 1. Force Restart the Explorer & Cortana Processes.
If you face search problems, when using Cortana search, then perform the following:
1. Press Ctrl + Alt + Del to open Task Manager.
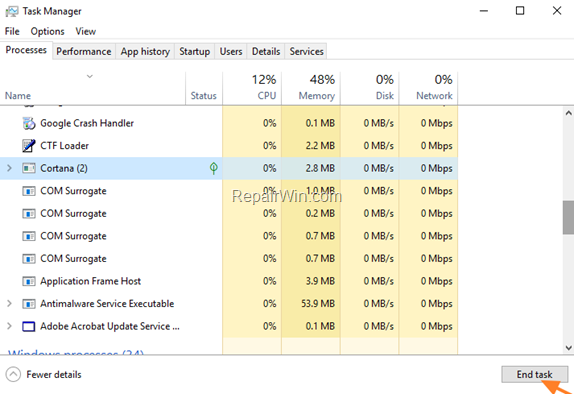
2. At Processes * tab:
a. Highlight the Cortana process and click End Task.
* Note: If you don’t see the ‘Process’ tab, click More Details.
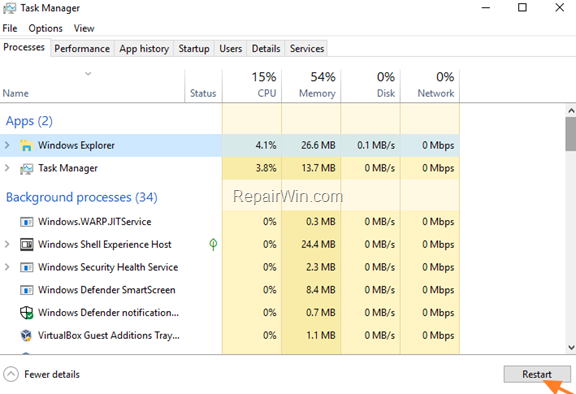
b Then highlight the Windows Explorer process and choose Restart.
3. Close the Task manager and try to search with Cortana. If the search doesn’t work, then continue below.
Method 2. Run the Search Troubleshooter.
1. Go to Settings ![]() -> Update and Security.
-> Update and Security.
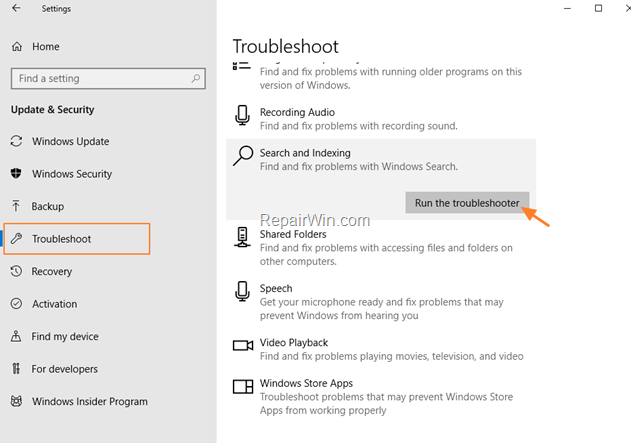
2. Select Troubleshoot on the left and then click Search and indexing > Run the Troubleshooter.
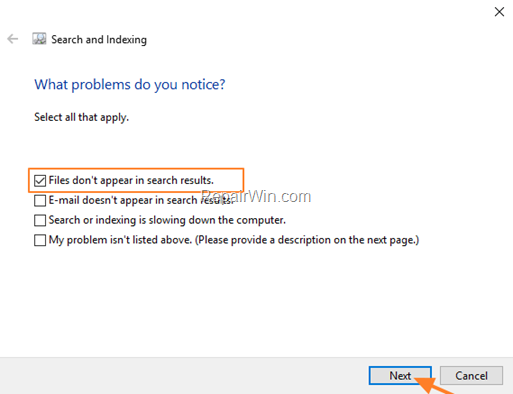
3. Select Files don’t appear in search results and click Next.
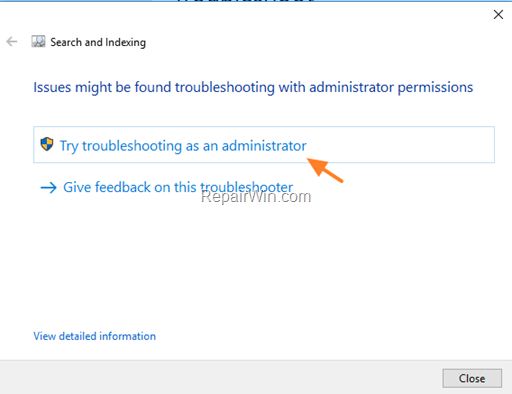
4. At the next screen, choose Try troubleshooting as an administrator and follow the onscreen instructions to resolve the search problems.
5. If the search troubleshooter cannot identify (fix) the problem, then proceed below.
Method 3. Reregister the Cortana App.
1. Open PowerShell as Administrator. To do that:
1. Press the Windows ![]() + R keys to open the ‘Run’ command box
+ R keys to open the ‘Run’ command box
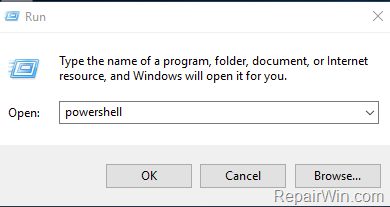
2. Type powershell and then press CTRL + SHIFT + ENTER.
2. At PowerShell and according your Windows 10 version, copy/paste the corresponding command below and press Enter:
For Windows 10 2004 or later, give this command:
- Get-AppxPackage Microsoft.549981C3F5F10 | Foreach {Add-AppxPackage -DisableDevelopmentMode -Register “$($_.InstallLocation)AppXManifest.xml”}
For Windows 10 1909 or lower, give this command:
- Get-AppXPackage -AllUsers | Foreach {Add-AppxPackage -DisableDevelopmentMode -Register “$($_.InstallLocation)AppXManifest.xml”}

3. When the command is completed, restart your computer and try to search.
Method 4. Rebuild the Search Index.
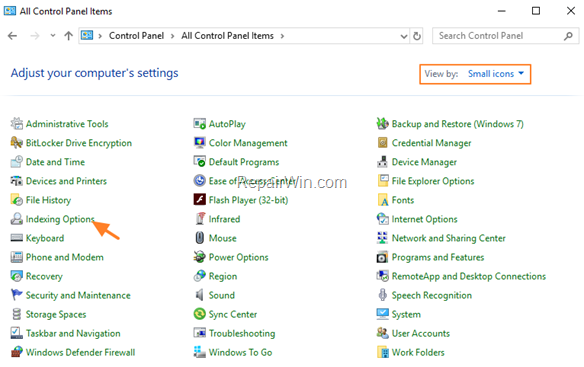
1. Navigate to Windows Control Panel and click Indexing Options. *
* (If you don’t see the Indexing options, set the View (View by) to Small icons)
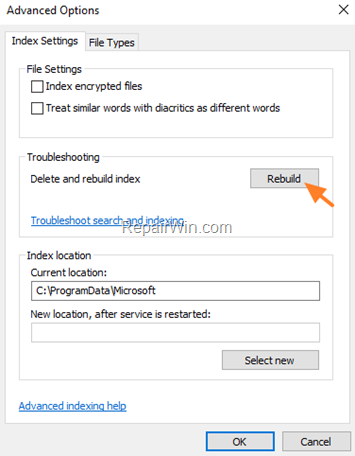
2. At Indexing Options click Advanced.

3. At ‘Index settings’ tab, click the Rebuild button.
4. Press OK to rebuild the Index.
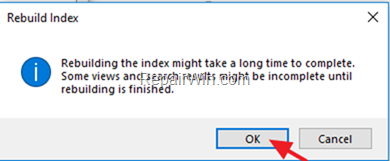
5. Wait the index rebuilding process to complete and then restart your computer.
6. After restart, check the search function.
Method 5. Repair Windows System Files.
The next method to resolve the search problems in Windows 10, is to repair Windows by using the DISM and SFC commands.
1. Open Command Prompt as Administrator. To do that:
1. Press the Windows ![]() + R keys to open the ‘Run’ command box
+ R keys to open the ‘Run’ command box
2. Type CMD and then press CTRL + SHIFT + ENTER.
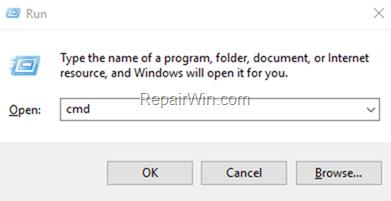
2. In command prompt give the following dism command and press Enter:
- DISM.exe /Online /Cleanup-image /Restorehealth

3. When the DISM operation is completed, type the following command and hit Enter:
- sfc /scannow

4. Now wait until the System File Checker repairs the Windows System Files.
5. When this done, restart your computer.
6. Try to perform a search.
Method 6. Create a new User Account.
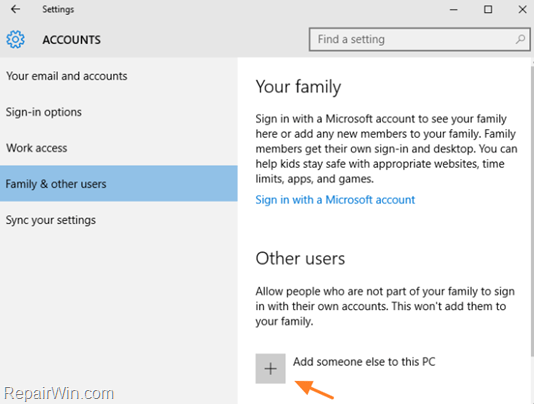
1. Open Settings > Accounts.
2. Select Family & other users on the left and click Add someone else on this PC.
3. At ‘How will this person sign in’ screen, click “I don’t have this person’s sign-in information“.
4. At ‘Let’s create your account’ screen, click at “Add a user without a Microsoft account“.
5. Type a username (& password if you want) & click Next.
6. Then click at the new user and select the Change account type button.
7. Set the new user as Administrator & hit OK.
8. Sign-out from your account and sign-in with the new user account.
9. Check if the search is working. If yes, then transfer your files and settings to the new user account.
Method 7. Perform a Windows 10 Repair.
If you still face problems with the search function in Windows 10 , then perform a repair of your Windows 10 installation by using the instructions mentioned in this article:
- How to repair Windows 10.
That’s all folks! Did it work for you?
Please leave a comment in the comment section below or even better: like and share this blog post in the social networks to help spread the word about this solution.
For Windows 10 2004 or later, give this command:
- Get-AppxPackage Microsoft.549981C3F5F10 | Foreach {Add-AppxPackage -DisableDevelopmentMode -Register “$($_.InstallLocation)AppXManifest.xml”}
For Windows 10 1909 or lower, give this command:
- Get-AppXPackage -AllUsers | Foreach {Add-AppxPackage -DisableDevelopmentMode -Register “$($_.InstallLocation)AppXManifest.xml”}


