This tutorial contains instructions to fix the Windows 10 Upgrade Error 0x800711C7 – 0x2000A: “The installation failed in the SAFE_OS phase with an error during PREPARE_FIRST_BOOT”.
Windows 10 Upgrade Problem 0x800711C7 – 0x2000A in details: When you try to upgrade Windows 10 to the latest version (build) the installation stops with error “We couldn’t install Windows 10 – 0x800711C7 – 0x2000A – The installation failed in the SAFE_OS phase with an error during PREPARE_FIRST_BOOT”, and then reverts back to the previous Windows version.
How to Fix Windows 10 v1809 Update Installation Error 0x800711C7 – 0x2000A
Nội dung
Method 1. Disable Device Guard from PowerShell.
The error 0x800711C7 – 0x2000A in Windows 10 upgrade, appears in systems with the “Device Guard” enabled, So, the first method to resolve the error 0x800711C7 – 0x2000A in Windows 10 update, is to disable the Device Guard on your system.
1. Proceed and Download the Device Guard and Credential Guard hardware readiness tool from Microsoft.
2. When the download is completed extract the “dgreadiness”_v3.6.zip file.
3. Open the extracted folder and from the File menu choose Open Windows PowerShell as administrator.
4. At PowerShell type the following command to allow (set) the Execution Policy to run scripts (Press A when asked to change the execution policy).
- Set-ExecutionPolicy Unrestricted
5. Then give this command to disable the Device Guard and the Credential Guard:
- .DG_Readiness_Tool_v3.6 -Disable
6. After command execution, reboot the computer.
7. Try to update Windows 10. *
* Note: After updating Windows 10, follow the same procedure to enable the Device Guard and the Credential Guard, with these commands:
- Set-ExecutionPolicy Unrestricted
- .DG_Readiness_Tool_v3.6 -Enable
Method 2. Disable Hyper-V from Command Prompt.
The next method to resolve the error 0x800711C7 – 0x2000A in Windows 10 upgrade, is to disable the hypervisor at Windows boot.
1. Open command prompt as Administrator.
2. Type the following command to disable the Hyper-V at Windows startup.
- bcdedit /set hypervisorlaunchtype off
3. Reboot your PC.
4. Try to install the update.*
* Note: After updating Windows 10, give the following command to automatically start Hypervisor when the computer starts up:
- bcdedit /set hypervisorlaunchtype auto
Method 3. Disable the Secure Boot from BIOS settings.
Another cause of the Windows 10 update error 0x800711C7 – 0x2000A, is the Secure Boot. So, proceed and disable the Secure Boot from BIOS settings. To do that:
1. Power On your system and immediately press the corresponding key* to enter into BIOS SETUP.
* Note: Usually to enter in BIOS, you have to press the DEL or F1 or F2 or the F10 key. (depends on manufacturer)
2. Look at Security or at Boot Options, or at Authentication settings,* to find the Secure Boot option and Disable it.
* Notes:
1.The location of the ‘Secure Boot’ setting in BIOS, depends on device’s manufacturer.
2. If you cannot find the ‘Secure Boot’ setting, then Disable the CSM Support and then Save and Exit form BIOS setup. Then enter into BIOS setup again to find the Secure Boot.
3. Save settings and EXIT BIOS Setup.
4. Let Windows to boot normally and try to install the update. If the update fails again, then re-enable the ‘Secure Boot’ and continue to next method.
Method 4. Update Windows 10 by using the Update Assistant
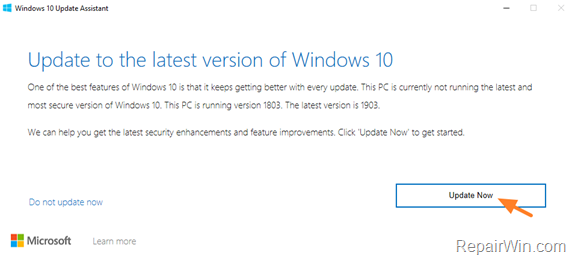
1. Navigate to Windows 10 download site and click the Update now button.
2. Save the “Windows10Upgrade9252.exe” file on your desktop.
3. Double click at the downloaded file to open the Windows Upgrade Assistant.
4. Click Update Now to start the update.
5. Let Windows to finish the downloading and the verification.
6. When the verification is reaches 100%, disconnect your computer from the Internet, or set it to “Airplane mode“.
7. Wait until Windows updating your system.
8. When prompted, restart your system to install the update.
That’s all folks! Did it work for you? Please leave a comment in the comment section below or even better: like and share this blog post in the social networks to help spread the word about this solution.
Bài liên quan
- FIX: Error 0x81000203 in System Restore. (Solved)
- Cannot Access Shared folder. User has not been granted the requested logon type at this computer. (Solved)
- FIX: Cannot clear TPM – 0x80284001, 0x80290300 or 0x80290304.
- Unable to Schedule Teams Meeting in 15 or 10 minutes slots (Solved)
- How to Share Folder without Username/Password on Windows 10/11.
- FIX: Thunderbird High CPU or Memory Usage issues.


