This tutorial contains instructions to resolve the following error in Windows 10 Apps Troubleshooter: “Windows Store Cache may be Damaged – Not Fixed”.
The Windows Apps Troubleshooter, in Windows 10, helps you to repair problems with the Windows Store App and the Windows Store Apps, but,
sometimes the Apps troubleshooter itself, is not enough to fix the problems, especially if it gives the error “Windows Store Cache may be damaged”.
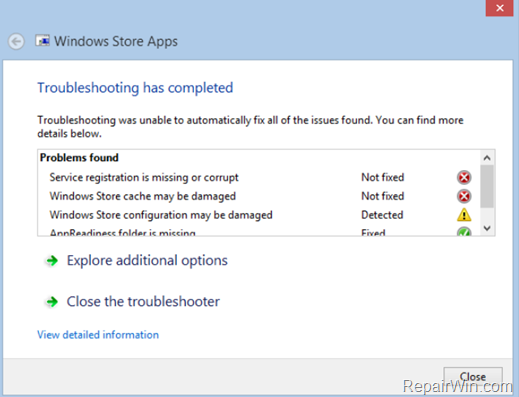
In this tutorial you ‘ll find instructions to fix the damaged Windows Store Cache in Windows 10.
How to Fix: Windows 10 Store Apps troubleshooter – Windows Store Cache may be Damaged.
Method 1. Fix Damaged Windows Store Cache using Apps troubleshooter utility.
The first method to resolve the “Windows Store Cache may be Damaged” problem is to run Microsoft’s Apps Troubleshooter utility. to do that go to:
1. Start menu ![]() –> Settings
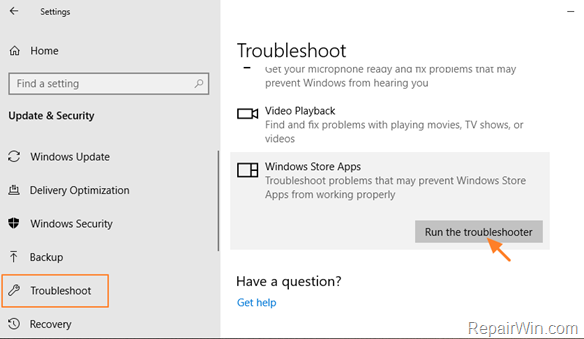
–> Settings ![]() –> Update & Security –> Troubleshoot –> Windows Store Apps and click Run the troubleshooter.
–> Update & Security –> Troubleshoot –> Windows Store Apps and click Run the troubleshooter.
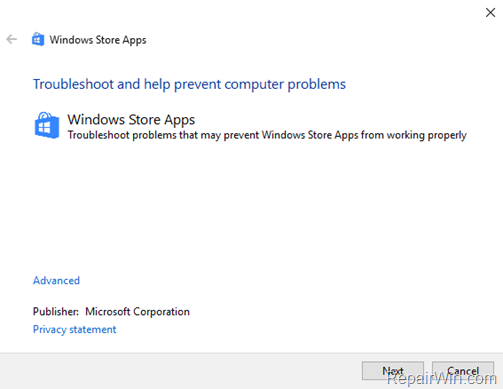
2. Click Next and let the troubleshooter to fix the problem.
3. Finally, close the troubleshooter and then check if your problem is solved.
Method 2. Reset Windows Store Cache.
The second method to fix the “Windows Store Cache may be Damaged” problem, is to reset the Windows Store Cache. To do that:
1. Press Windows ![]() + R keys to open the run command box.
+ R keys to open the run command box.
2. Type wsreset.exe and press Enter.
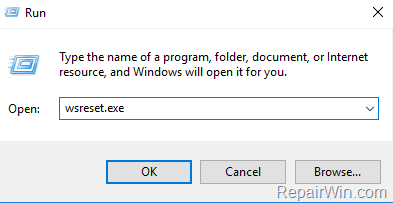
3. Check if the store apps are working. If not, then run the Apps Troubleshooter again.
Method 3. Create a new Cache folder for Windows Store.
1. Press Windows ![]() + R keys to open the run command box.
+ R keys to open the run command box.
2. Type %LocalAppData%PackagesMicrosoft.WindowsStore_8wekyb3d8bbweLocalState and press Enter. *
* Full path = C:Users<USERNAME>AppDataLocalPackagesMicrosoft.WindowsStore_8wekyb3d8bbweLocalState
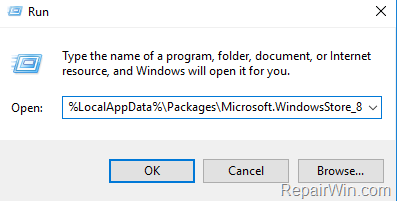
3. In LocalState folder:
a. If you see a folder named “Cache”, then rename it to “Cache.OLD”
b. Create a new folder and name it Cache.

4. Restart the computer.
5. Run the troubleshooter. If the problem persists continue to next method.
Method 4. Create a new User Account on your computer.
Use this method to create an new local account on your computer (with Administrative privileges) and sign-in with the new account. If the Store Apps are working, then transfer your personal data from the old account to the new one.
1. Open Command Prompt as Administrator. To do that:
- At the search box type: command prompt or cmd
- Right-click at Command Prompt result and select Run As Administrator.
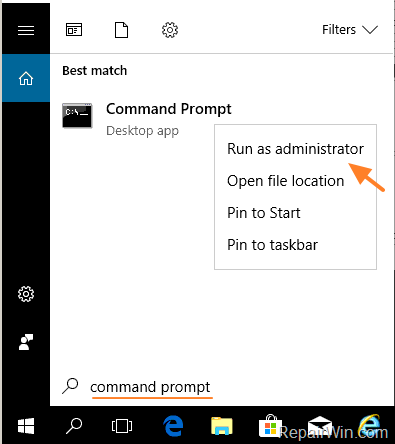
2. At command prompt window, type the following command to create a new user account* and press Enter.
- net user UserName /add
* Replace the UserName with your preferred username:
e.g. if you want to create a new account with name “User1” then you have to give the command:
- net user User1 /add
3. Then give this command to add the new user account to the Local Administrators Group:
- net localgroup administrators UserName /add
e.g. If the new username is “User1” then you have to give this command:
- net localgroup administrators User1 /add
4. Sign-out and logon to the new user.
5. If the Store Apps are working, in the new profile, then transfer your data from the old to the new account.
Method 5. Repair Windows 10 with an in place Update.
1. Download Media Creation Tool. *
* Source: https://www.microsoft.com/en-us/software-download/windows10
2. Run Media Creation Tool and Accept the License Terms at first screen.
3. Select Create installation media for another PC.
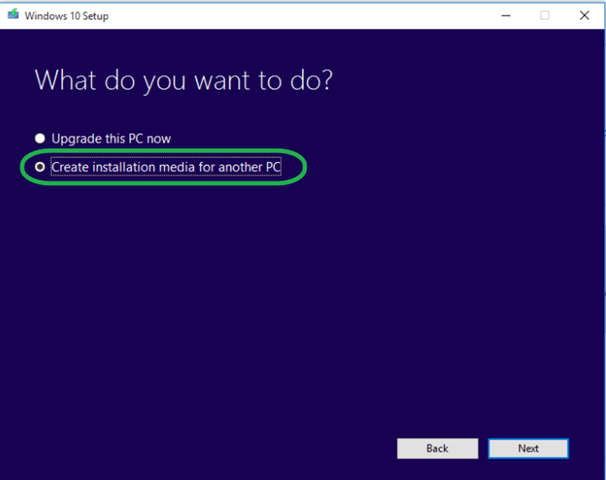
4. Windows should recognize automatically your current version of Windows if you currently run Windows 10. *
* Note: Leave these options untouched if you want to re-install or repair Windows on the current computer. Otherwise, if you want to install Windows 10 on a different computer, then uncheck the ‘Use the recommended options for this PC” checkbox and then select the Windows language, edition and architecture that you want to download.
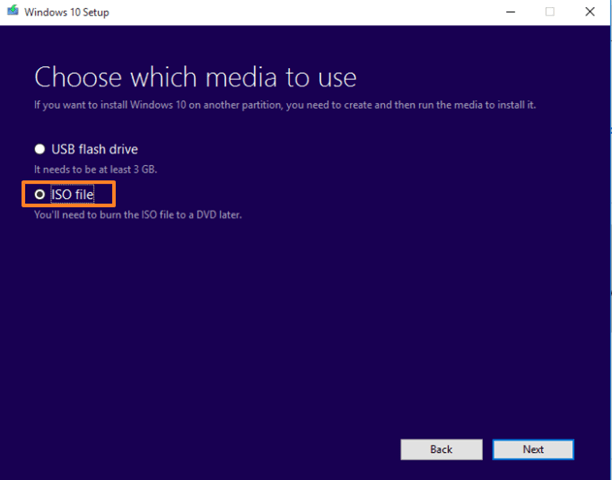
5. Place a dot at ISO file and click Next.
6. When the download is completed, double click on Windows.ISO file to mount it.
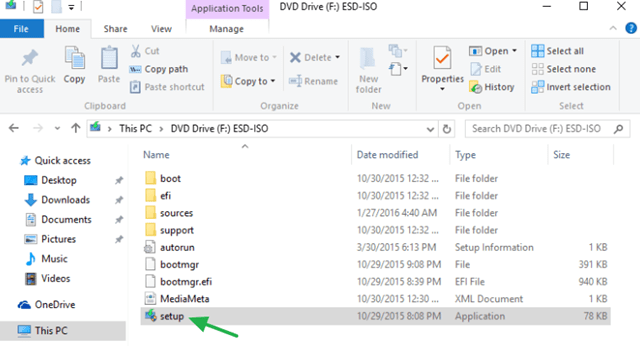
7. Explore the contents of the mounted file and double-click to run the Setup application.
8. Choose to Download and install updates (recommended) when asked and click Next.
![image_thumb[4] repair - reinstall Windows 10](https://qnet88.com/wp-content/uploads/2021/12/image_thumb4_thumb-10.png)
9 . Accept the license terms.
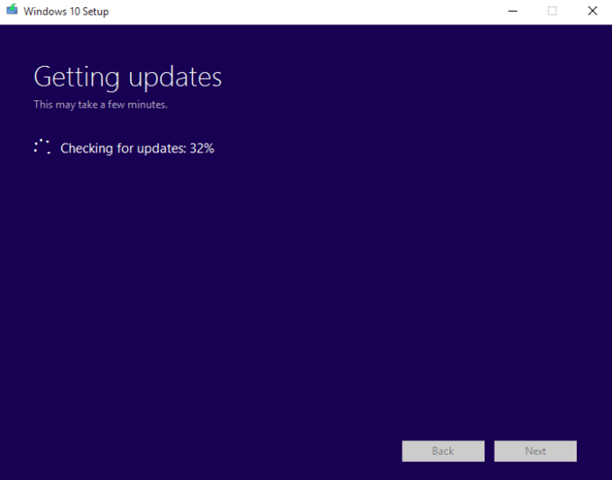
10. Wait until Windows gets all available updates.
11. Finally click Install to start the repair process.
![image_thumb[5] repair windows 10](https://qnet88.com/wp-content/uploads/2021/12/image_thumb5_thumb-1-2.png)
12. Be patient until the Windows 10 Setup upgrade and fixes your system.
13. When the repair (upgrade) of Windows 10 is completed, login to your account normally.
That’s all folks! Did it work for you?
Please leave a comment in the comment section below or even better: like and share this blog post in the social networks to help spread the word about this solution.

