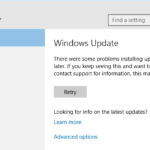
The Windows Update error 8024402F (Windows Update There were some problems installing updates, but we’ll try again again later. If you keep seeing this and want to search the web or contact support for information, this may help: (ox8024402f)), is faced while trying to search and install the latest updates on a Windows 10, 8, 7 or Vista computer.
The 0x8024402F Update error, commonly is caused due to poor Internet connection or if the Windows Update store folder (aka “SoftwareDistribution”) becomes corrupted.

This tutorial contains detailed instructions on how to resolve the Windows Update error 0x8024402f in Windows 10, 8, 7 or Vista.
How to fix Windows Update Error 0x8024402F (Windows 7, 8, 8.1 or 10).
Solution 1. Check your Date and Time Settings.
First make sure that your date and time settings are correct.
1. Open “Date and time settings”.
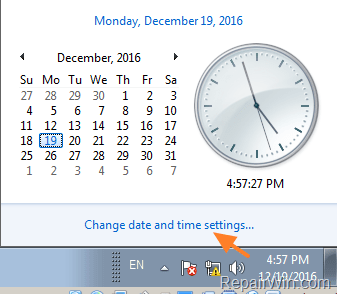
2. Press the Change date and time button and make sure that you have set the correct (current) date and time. Click OK when done.

3. Press the Change time zone button and set the Time Zone of your location. Click OK when done.
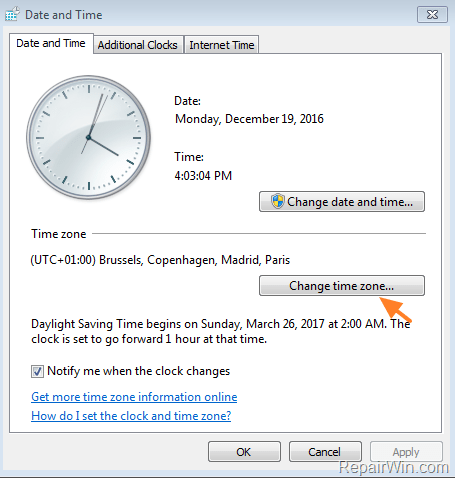
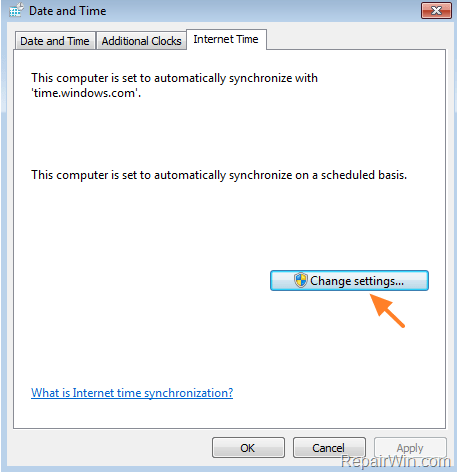
4. Finally select the Internet Time tab.
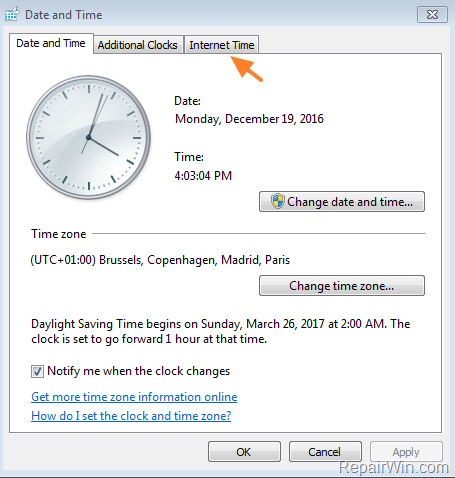
5. Click the Change settings button.
6. Click Update now.
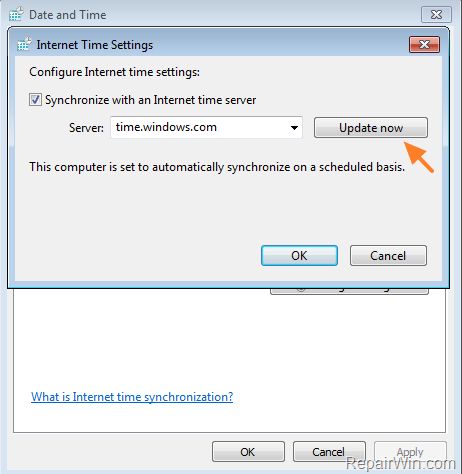
7. Click OK twice, to exit all windows.
8. Try to check for updates again.
Solution 2. Run the Windows Update Troubleshooter.
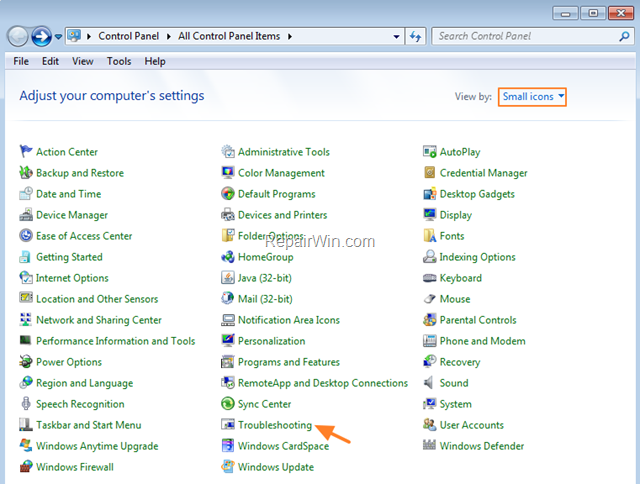
1. Navigate to Windows Control Panel, set the ‘View By’ to Small icons and open Troubleshooting.
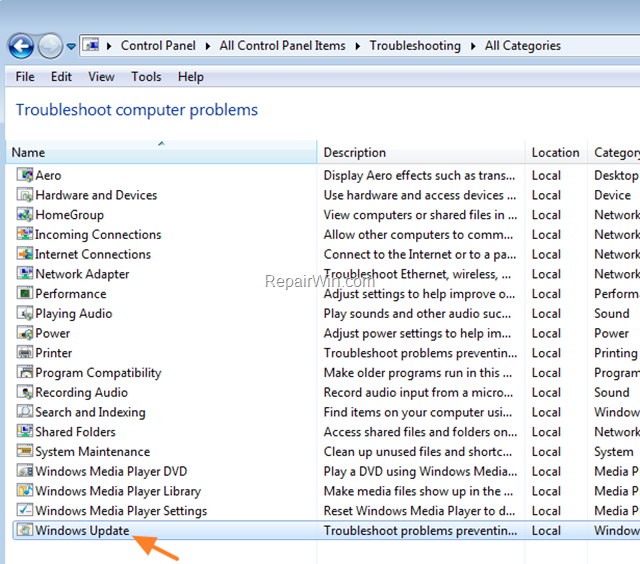
2. In Troubleshooting options, click View all.
3. Open the Windows Update.
4. Click Next to troubleshoot Windows update problems.
5. When the troubleshooting process is complete, close the troubleshooter and restart your PC.
6. After restart check if the Update Error 0x8024402f has been resolved.
Solution 3. Change the DNS servers.
Some IPS causes errors with Windows Update. So try to manually add a public DNS server (e.g. Google DNS) on your network connection.
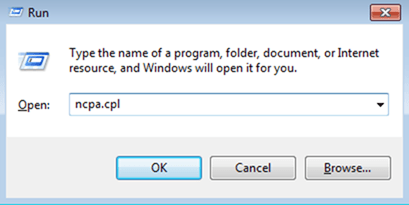
1. Press Windows ![]() + R keys to open the run command box.
+ R keys to open the run command box.
2. Type ncpa.cpl and press Enter.
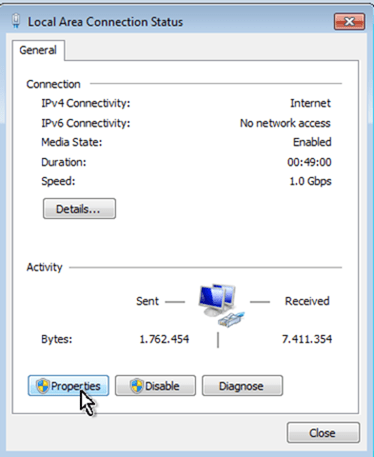
3. Double click at your active Network Adapter.
4. Click Properties.
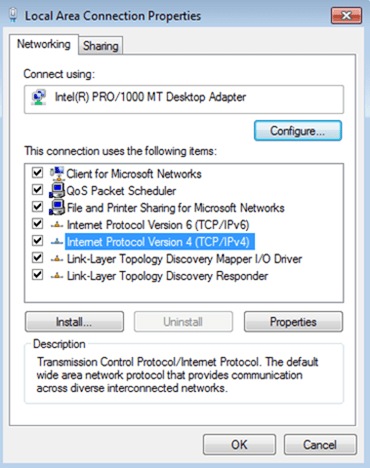
5. Open ‘Internet Protocol Version 4 (TCP/IPv4)’ Properties.
6. Select “Use the following DNS server addresses:” and type the following Google’s public DNS server addresses:
- 8.8.8.8
- 8.8.4.4
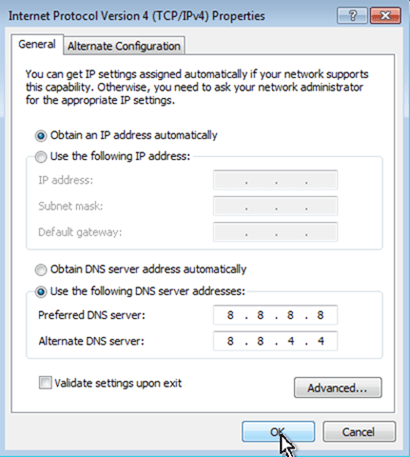
7. Press OK twice to exit Network settings.
8. Restart your computer and check for updates again.
Solution 4. Delete the SoftwareDistribution Folder.
The “C:WindowsSoftwareDistribution“, is the location where Windows store the Windows Updates. Many times this folder becomes corrupted and you must re-create it in order to download updates and install from scratch. To rebuild (re-create) the “SoftwareDistribution” folder follow the steps below:
Step 1: Stop Windows Update Service.
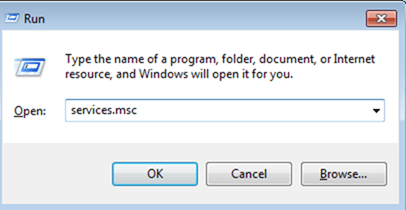
1. Open Windows Services control panel: To do that:
- Press Windows
 + R keys to open the run command box.
 - In the Search box, type: services.msc & click OK.
- (Accept the UAC warning if appears).
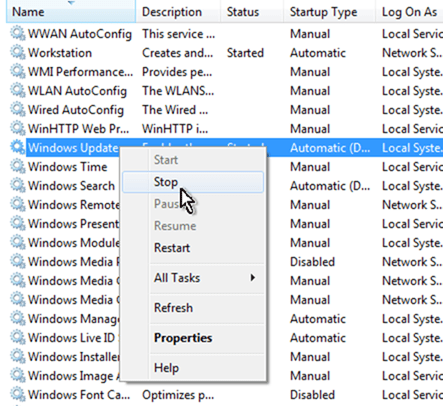
2. In Services control panel locate the Windows Update service.
3. Right-click on Windows Update service and select “Stop”.
Step 2: Delete the SoftwareDistribution folder.
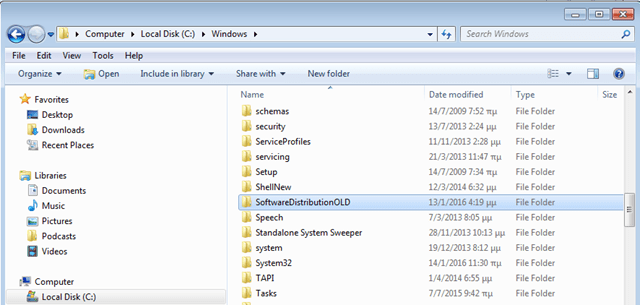
1. Open Windows Explorer and navigate to: C:Windows folder.
2. Find and Delete the “SoftwareDistribution” folder (or rename it. e.g. to “SoftwareDistributionOLD”) .
Step 3: Start the Windows Update Service.
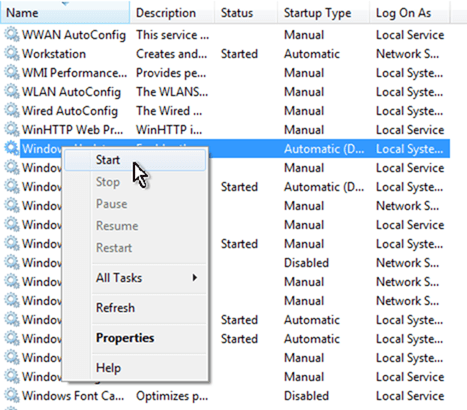
1. Now go back to Windows Services control panel:
2. Right-click on Windows Update service and select “Start”.
3. Try to check for Updates again.
That’s all folks! Did it work for you?
Please leave a comment in the comment section below or even better: like and share this blog post in the social networks to help spread the word about this solution.

