If you cannot open the Services control manager on a remote computer, due to error “Windows was unable to open service control manager on database on remote computer-name. Error 5: Access is denied“, continue reading below to fix the problem.
As an administrator in a network environment, there is a need to remotely stop or start services on other computers on the network through the Services console. However, you may receive the message “Error 5: Access is denied” when you try to open the service control manager on another computer, and in this guide we will show you how to fix the problem.
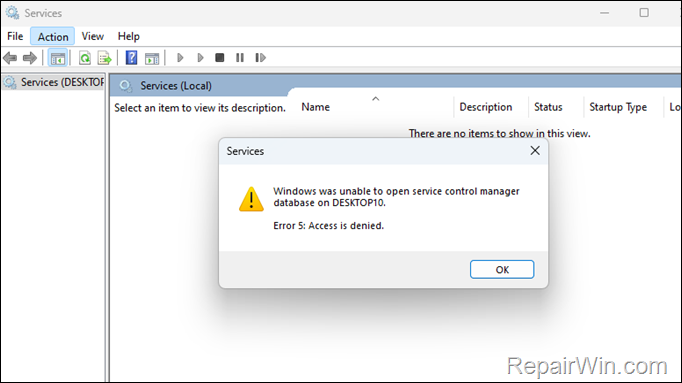

How to FIX: Cannot Open Services on Remote Computer. “Error 5: Access is denied” on Windows 10/11
The “Error 5: Access is denied” when trying to open the Services console on a remote computer, may appear for the following two (2) reasons:
- The user you’re using to connect to the remote computer doesn’t have administrative privileges on the remote computer.
- The Windows Firewall on the remote computer, doesn’t allow the remote service management.
So if you are using a user with administrative rights to connect to the remote computer and you get the error “Windows could not open the service control manager in the database on the remote computer”, proceed as instructed below.
Step 1. Allow ‘Remote Service Management’ on Remote Computer’s Firewall.
On the target computer allow the ‘Remote Service Management’ & the “File & Print Sharing” features on Windows Firewall.
1. Press Windows ![]()
![]() + R keys to open the Run command box.
+ R keys to open the Run command box.
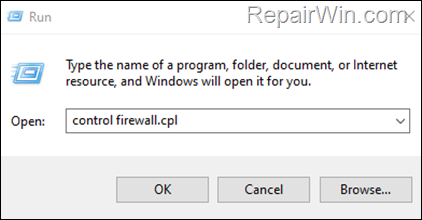
2. Type control firewall.cpl and press OK (or Enter) to open the Windows Defender Firewall settings.

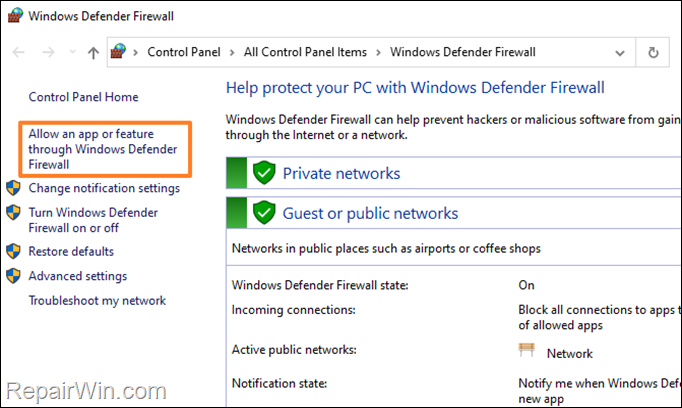
3. Click Allow an app or feature through Windows Defender Firewall.

4. Click Change settings.
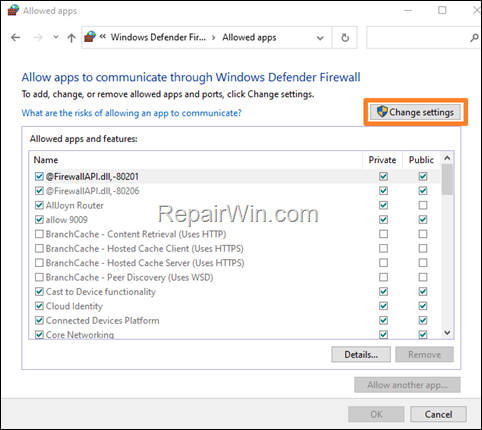

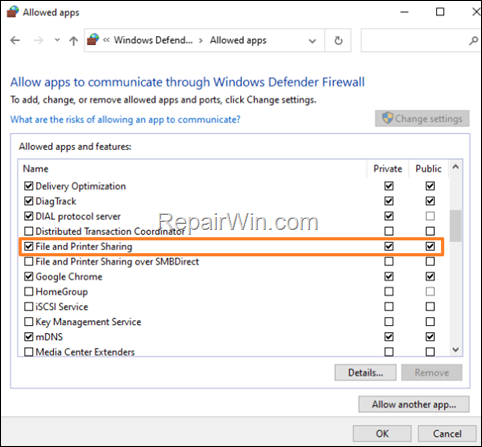
5. First ensure that the “File and Printer Sharing” feature in checked and allowed in Windows Firewall for Private and Public networks.

6. Then scroll down and check the Remote Service Management box and also check the Private and Public checkboxes. When done click OK.
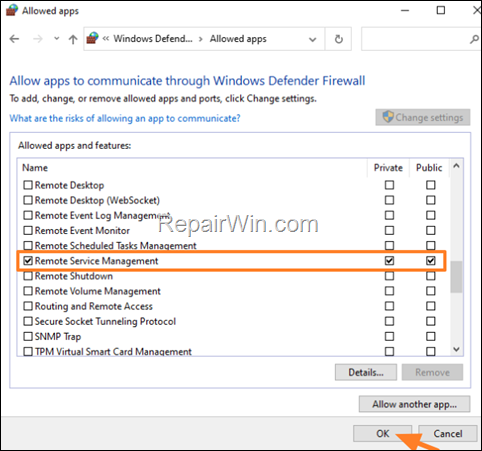

7. Now restart the remote computer.
Step 2. Connect to Remote Computer’s Services console.
* Note: After restarting the remote PC, I suggest to restart also your local PC and then to connect to the remote PC as instructed below:
1. Press Windows ![]()
![]() + R keys to open the Run command box.
+ R keys to open the Run command box.
2. Type services.msc and press OK (or Enter) to open the Services console.


3. On Action menu, click Connect to another computer…
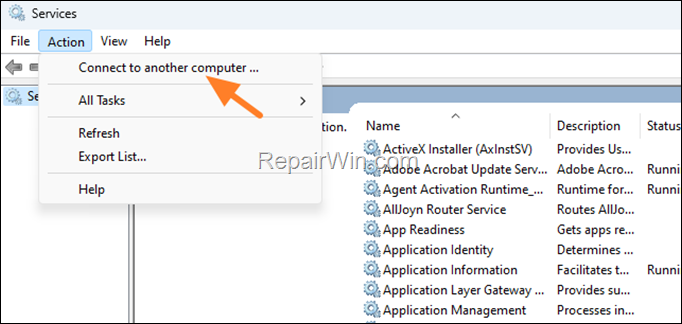

4. At Select Computer window click Browse. *
* Important: Click “Browse” here and don’t type the name or IP of the remote computer, if you want to connect to the remote computer using different credentials.
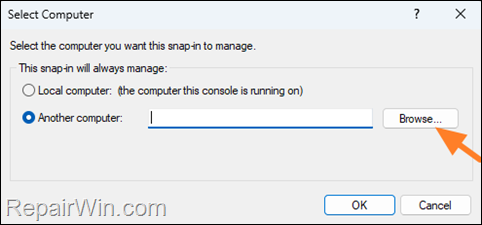

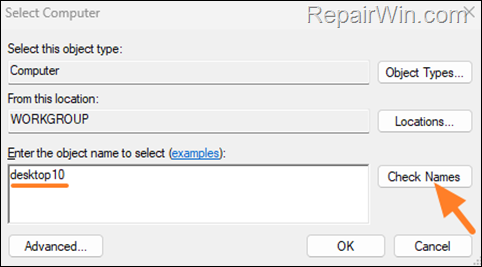
5. Now type the name of the remote computer and click Check Names

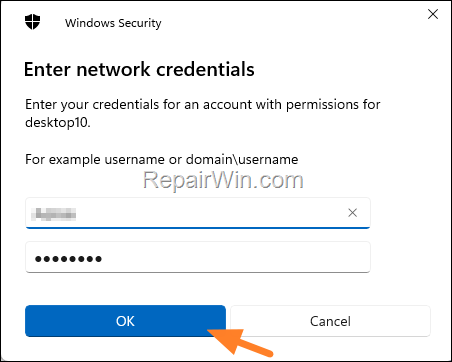
6. Type the Administrator credentials on the remote computer and click OK.

7. Then click OK twice to close and “Select Computer” windows.
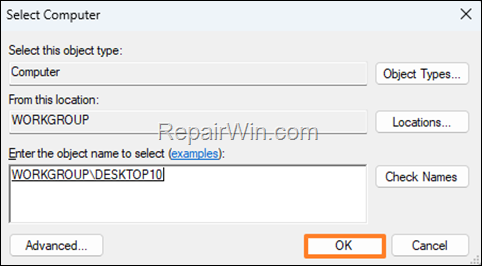

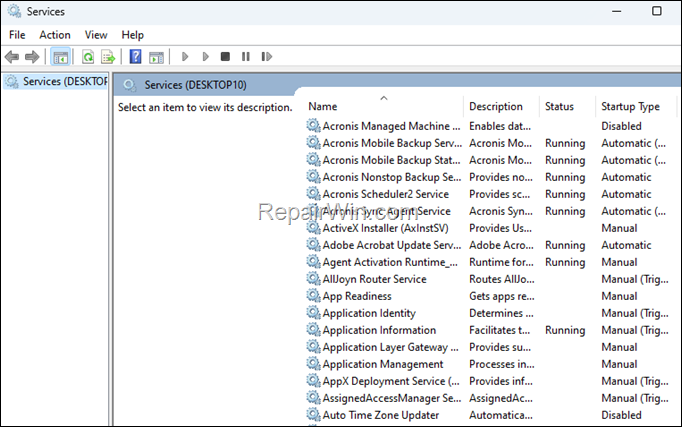
8. Now you should be able to manage the services on the remote computer from your local PC.

That’s all folks! Did it work for you?
Please leave a comment in the comment section below or even better: like and share this blog post in the social networks to help spread the word about this solution.


