This tutorial contains instructions on how to auto login to Windows 10. In fact you ‘ll learn how to automatically login to your user account (Microsoft, Local or Domain account), without having to enter your credentials at Sign-in or at Lock screen. The instructions applies to Windows 10/8/7 OS.
When you perform a new Windows 10 installation, you ‘ll be prompted to specify a user account and a password to use the computer. At this step, you can use your Microsoft account (with your MS account password), or to create a new Local Account and a new password to sign-in in Windows. In both cases (unless you create a local account with a blank password), you will be prompted to type your password every time you start Windows.
Protecting your own computer with a password is a good security measure, especially if you share you computer with others, or when you traveling with your laptop, or when you PC belongs to a business environment. But, if you ‘re the only user on your standalone desktop computer, or if you’re using your laptop only at home, there is no need to type your credentials every time you want to use it. *
Warning: DO NOT ENABLE AUTOMATIC LOGON on Windows if you share your computer with others, or if you are traveling with your laptop or tablet, because everyone who finds your computer will have easy access to your files.
How to Automatically Sign in to your User Account in Windows 10/8/7/Vista. (Enable Auto Login)
Method 1. Turn on Auto Login by using the AUTOLOGON utility.
Microsoft has designed a tool to automate the login process in Windows. The tool is named “Autologon” and enables you to easily configure Windows to auto login without having to type your credentials at every startup. The advantage of this tool, is that the password is stored encrypted in registry.
1. Download Autologon utility.
2. Extract the downloaded file.
3. Run “autologon.exe”
4. Type your password and click Enable.
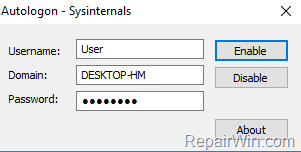
* Note: If you want to turn of auto logon, run the utility again and click Disable.
Method 2. Enable Auto Sign-in from User Accounts control panel.
The second method to enable the Auto Login to Windows 10/8/7, is to disable the “Users must enter a user name and password to use this computer” setting in User Accounts control panel. To do that:
Note: If you ‘re using a local account, there is another more simply way to force Windows to Sign-in automatically: Just specify an a new blank (empty) password from Settings > Accounts > Sign-in options > Change Password. Then type your password once and then click Next twice and Finish.
1. Press Windows ![]() + R keys to open the run command box.
+ R keys to open the run command box.
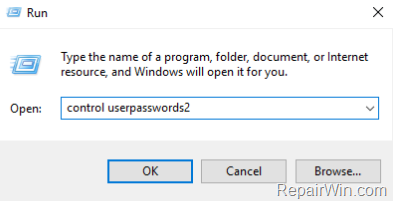
2. In the “Open” box, type: control userpasswords2 & click OK.
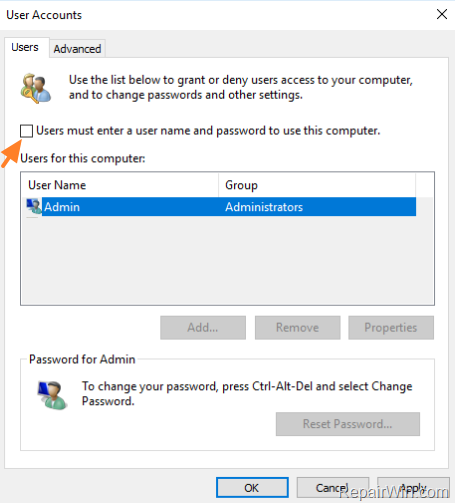
3. In User Accounts options (‘Users’ tab), uncheck the Users must enter a user name and password to use this computer checkbox and then click Apply. *
* Note: If you want to disable the automatically login in the future, just check this box.
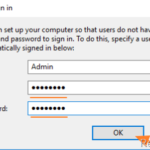
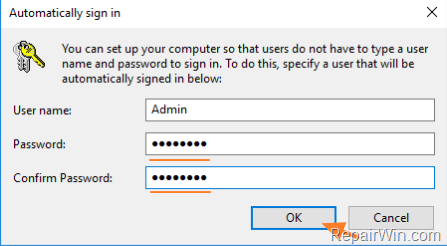
4. Type (twice) your account password and click OK twice to close User Account properties.
Method 3. Enable Auto Login in Registry (Windows 10/8/7/Vista).
The final method to disable the password login, in Windows 10, 8 or 7 OS, is to enable the auto sign-in registry. To do that:
1. Press Windows ![]() + R keys to open the run command box.
+ R keys to open the run command box.
2. In the “Open” box, type: regedit & click OK.

3. Navigate to this key from the left pane:
- HKEY_LOCAL_MACHINESOFTWAREMicrosoftWindows NTCurrentVersionWinlogon
4. At the right pane:
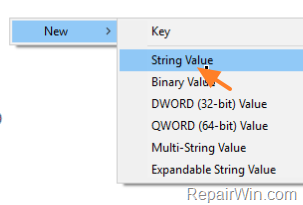
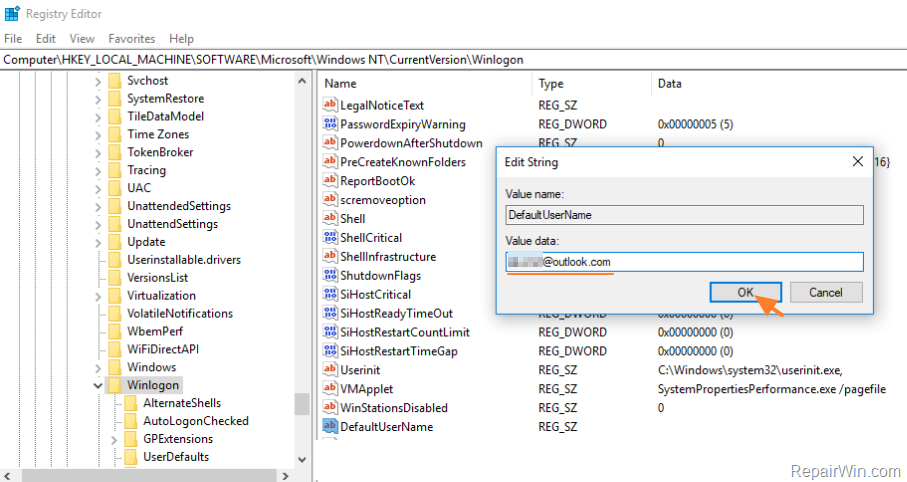
a. Right click at an empty space and select New > String value.
b. Rename the new value to DefaultUserName and press Enter.
c. Open the ‘DefaultUserName’ REG_SZ value.
d. Type the name of your Local User Account or your Microsoft Account and click OK.
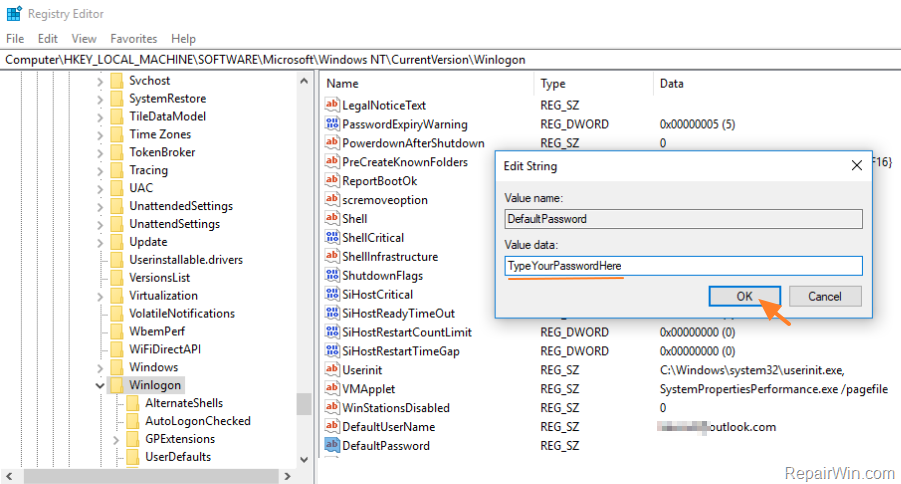
5a. Perform the same steps and create a new REG_SZ (String) value and name it DefaultPassword.
5b. Double click at ‘DefaultPassword‘ REG_SZ value, type your password in the Value data box and click OK.
7a. Finally, create a new REG_SZ value and name it AutoAdminLogon.
7b. Double click at ‘AutoAdminLogon’ value, type 1 in the Value data box and click OK.
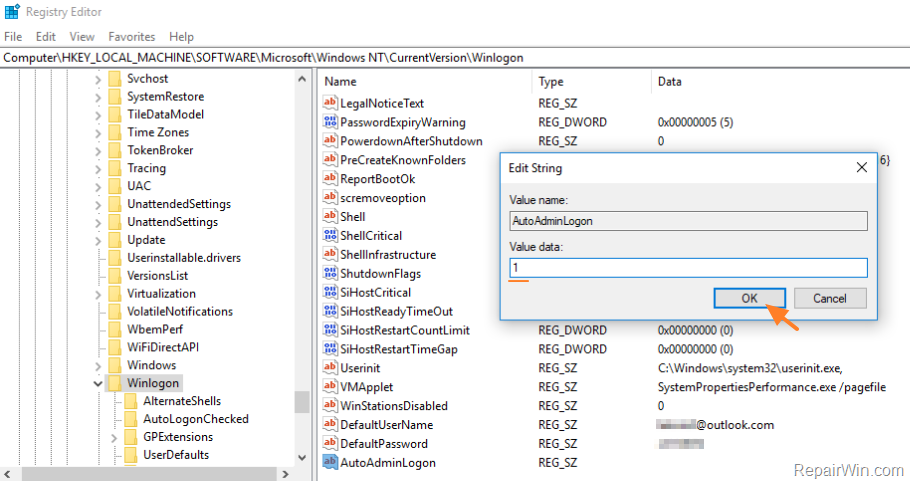
8. Close Registry Editor and Restart your PC. *
* Notes:
1. If you computer is part of a Domain, then you have to create another one REG_SZ value with the name DefaultDomainName and then to type in value data box the name of your domain.
2. To disable the auto login in the future, just delete the newly created string values that mentioned above.
That’s all folks! Did it work for you?
Please leave a comment in the comment section below or even better: like and share this blog post in the social networks to help spread the word about this solution.

