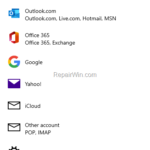
If you’re looking for a way to backup your messages in Windows 10 Mail app, continue reading below. In Windows 10, the Mail app is a built-in mail application that helps you to manage your email from multiple accounts (e.g. Outlook.com, Yahoo Mail, Gmail, iCloud or any other POP3 or IMAP account you want.).
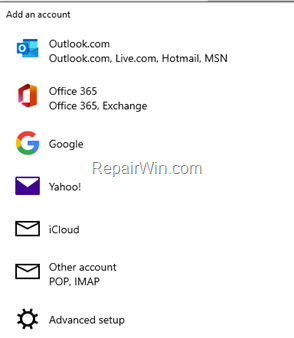
To set up an email account on Windows Mail Client Program is an easy process: Just open the Mail app, choose the account type you want to add, type your email address and the password, and let the program to find out all the server settings needed to add your email account

Where Windows Mail messages stored in Windows 10?
Windows 10 Mail messages, are saved as DAT files on the following location* on disk: *
- C:UsersUserNameAppDataLocalCommsUnistoredata
* Notes:
1. To be able to view the “AppData” folder, you have to enable the Show Hidden files, folders and drives option in Folder Options.
2. The email messages are stored in several folders under the “data” folder as .dat files.
3. If you want to view the contents of the .dat files, open them with Notepad or WordPad, or change their extension from .dat to .html and view them with your web browser.
How to transfer Windows 10 Mail data to another PC?
- IMAP Account(s).
If you’re using an IMAP account on Windows Mail app, there is no need to transfer your emails to another computer manually, because at this case all the messages are stored on the mail server and upon adding your IMAP account on the new computer all the messages will be re-downloaded automatically there. - POP Accounts.
Unfortunately, if you use a POP3 account in the Mail app in Windows 10, there’s no official* way to get a backup of all your messages or to export them to a file, so you can transfer them to another computer. For that reason, I suggest to always add your account as IMAP in Windows Mail app, or to avoid using the Windows 10 Mail app and use another mail client to manage your mail. (e.g. Thunderbird, Outlook, etc.).
* Note: Since the Windows Mail application does not offer a way to export/import your mail data (messages and settings), I found an unofficial solution to do this which can be found at the end of this article.
How to Backup Emails in Mail App on Windows 10.
If you use the Mail app on Windows 10 with a POP3 account* the only reliable way to back up your messages, is to save each individual message to an .EML file and to open (view) the EML file(s) in your web browser or with another email client program, such as Microsoft Outlook, Thunderbird, etc.
* Note: If you have setup an IMAP account, there is no need to backup your emails, because at this case all the messages are stored on mail server.
To Save Windows Mail Messages to .EML file(s):
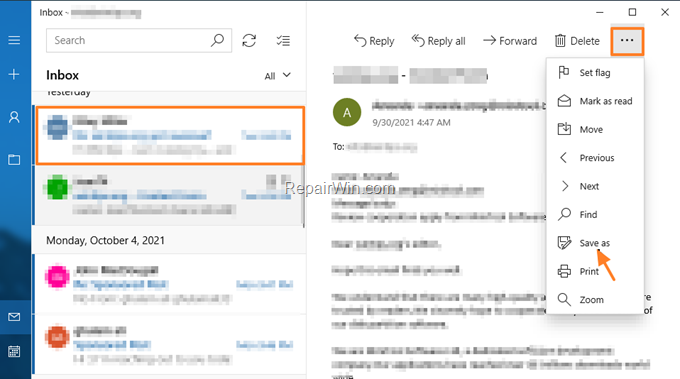
1. Click on the email message that you want to save to an .eml file.
2. From the three dots menu … (on the upper right corner), click Save As

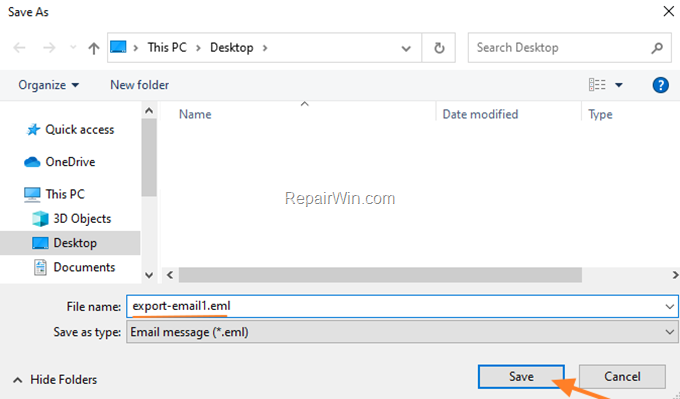
3. Choose a location to save the email, type a name for it (e.g. “export.email1.eml”) and click Save.

Conclusion: Since the above process is time-consuming and tedious I suggest you to save only the important messages to .EML files, or to print the messages you want. Additionally you can save MAIL messages as PDF files by using the Windows built-in PDF printer. To do that:
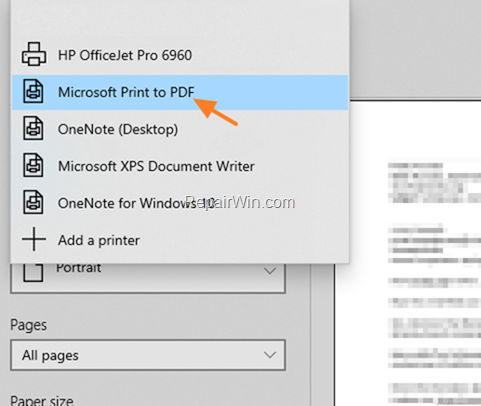
1. Select Print from the three dots menu …


2. Select Microsoft Print to PDF.

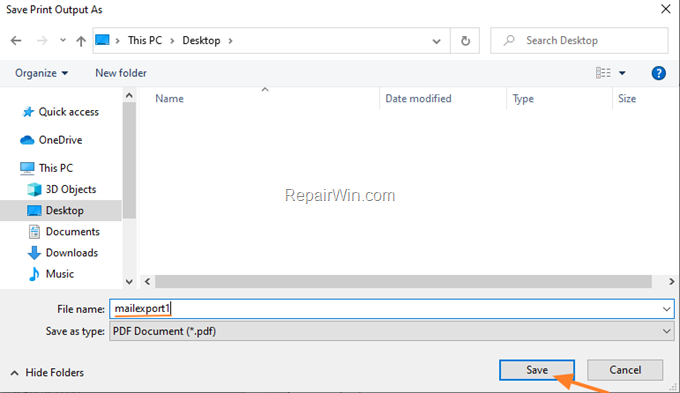
3. Type a file name and click Save to store the email message as a PDF file.

How to Transfer Windows 10 Mail Data to another computer (Unofficial solution) *
* Note: Since this solution is unofficial, I don’t know if it works in all cases. (Please inform me for the results if you try it).
Important: Be Aware that after applying the steps below, you will be able to view all your messages from the Windows Mail application on your old computer to the new one, but you will not be able to receive new emails, or to modify the account settings on the new computer.
Step 1 Backup Windows 10 Mail Data from your OLD Computer.
1. From your old computer, save the following folders in bold letters on an external storage device (e.g. your USB Disk)
- C:UsersUserNameAppDataLocalComms
- C:UsersAdminAppDataLocalPackagesmicrosoft.windowscommunicationsapps_8wekyb3d8bbwe
Step 2. Restore Windows Mail Data on your NEW Computer.
1. Start your new computer in Safe Mode. To do that:
1. Press the Windows
+ R keys to open the run command box.
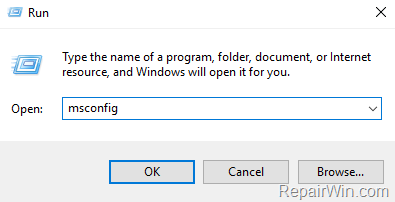
2. Type msconfig and press Enter.
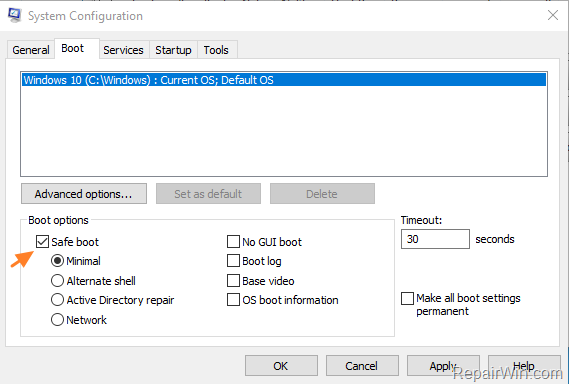
3. At Boot tab select the Safe Boot option, then click OK and restart your computer.
3. Restart your PC.
2a. Open Explorer and navigate to the following location on disk: *
- C:UsersUserNameAppDataLocal
Note: To be able to view the “AppData” folder, you have to enable the Show Hidden files, folders and drives option in Folder Options.
2b. Rename the Comms folder to Comms.OLD
2c Copy the Comms folder from the backup location here.
3a. Now navigate to the following location:
- C:UsersAdminAppDataLocalPackages
3b. Find and rename the microsoft.windowscommunicationsapps_8wekyb3d8bbwe folder to microsoft.windowscommunicationsapps_8wekyb3d8bbwe.OLD
3c. Copy the microsoft.windowscommunicationsapps_8wekyb3d8bbwe from the backup here.
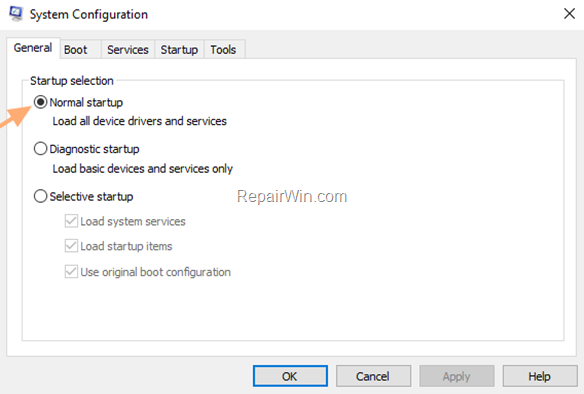
4. Start Windows in Normal mode. To do that, run the ‘msconfig’ tool again and at the General tab, check the Normal startup and click OK.

5. Restart your computer.
6. After restart, open the Mail application. You should be able to see all your emails. *
Conclusion: As I said above, if you apply the above workaround, you will not be able to receive new emails and you will also not be able to modify the email account settings or to add another email account to the Windows Mail application. So, I suggest you to save your important messages as .eml files (as described above) and use another email client for your mail (e.g. Outlook, Thunderbird, etc..).
That’s all folks! Did it work for you?
Please leave a comment in the comment section below or even better: like and share this blog post in the social networks to help spread the word about this problem.


