In a Windows 10 based computer, suddenly, store apps becomes “broken”, probably after a Windows update or after a virus attack.
The “broken” store apps issue, is a common problem on Windows 10 ( and Windows 8, 8.1) machines but unfortunately Microsoft doesn’t offer a permanent fix for it yet. When a store app becomes “broken”, is displayed with a long filename under ‘All Apps’ > ‘Other‘ section (see screenshot below) and when the user tries to open the “broken” app, the app’s window doesn’t open at all.
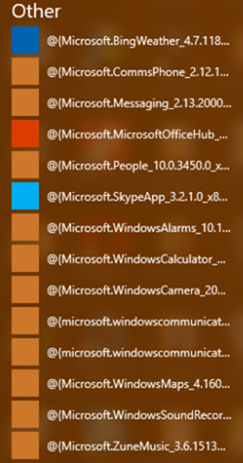
This tutorial contains several methods to fix the “broken” Windows Store apps issue in Windows 10.
How to fix “broken” store apps in Windows 10.
Method 1. Using Microsoft’s Troubleshooter.
The first method to resolve the “Windows Store Cache may be Damaged” problem is to run Microsoft’s Apps Troubleshooter utility. to do that go to:
1. Start menu ![]() –> Settings
–> Settings ![]() –> Update & Security –> Troubleshoot –> Windows Store Apps and click Run the troubleshooter.
–> Update & Security –> Troubleshoot –> Windows Store Apps and click Run the troubleshooter.
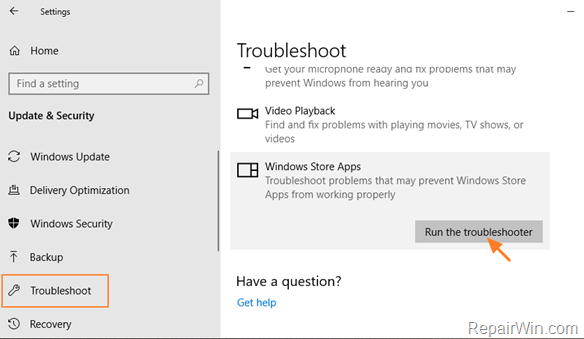
2. Click Next and let the troubleshooter to fix the problem.
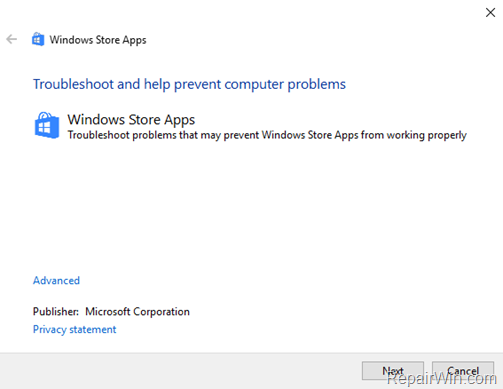
3. Finally, close the troubleshooter and then check if your problem is solved.
Method 2. Perform a repair upgrade of Windows 10.
Step 1. Create a Windows 10 Installation Media
1. Use Media Creation Tool by MS and create a Windows 10 USB or DVD installation media. Detailed instructions on how to do that you can find at the following articles:
- How to create a Windows 10 USB installation media
- How to create a Windows 10 DVD installation media
Step 2. Perform a Windows 10 repair.
1. Put the Windows 10 installation media on you computer.
2. Double-click to run the Setup application.
3. Choose to Download and install updates (recommended) when asked and click Next.
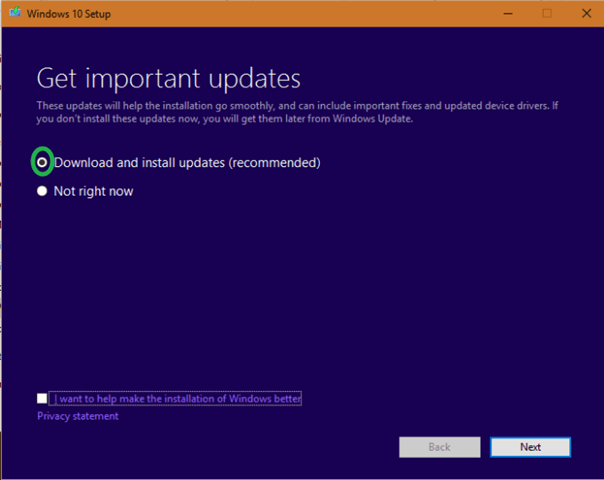
3. Accept the license terms.
4. Finally click Install to start the repair process.
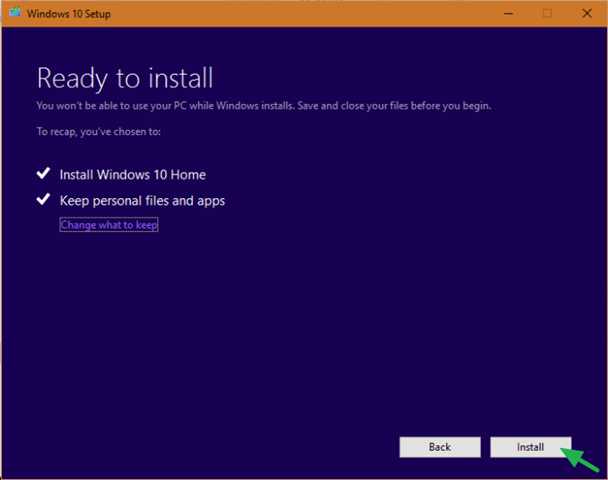
5. Be patient until the windows upgrade and fix your system.
6. After repair installation, login to your account normally.
That’s all folks! Did it work for you?
Please leave a comment in the comment section below or even better: like and share this blog post in the social networks to help spread the word about this.