This tutorial was written for users that they want to change the default account to use with Mail Merge in order to send bulk mail in Outlook 2013, 2010 or 2007. Outlook uses the default email account to send every new message, unless if you specify an additional account to send a specific email message by changing the “From:” address field.
If you want to send bulk emails from a secondary account, by using the “Mail Merge” feature, you will realize that Outlook, doesn’t allow to specify a different account in “From:” field. The problem is old and is coming from Outlook 2003/2007 version, but the easy solution to bypass it (in Outlook 2003 & 2007) was to temporary switch the default account (to the desired one for Mail Merge) from the Email Account options. Then, after Mail Merge, revert back to the default account. But this solution doesn’t work anymore in the new versions of Outlook (Outlook 2013 and Outlook 2010) because on these versions you have also to change the default Outlook data file (.PST).
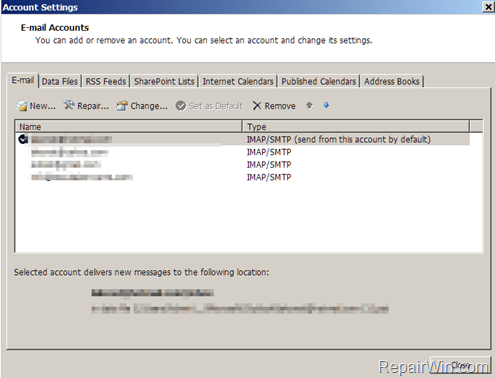
In this tutorial you will learn on how to change the default account for Mail Merge in Outlook 2010 & Outlook 2013.
How to change the default Email Account for Mail Merge in Outlook 2013 & 2010.
In order to change the default email account to use with mail merge:
1. Open Outlook.
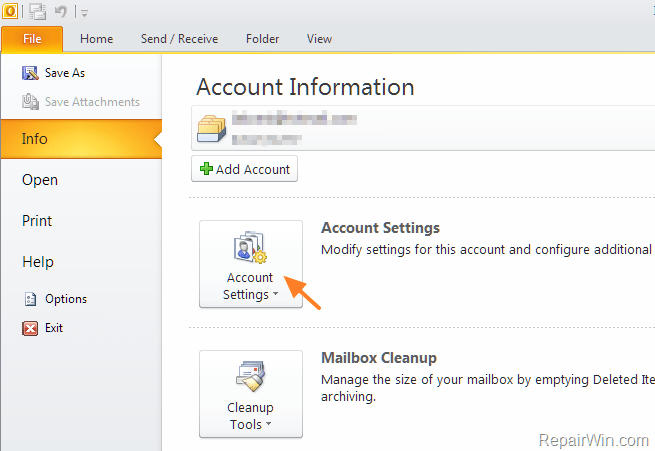
2. Go to File –> Account Settings.
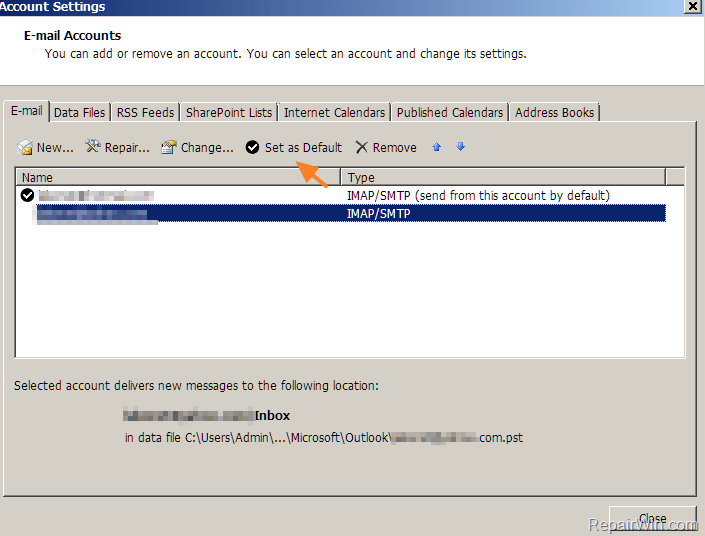
3. In Email tab:
1. Select the account that you want to use for mail merge (e.g. user22@repairwin.com).
2. Click Set as Default.
4. Click the Data Files tab.
1.Select the .PST data file that matches the email address you selected in E-mail tab. (e.g. “user22@example.com.pst“)
2. Click Set as Default. (Ignore the warning message).
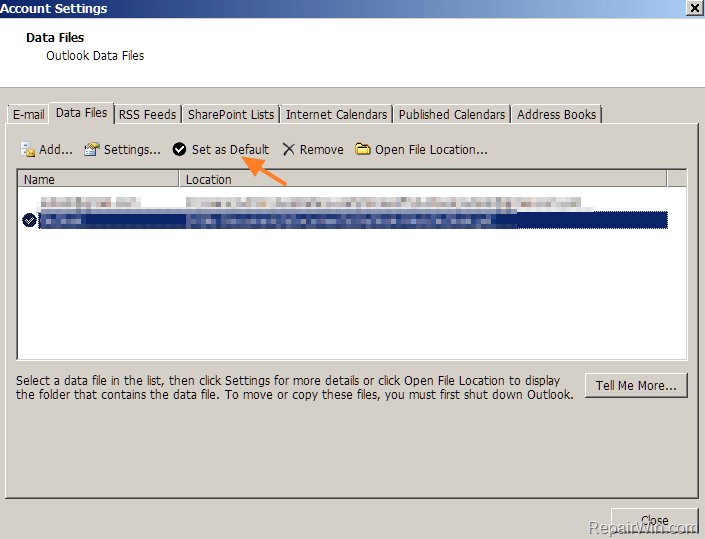
5. Close Email Account properties.
6. Restart Outlook.
7. Perform the mail merge.
– After Mail Merge don’t forget to switch to the default account and the default data file back to normal.
That’s all folks! Did it work for you?
Please leave a comment in the comment section below or even better: like and share this blog post in the social networks to help spread the word about this.

