.single .post-author, .post-date {
text-transform: none;
}
,
Last updated: January 10th, 2025
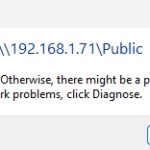
If you’ve recently upgraded to Windows 11 version 24H2 and encounter the error “Windows cannot access \SHARED-FOLDER. Error code: 0x80070035. Network path not found” when trying to access shared files and printers on other network devices, you’re not alone. This comprehensive guide will walk you through the steps to fix this issue.
Problem Description
After updating to Windows 11 24H2, users often find they cannot access network shares. The error “0x80070035: Network path not found” occurs, despite other computers running Windows 11 v23H2 or Windows 10 being able to access the same shared resources without any issues.
Why Does This Happen?
Windows 11 24H2 introduces stricter security protocols, which block access to shared files and printers unless valid credentials (a username and password) are provided. By default, insecure connections are no longer allowed, meaning you cannot access network shares without proper authentication.
How to Fix “0x80070035: Network Path Not Found” on Windows 11 24H2
To resolve this issue, you have one of the following options:
- To Create individual accounts with passwords on the computer hosting the shared files for each user accessing them.
- To Allow insecure connections by modifying system policies, registry settings, or using PowerShell commands. This guide focuses on the second option.
Fix 1: Allow Insecure Logins via Group Policy (Windows 11/10 Pro)
If you have Windows Pro editions, follow these steps to allow access without requiring credentials.
Step 1: Enable Insecure Guest Logons
- Press Windows + R, type
gpedit.msc, and press Enter. - Navigate to:
Computer Configuration > Administrative Templates > Network > Lanman Workstation - Open Enable insecure guest logons and set it to Enabled.
- Click Apply and OK, then restart the computer.
Step 2: Disable Digital Signature Requirements
- In the Group Policy Editor, go to:
Computer Configuration > Windows Settings > Security Settings > Local Policies > Security Options - Disable these policies:
- Microsoft Network Client: Digitally sign communications (always)
- Microsoft Network Client: Digitally sign communications (if server agrees)
- Restart both the host and client computers, then test access.
Fix 2: Use Registry to Allow Insecure Connections (Windows 11/10 Home)
If you’re using Windows Home editions, you can make the changes via the registry:
1. Open Command Prompt as Administrator and run these commands:
- reg add HKLMSYSTEMCurrentControlSetServicesLanmanWorkstationParameters /f /v RequireSecuritySignature /t REG_DWORD /d 0
- reg add HKLMSOFTWAREPoliciesMicrosoftWindowsLanmanWorkstation /f /v AllowInsecureGuestAuth /t REG_DWORD /d 1
- reg add HKLMSOFTWAREWOW6432NodePoliciesMicrosoftWindowsLanmanWorkstation /f /v AllowInsecureGuestAuth /t REG_DWORD /d 1
2. Restart your computer and try accessing the shared files again. *
* Note: If the problem persists, revert these changes, by running the below commands as Administrator and continue to the next fix.
- reg delete HKLMSYSTEMCurrentControlSetServicesLanmanWorkstationParameters /f /v RequireSecuritySignature
- reg delete HKLMSOFTWAREPoliciesMicrosoftWindowsLanmanWorkstation /f /v AllowInsecureGuestAuth
- reg delete HKLMSOFTWAREWOW6432NodePoliciesMicrosoftWindowsLanmanWorkstation /f /v AllowInsecureGuestAuth
Fix 3: Use PowerShell to Allow Insecure Connections
For a quick fix using PowerShell, execute the following commands in PowerShell as administrator on both the computer with shared resources and the Windows 11 24H2 client:
- Set-SmbClientConfiguration -EnableInsecureGuestLogons $true -Force
- Set-SmbClientConfiguration -RequireSecuritySignature $false -Force
- Set-SmbServerConfiguration -RequireSecuritySignature $false -Force
When done, restart the systems and test access.
That’s all folks! Did it work for you?
Please leave a comment in the comment section below or even better: like and share this blog post in the social networks to help spread the word about this solution.

- Author
- Recent Posts
- How to Fix error 0x80070035 on Windows 11 24H2 (Network Path Not Found) – January 10, 2025
- Fix Network Connectivity Issues After Windows 11 24H2 Update – January 9, 2025
- FIX: Can’t check the “Auto-start Teams” option on New Teams app. (Solved) – January 8, 2025


